Members
-
This page lists all users in your organization along with their roles and connection details.
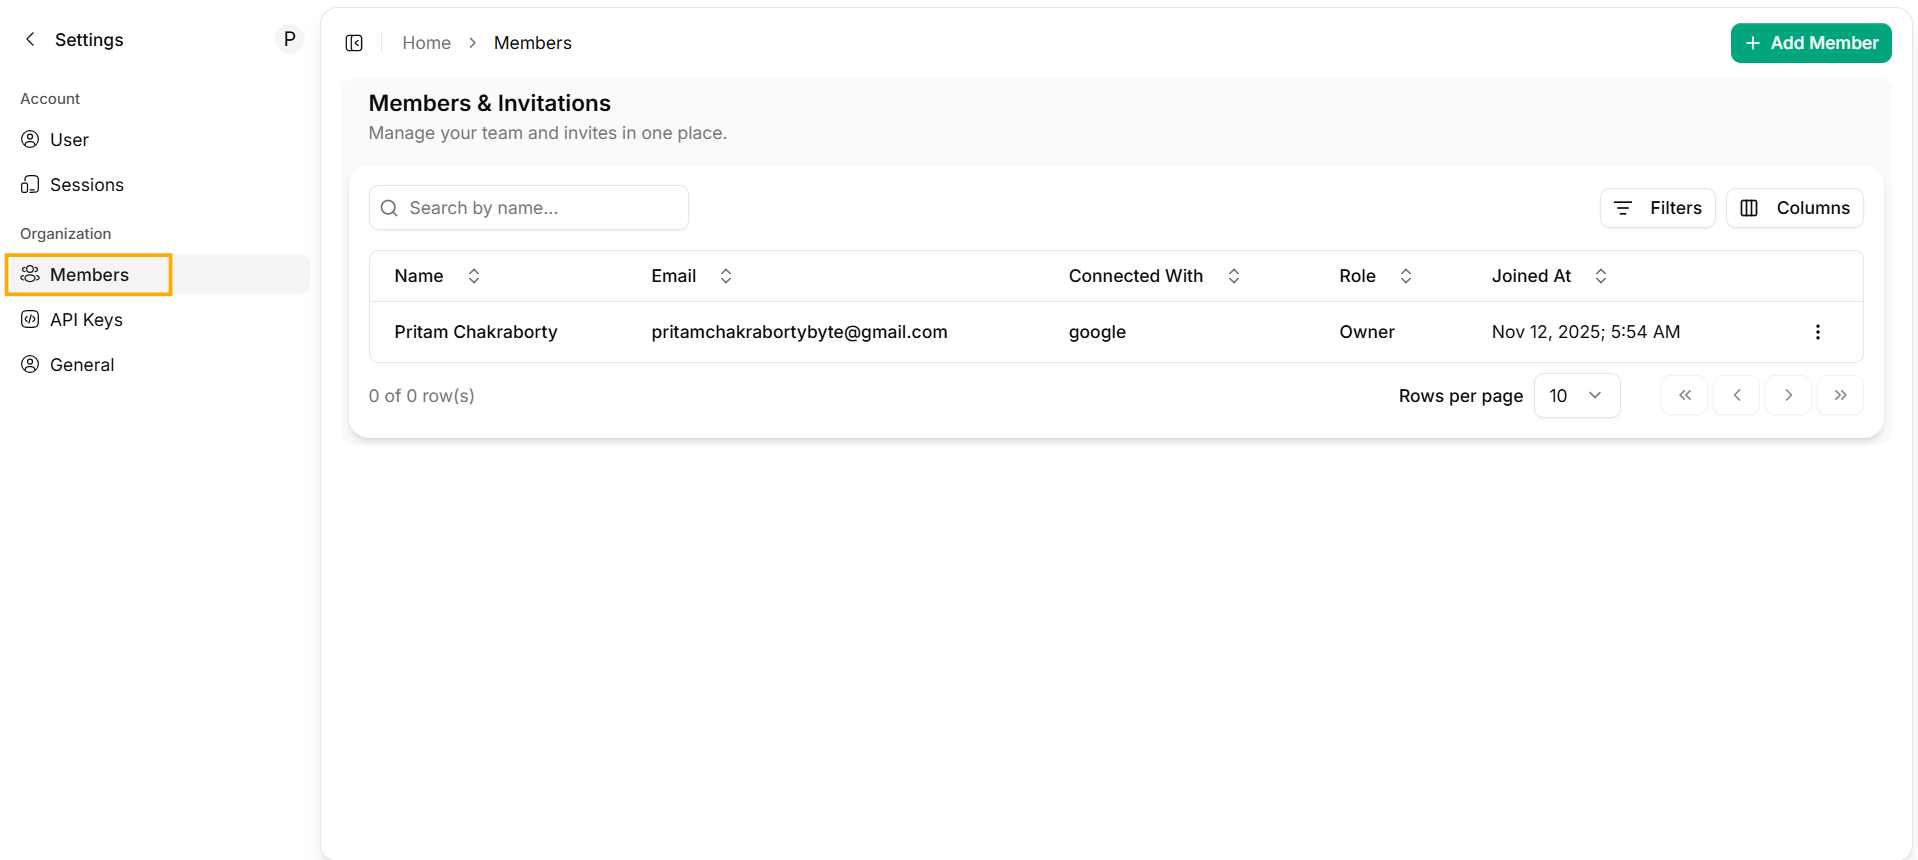
Organization Members
- Name — The member’s full name
- Email — Email address used to sign in
- Connected With — Sign-in provider like email, Google, or GitHub
- Role — Owner, Admin, Member, or custom-defined role
- Joined At — The date and time the member joined your workspace
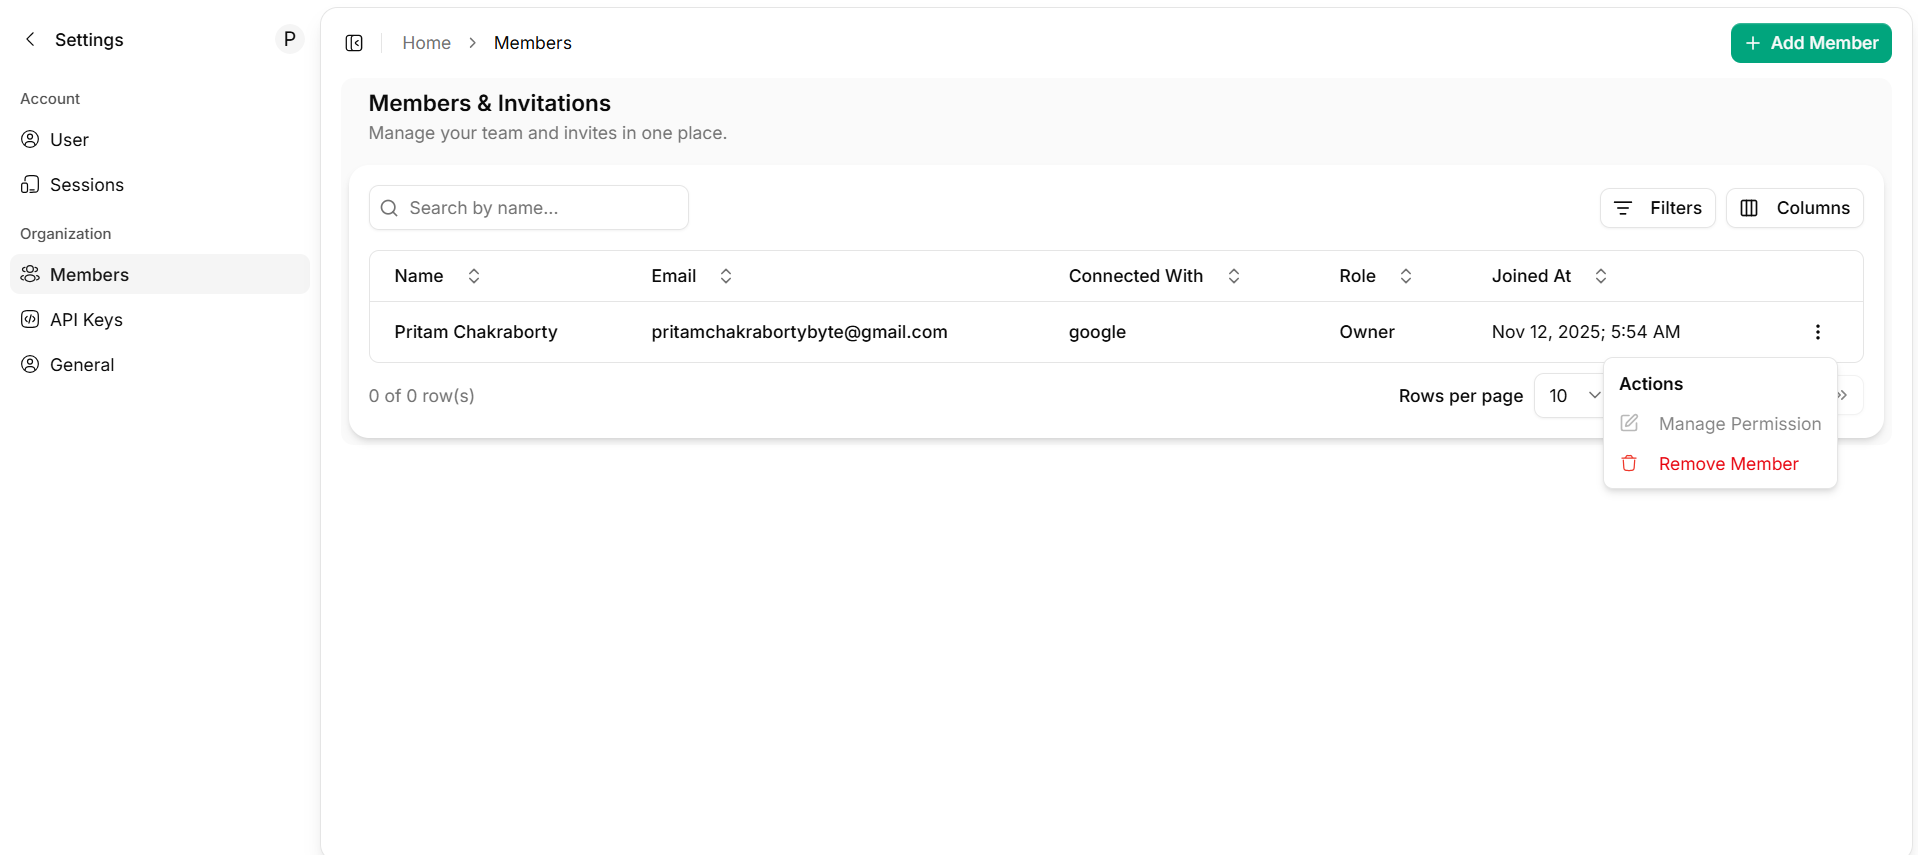
Actions
- Manage Permission — Adjust what this person can access and control
- Remove Member — Remove the user from your organization
Removing a member immediately revokes access to all dashboards, APIs, and distributions.
Invite Member
-
To bring new people into your workspace, select Add Members.
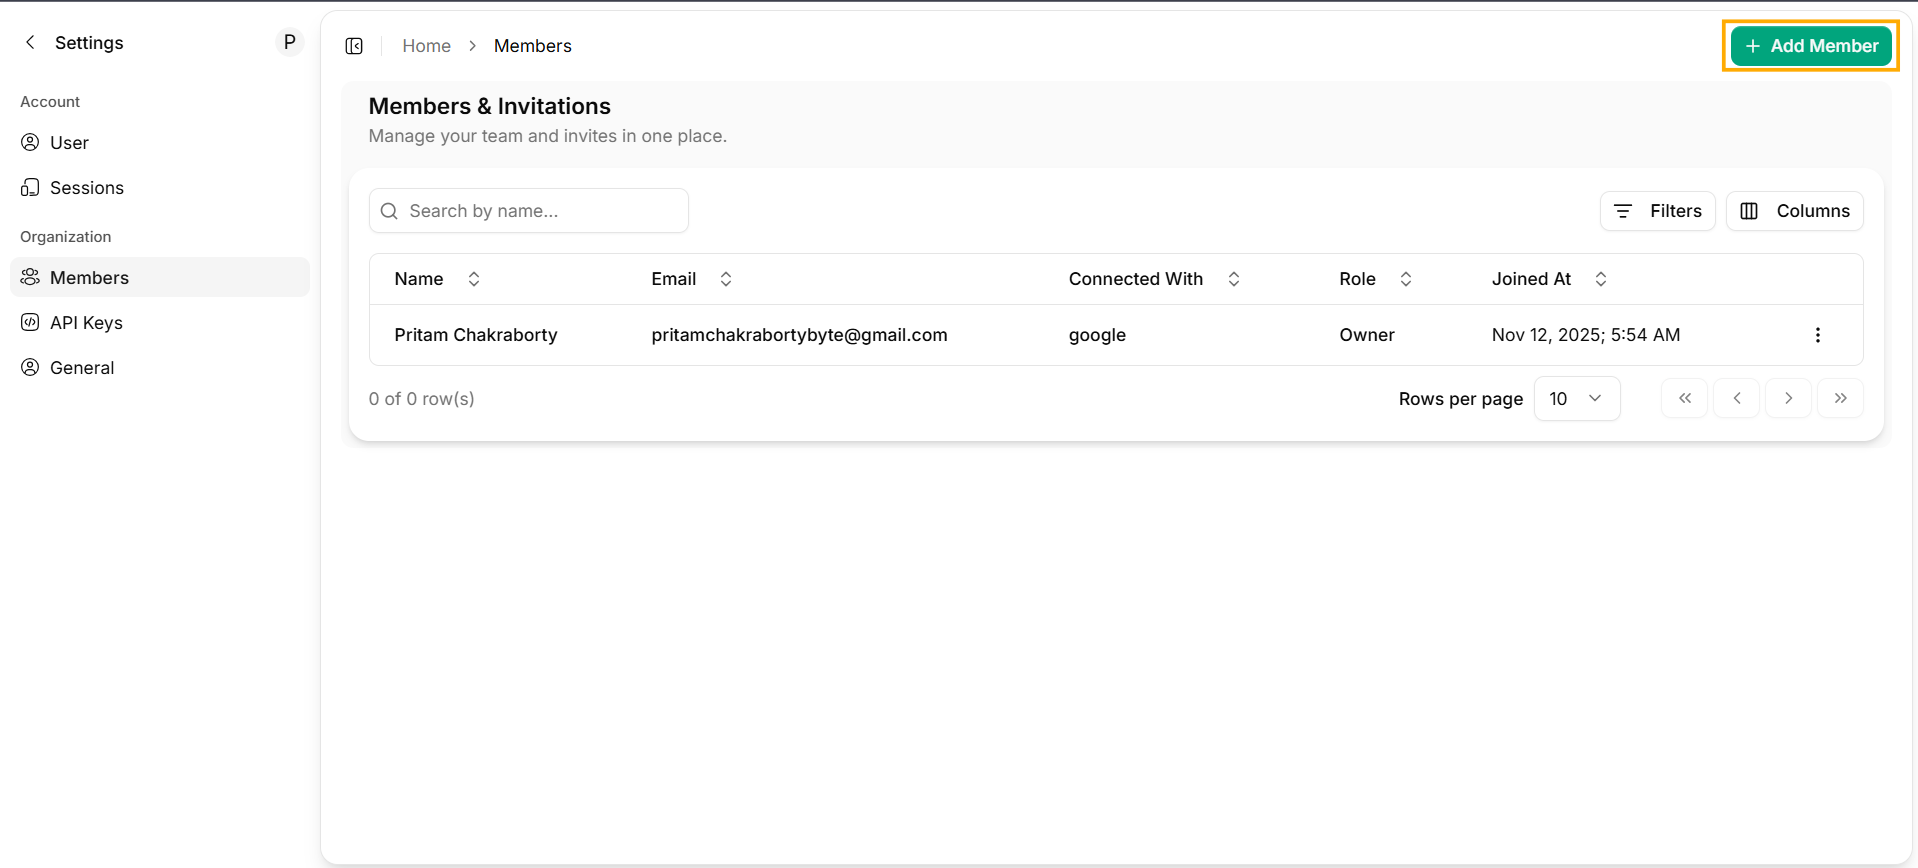
Add Members
- Enter Email Address - In the Invite Member section, type the email of the person you want to invite.
- Send Invitation - Once the email is entered click on Send invitation, an invitation will be sent.
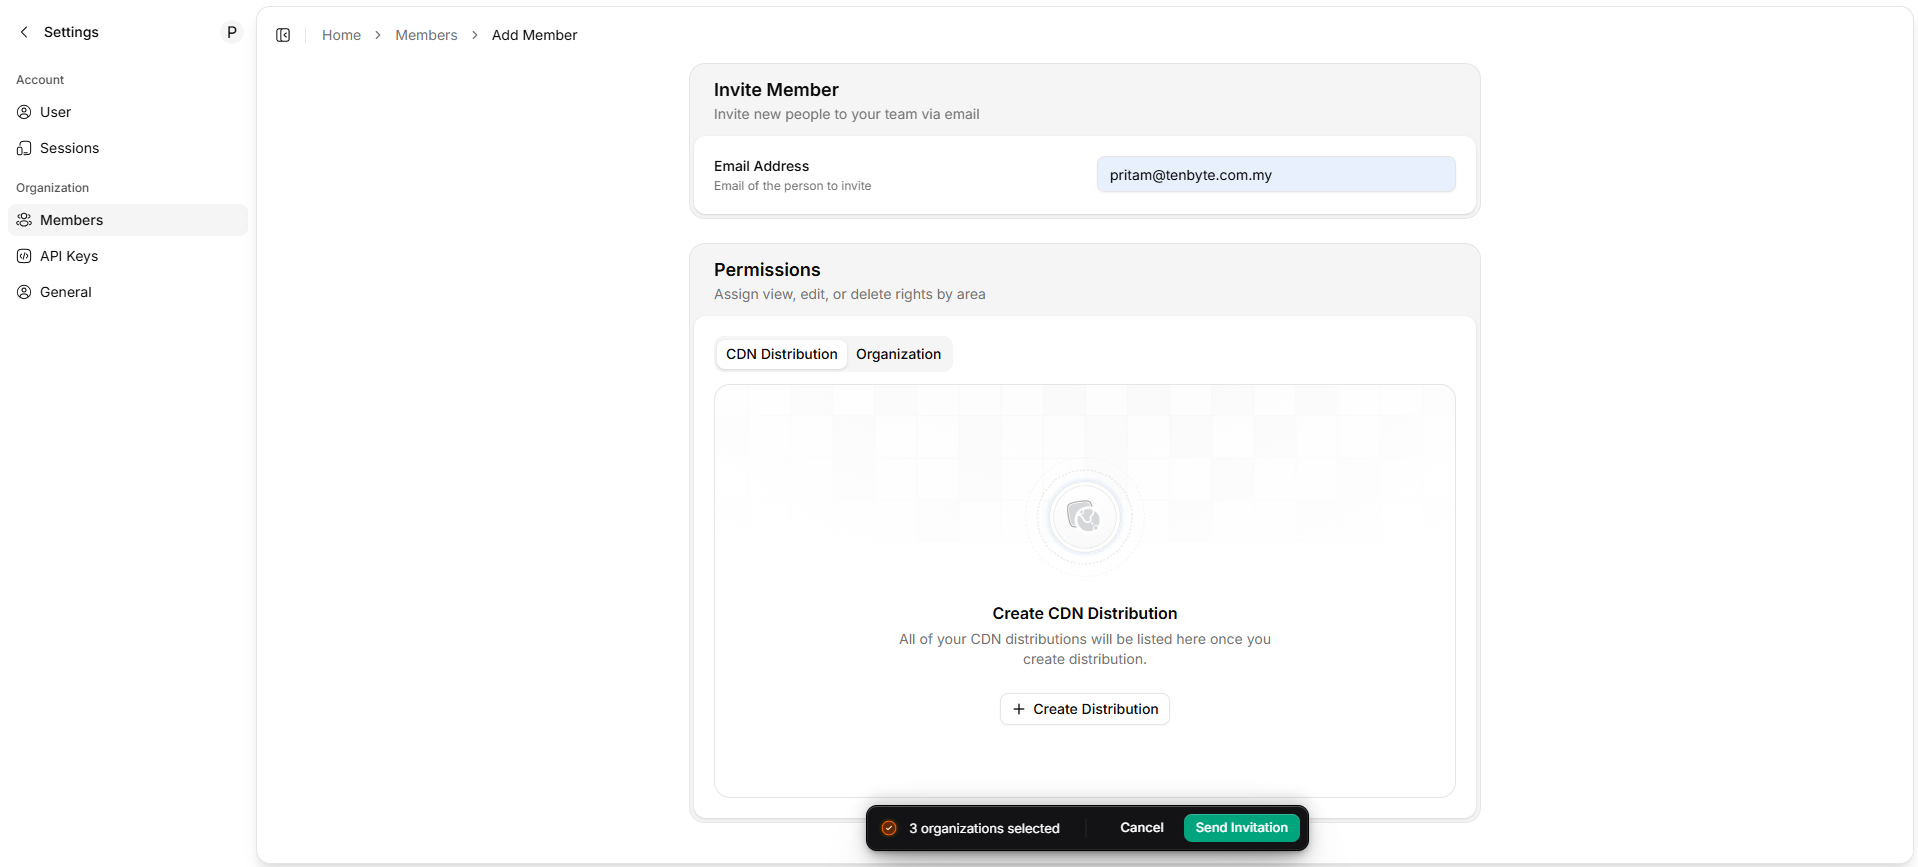
Send Invitation to your Team Member
Permissions
-
Permissions define what a member can view, edit, or delete inside your organization. Permissions are grouped into two areas:
- CDN Distribution
- Organization
CDN Distribution Permissions
- If your organization has CDN distributions, they will appear in this area.
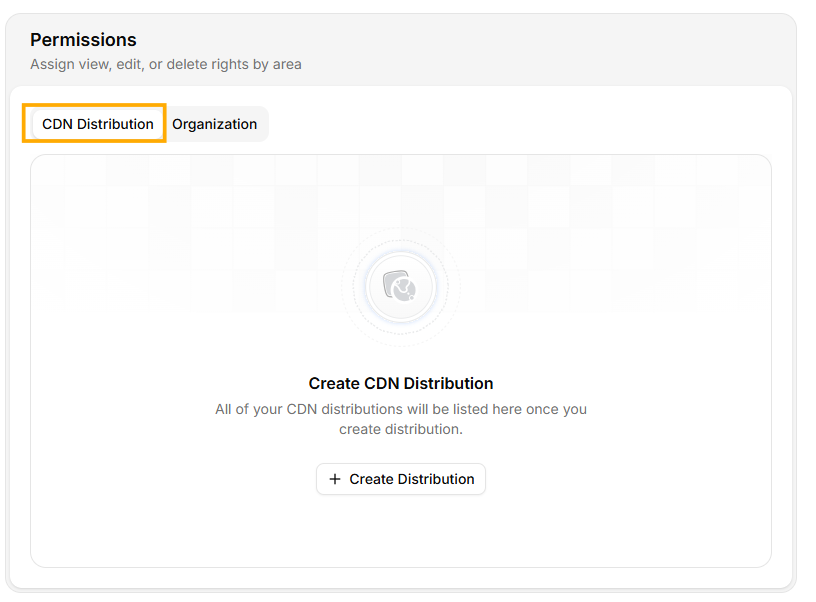
CDN Distribution Permissions
Organization Permissions
-
These permissions control access to global settings within your workspace.
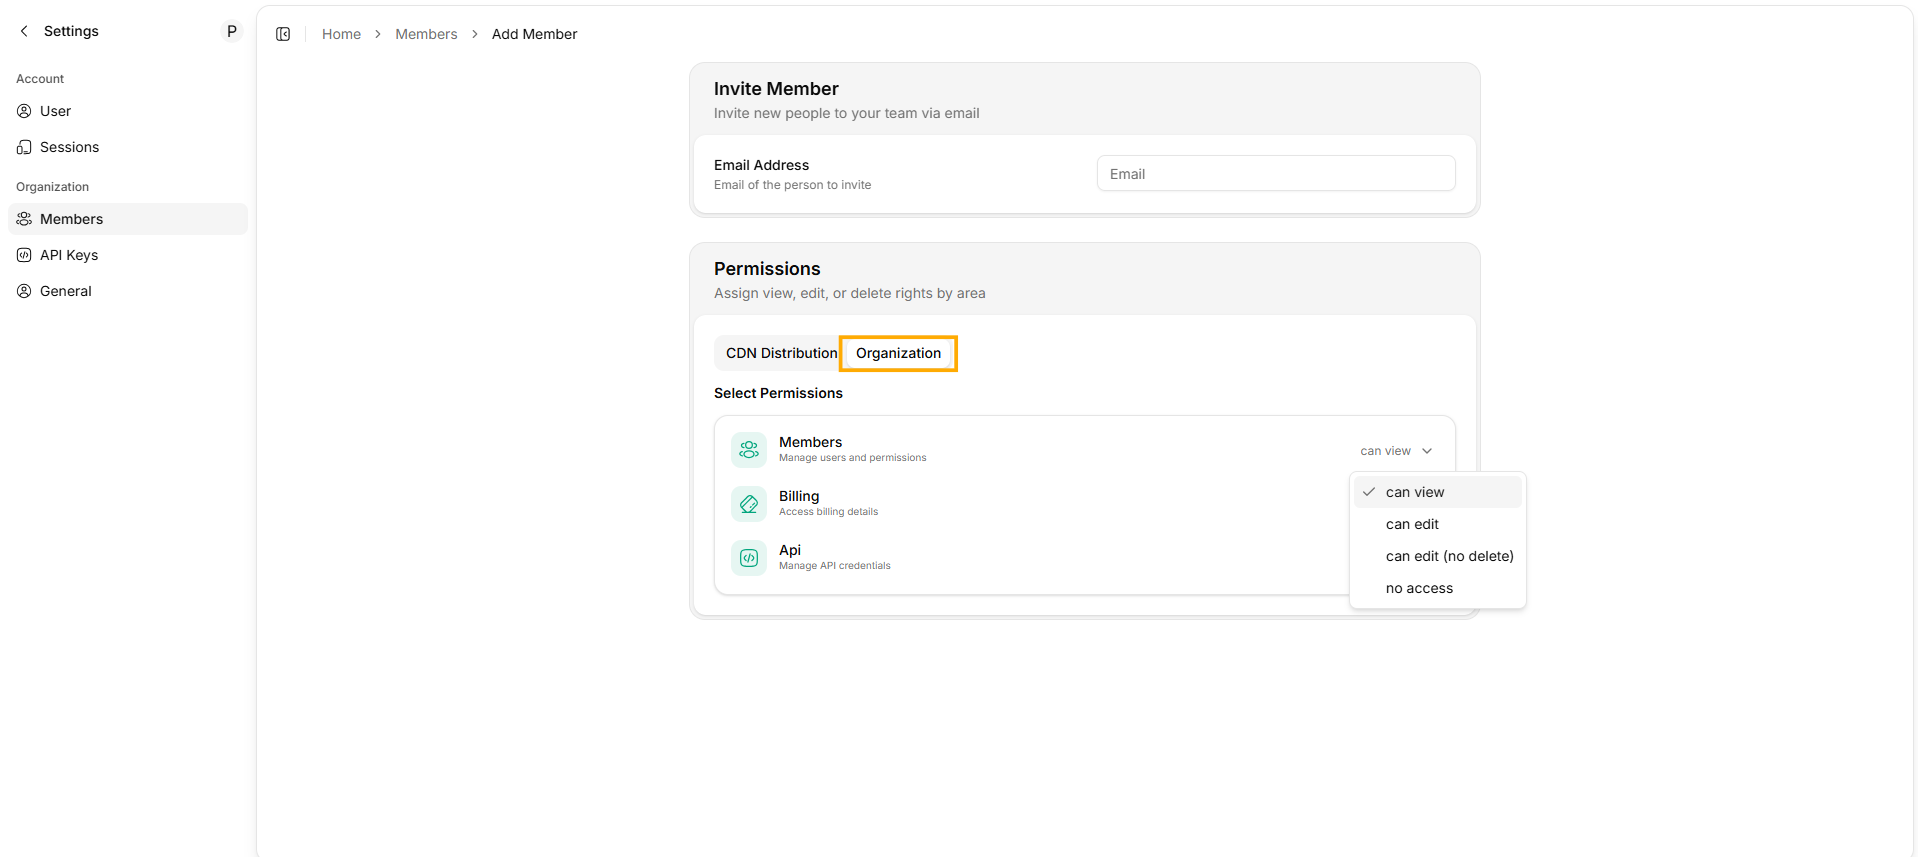
Organization Permissions
- Members — Invite users and manage their permissions
- Billing — View invoices and payment information
-
API — Create and manage API keys
For each area, you can choose:
can viewcan editcan edit(no delete)no access