- Overview
- Subtitles
- Chapters
- Others
Overview
The Overview tab contains the core information about your video. You can update the name, add a description, manage tags, and set thumbnails.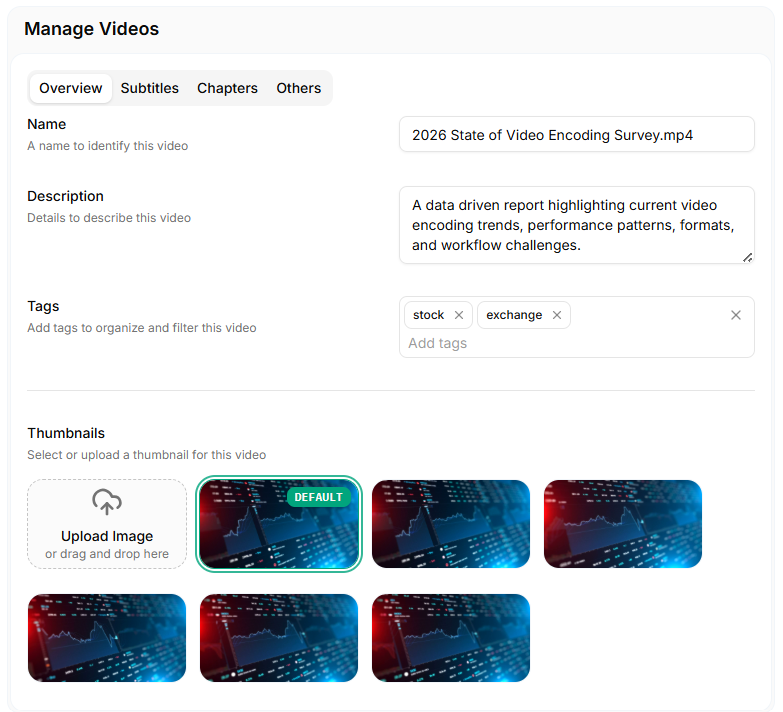
Video Overview
Name
Enter a title that identifies your video. This name appears across your Vidinfra dashboard and in all video listings.Description
Add a short description to explain what the video covers. This is helpful when managing large libraries or sharing content with teams.Tags
Tags help you organize and filter videos. Add multiple tags to group videos by category, event, project, or workflow. For advanced tag management, check Library Settings.Thumbnails
Choose a thumbnail to represent the video. You can:- Select a generated thumbnail
- Upload a custom image
- Drag and drop an image into the upload area
Subtitles
The Subtitles tab allows you to upload caption files for your video. Subtitles help improve accessibility, viewer engagement, and searchability.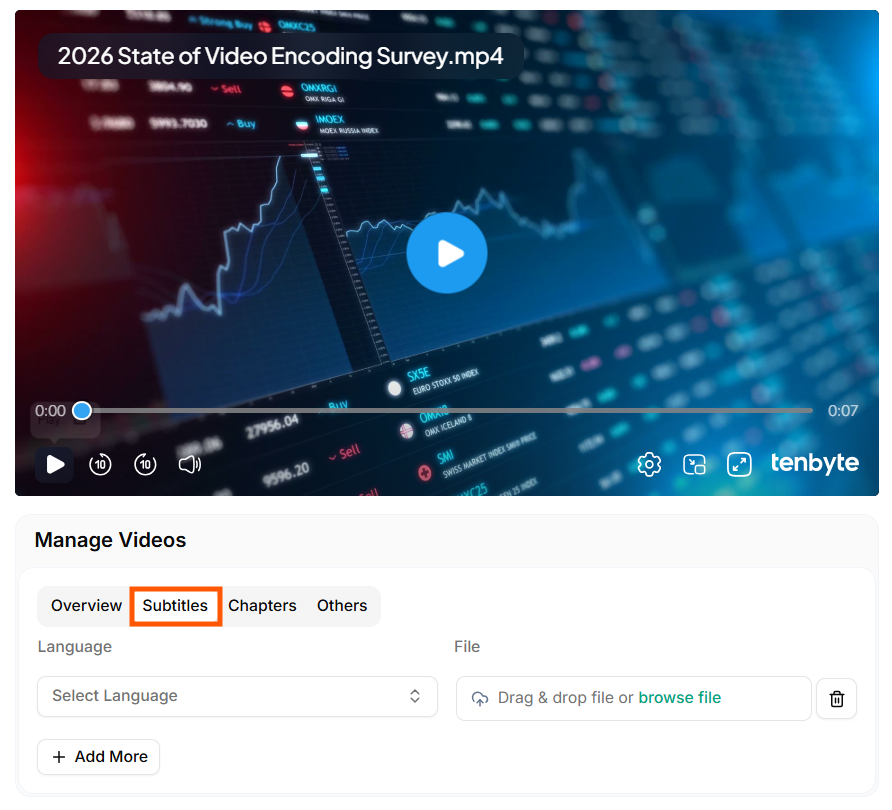
Add Subtitles
Language Selection
Choose the subtitle language from the dropdown list.Upload Subtitle File
Upload a subtitle file by:- Dragging and dropping it into the file box
- Clicking browse file to select it from your device
- Vidinfra supports standard subtitle formats like VTT and SRT.
Multiple Subtitles
- Click Add More to upload multiple subtitle tracks.
-
Select your languages and upload the files and click on Save subtitles
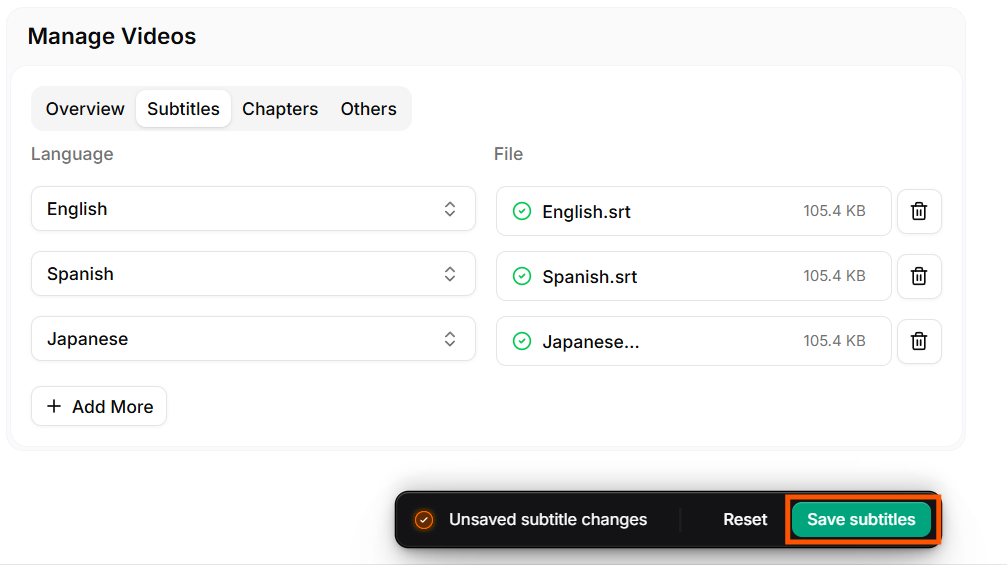
Add Multiple Subtitles
Chapters
The Chapters tab lets you break your video into sections. Chapters help viewers jump to key moments and improve navigation in long videos.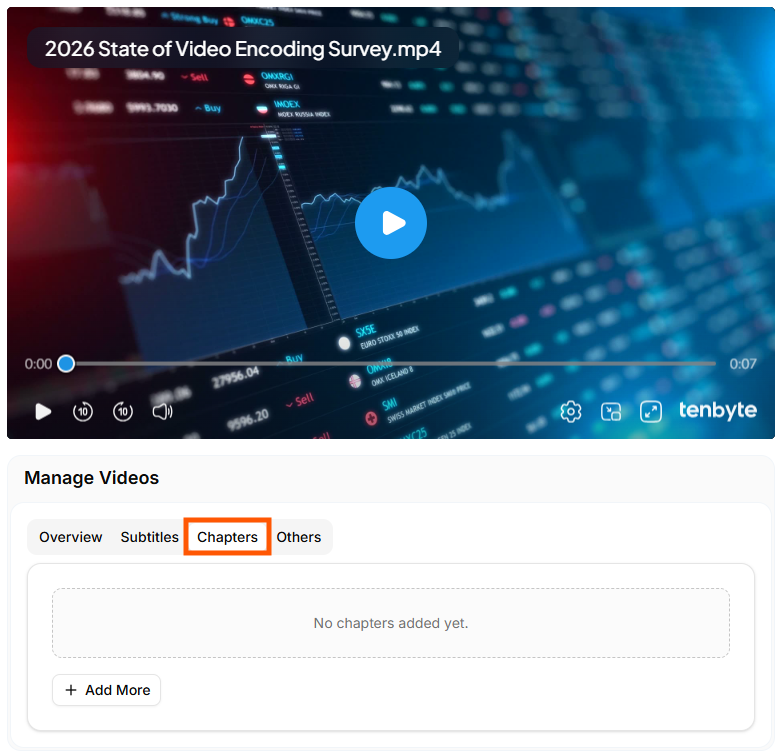
Add Chapters
Add Chapters
- Click Add More to create a new chapter.
- Enter the timestamp and title for each chapter.
- Add as many chapters as you need and click on Save changes.
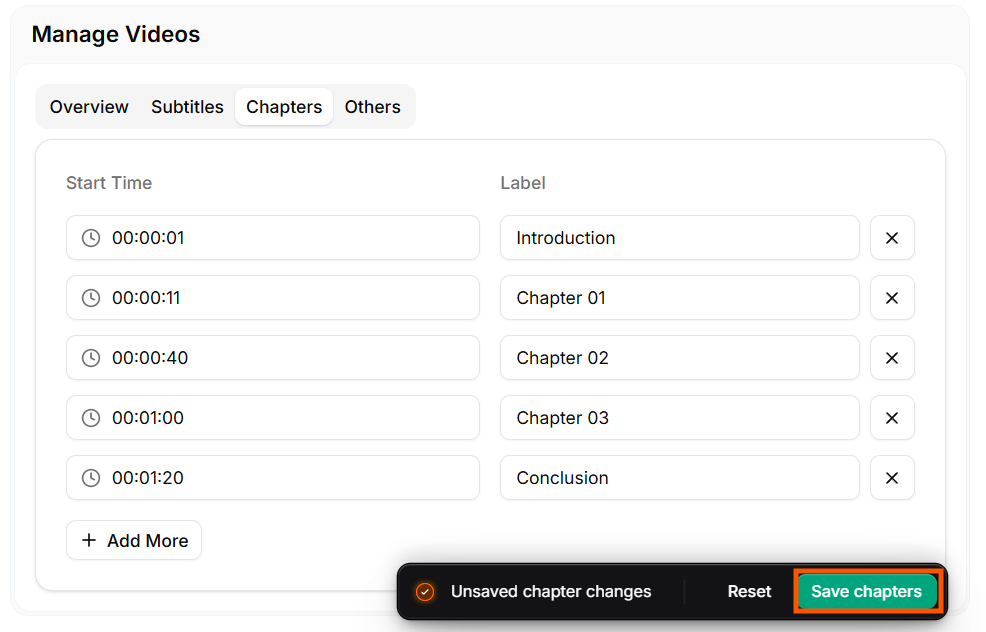
Add Multiple Chapters
If your video has no chapters yet, the panel will show: No chapters added yet.
Others
The Others tab displays technical metadata and asset information about your video. This section helps you understand the processing status, quality outputs, and file properties.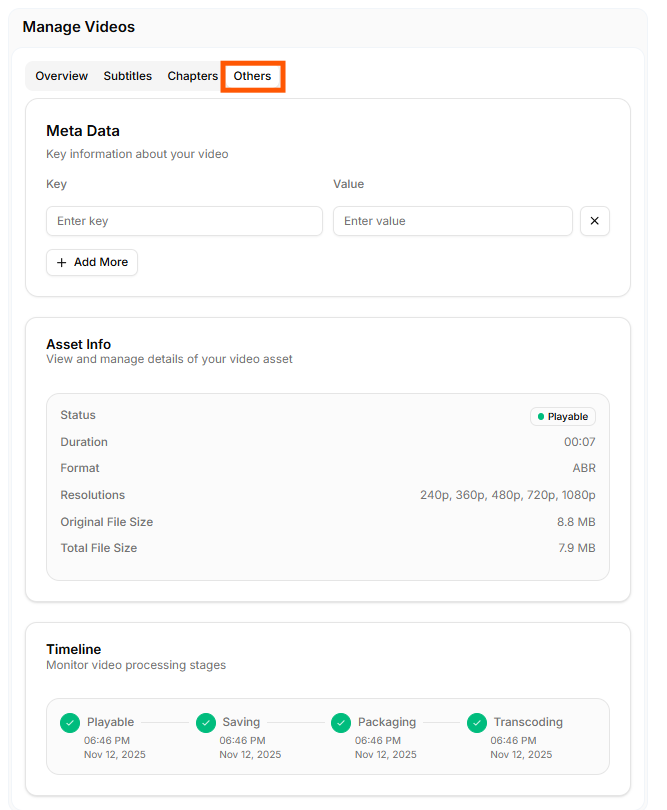
Add Chapters
Meta Data
Add custom key–value pairs to store extra information about the video. Examples:- Category
- Campaign name
- Internal tracking IDs
- Creator information
Asset Info
This section shows core details of your video asset, including:- Status – Shows whether the video is playable
- Duration – Video length
- Format – Playback format (e.g.,
ABR) - Resolutions – Available output qualities (240p to 1080p)
- Original File Size – Size of the uploaded file
- Total File Size – Size of all processed output variants
Timeline
Displays the full processing history of the video. You can track each stage with timestamps:- Playable
- Saving
- Packaging
- Transcoding