Select Compute Section
-
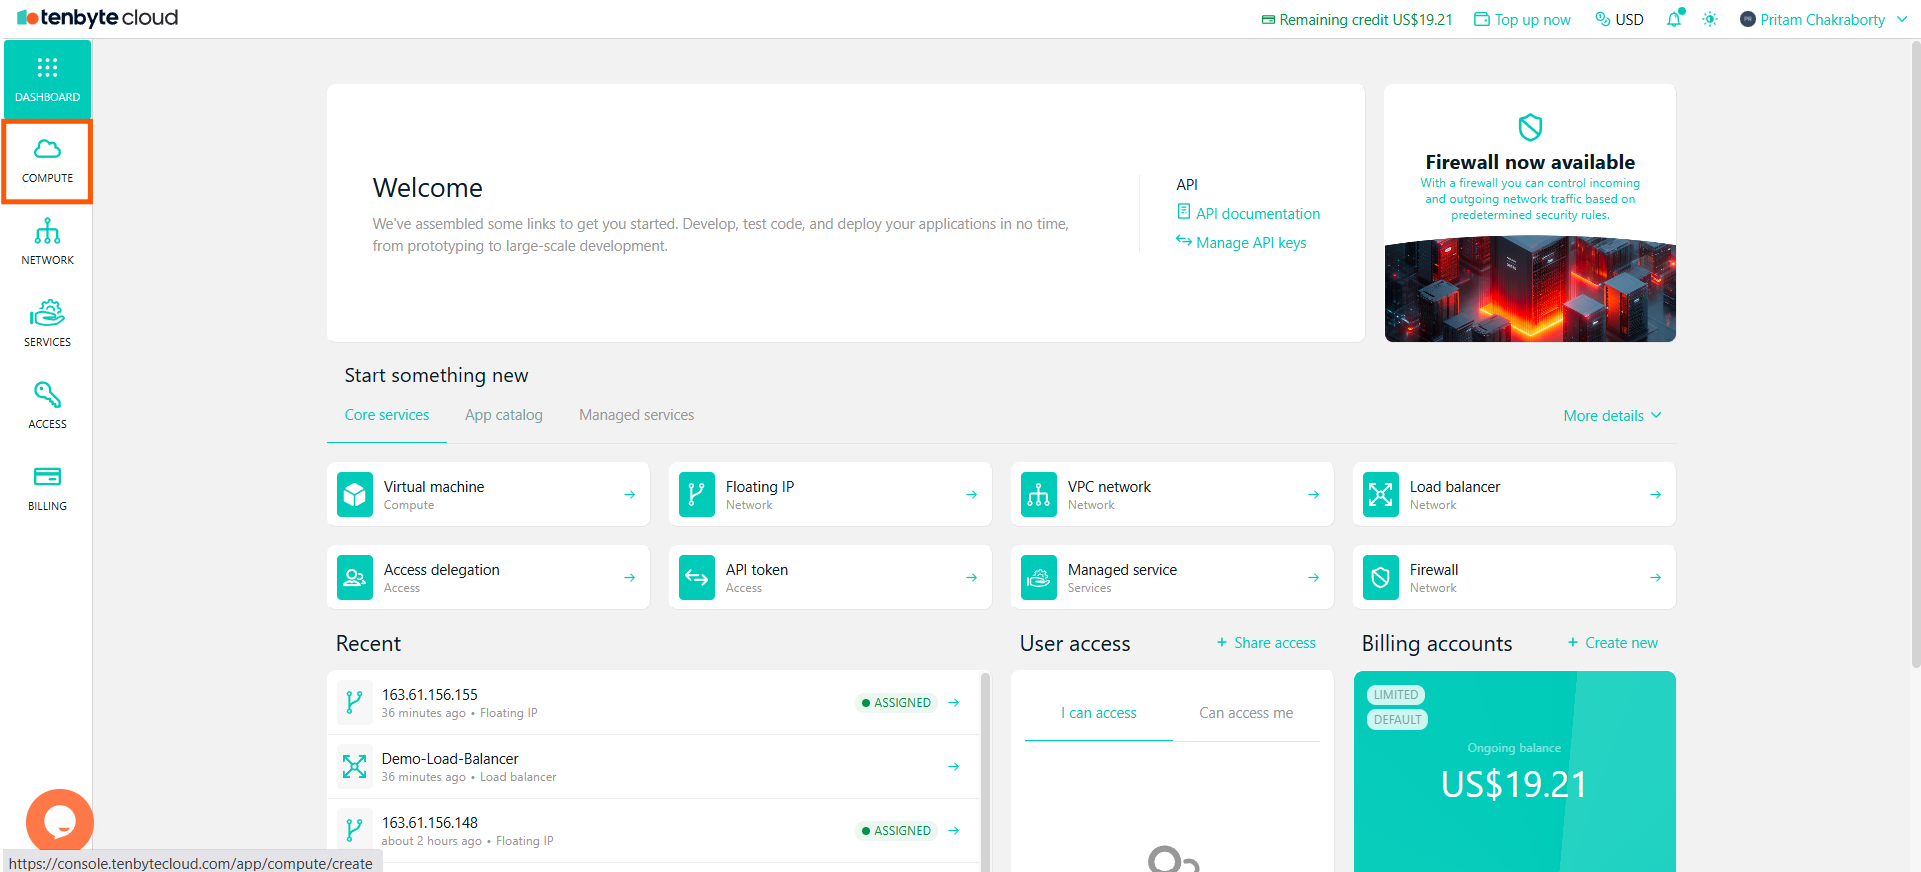
Start by opening the Compute section from the left sidebar. This page lists all the virtual machines you have created.
View your created Virtual Machines
Choose Your Virtual Machine
-
In the Compute section, locate the VM you want to manage.
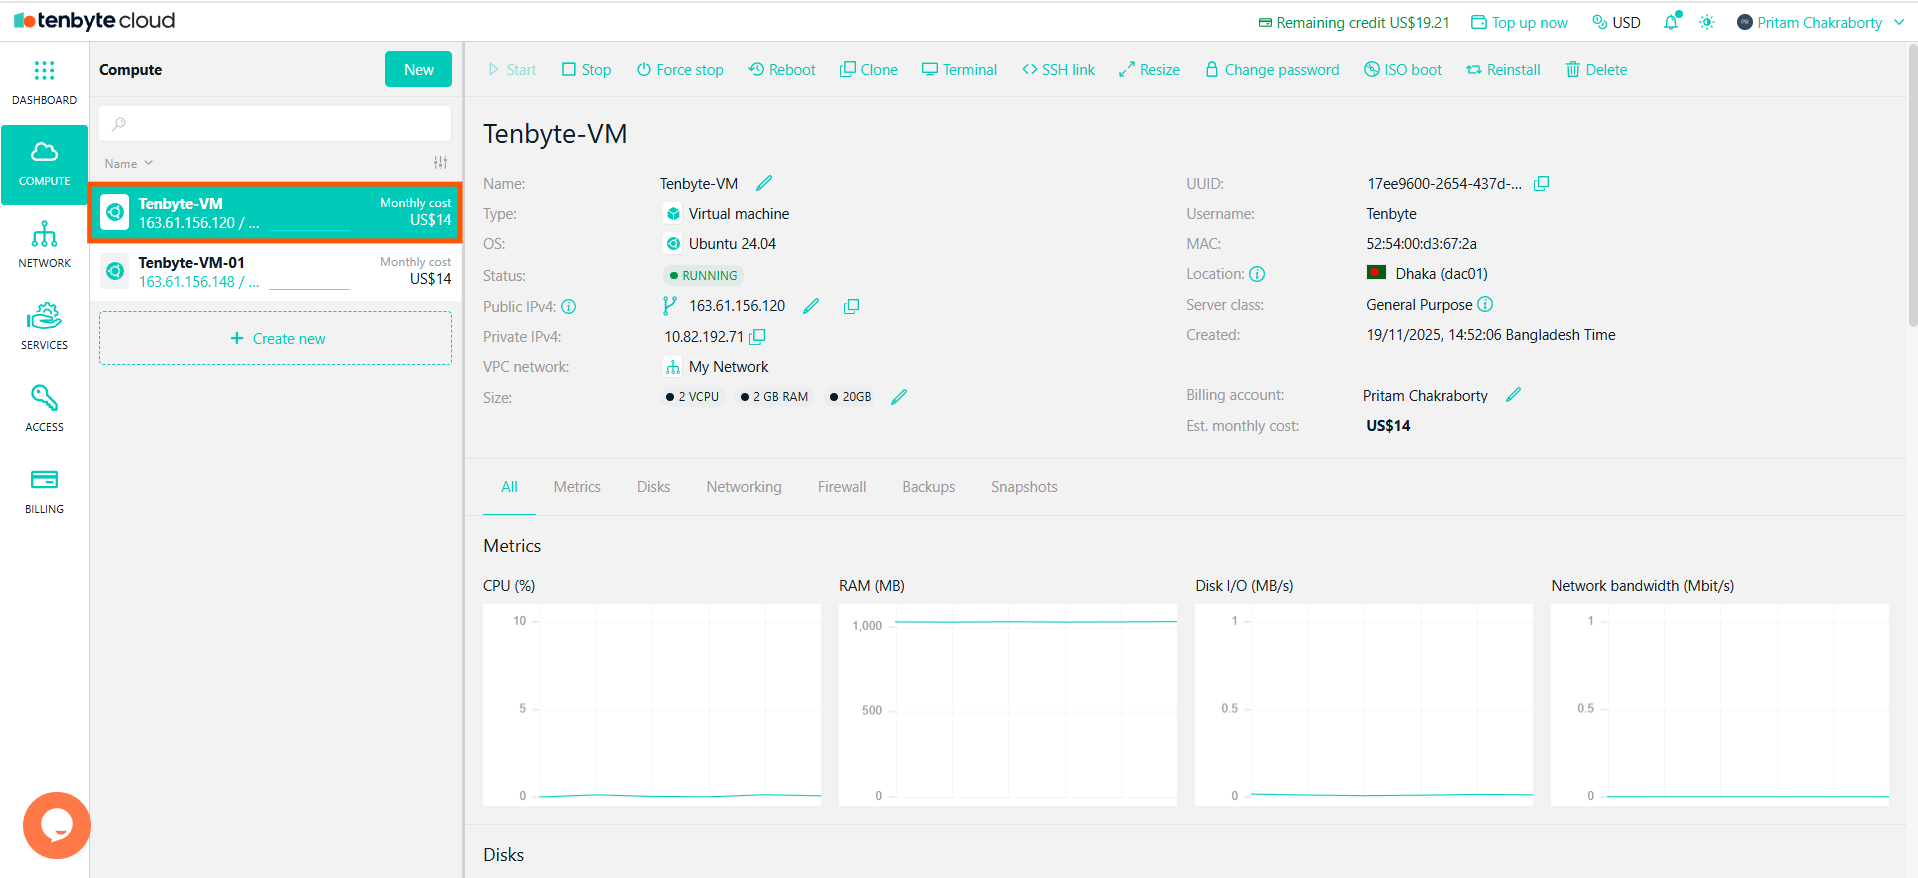
Select the VM
Navigate to the Disks Tab
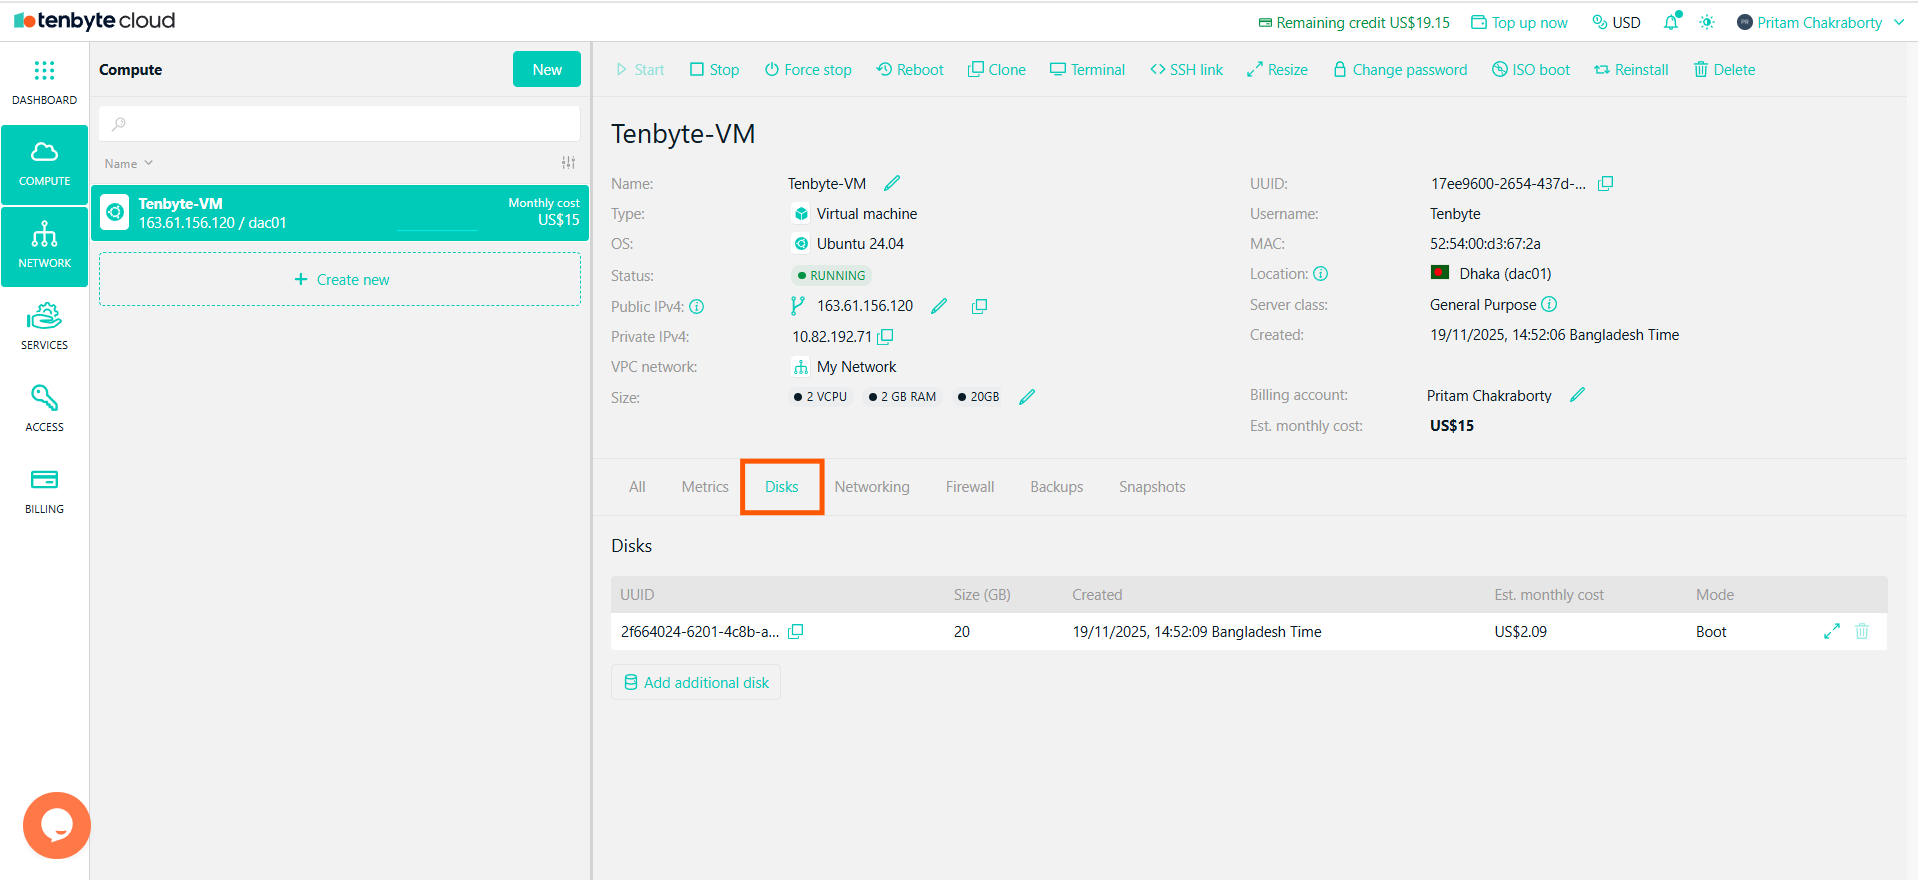
- Once you open the selected VM, you’ll see several tabs with different configuration options.
-
Click on the Disks tab to manage storage settings for the selected VM.
Navigate to the Disks Tab
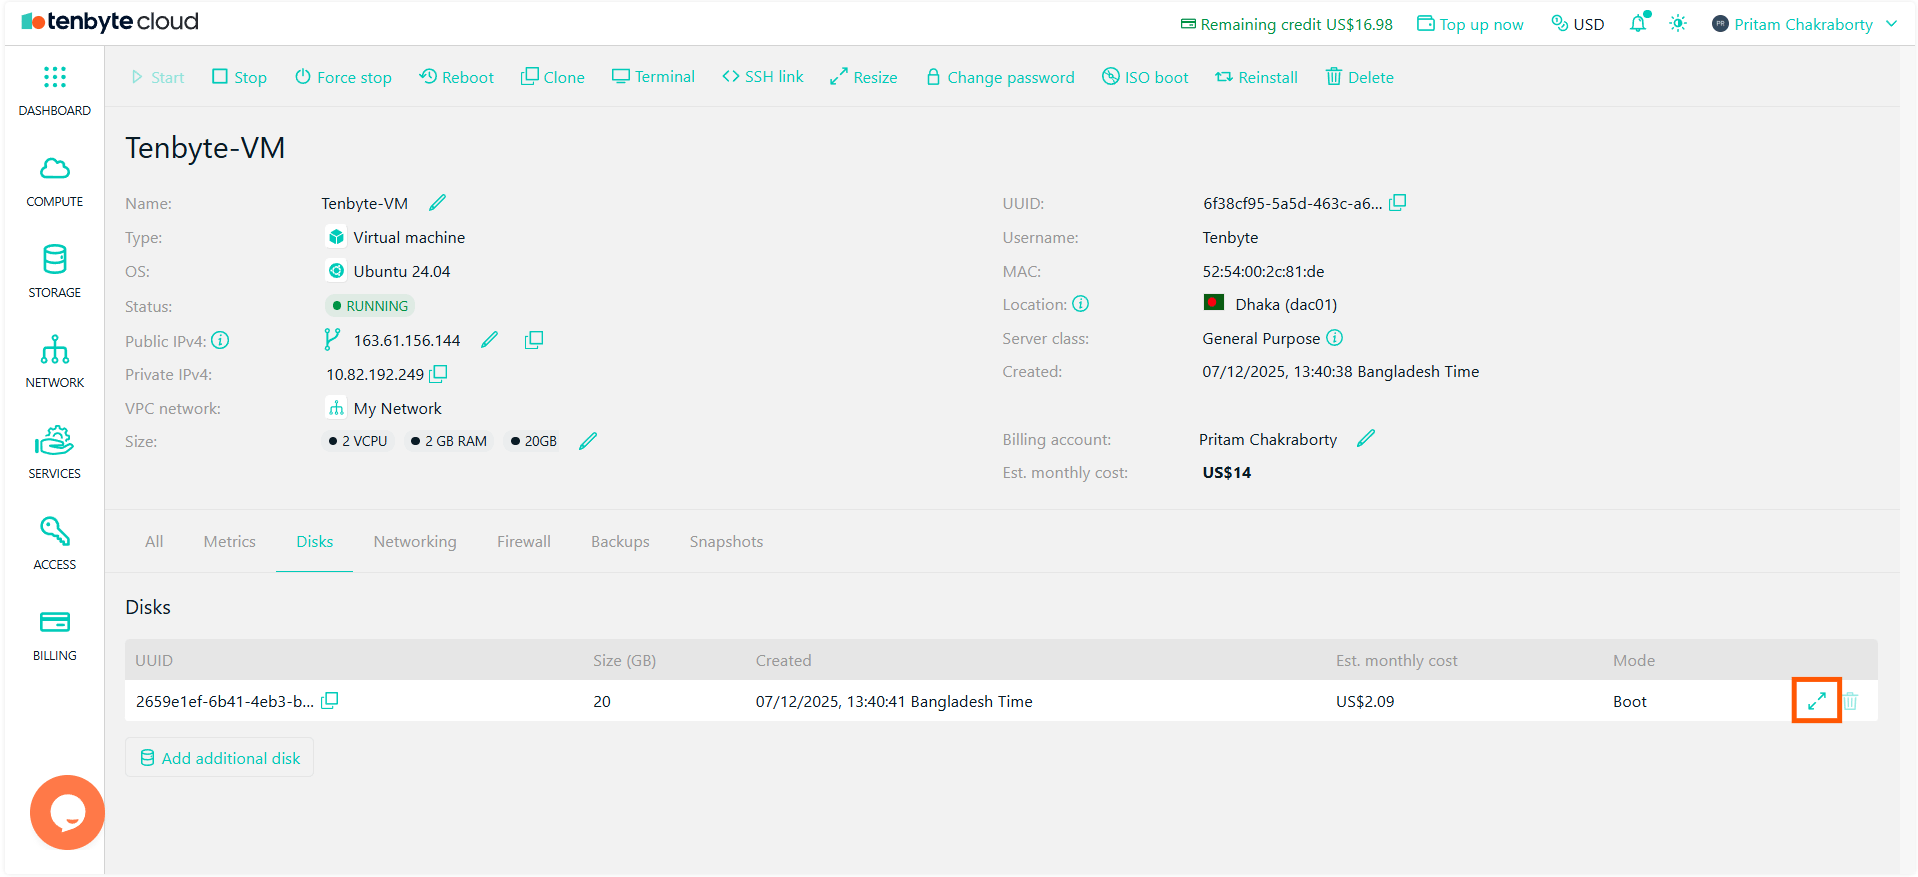
View Existing Disks
-
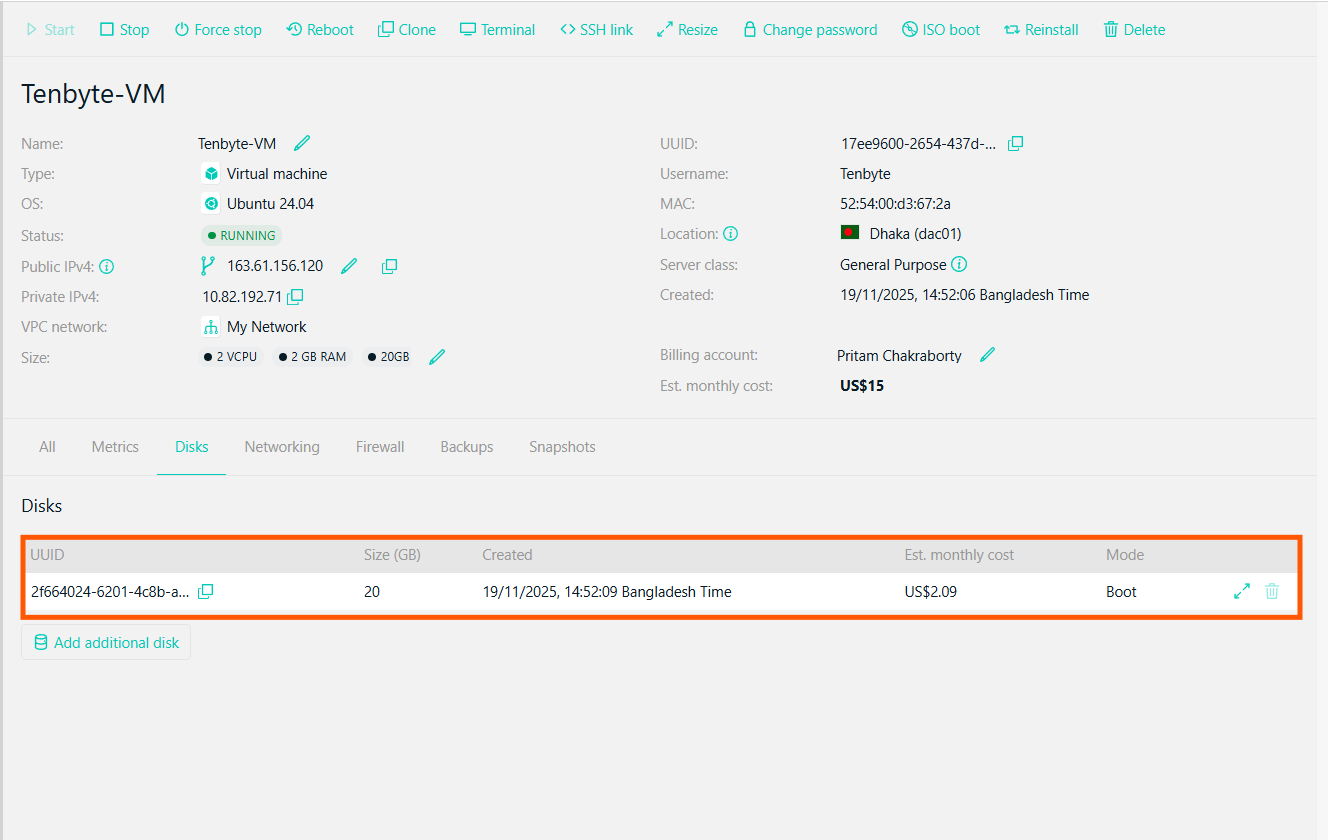
The Disks tab displays all disks currently attached to the VM.
View Existing Disks
-
You may see the Boot Disk with details such as:
- UUID: The unique identifier for the disk.
- Size: The disk size.
- Created: The creation timestamp.
- Est. Monthly Cost: The cost for the disk storage.
- This view helps you understand your storage layout before making changes.
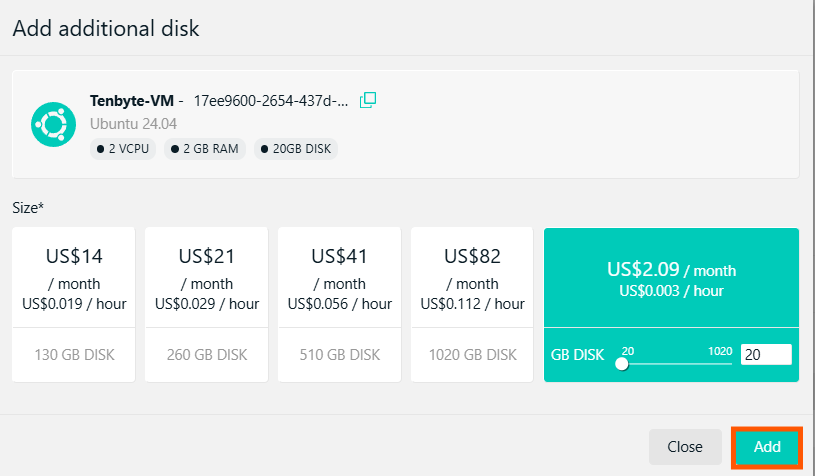
Add Additional Disk
- To add a new disk, click on Add additional disk. You can choose the disk size based on your requirements and attach it to the VM.
-
Click on the Add to add additional disk.
Add Additional Disk
- After creation, the disk will appear in your disk list and can be formatted or mounted inside the VM.
Manage Disks
- Tenbyte Cloud allows you to adjust disk size or remove additional disks based on your needs.
-
Next to the disk you want to resize, click on the Resize button.
Resize your Disk
-
Adjust the disk size according to your needs by modifying the disk size.
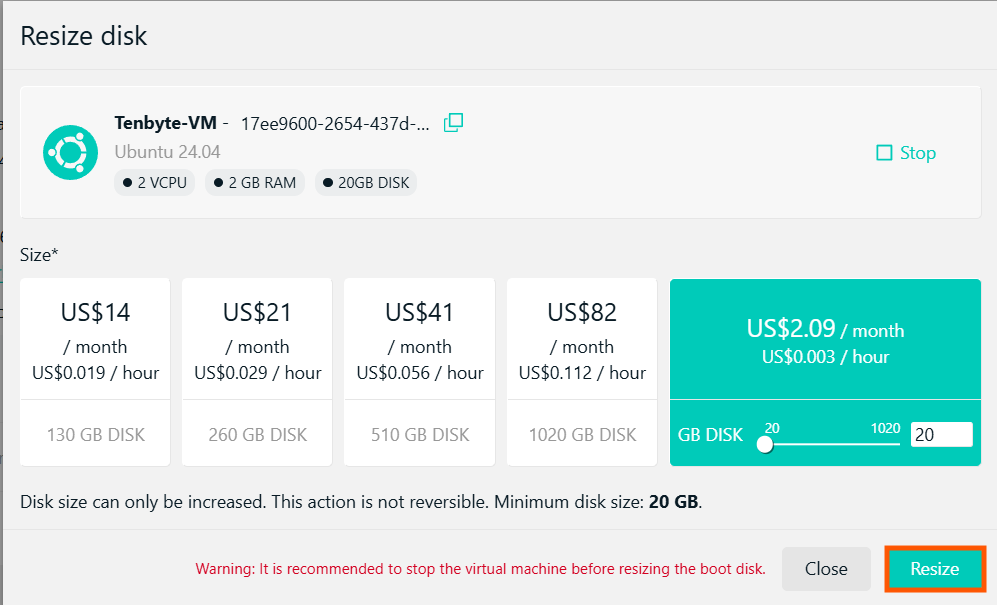
Resize your Disk
- After setting the desired size, click Resize to apply the changes.