Select Virtual Machine
-
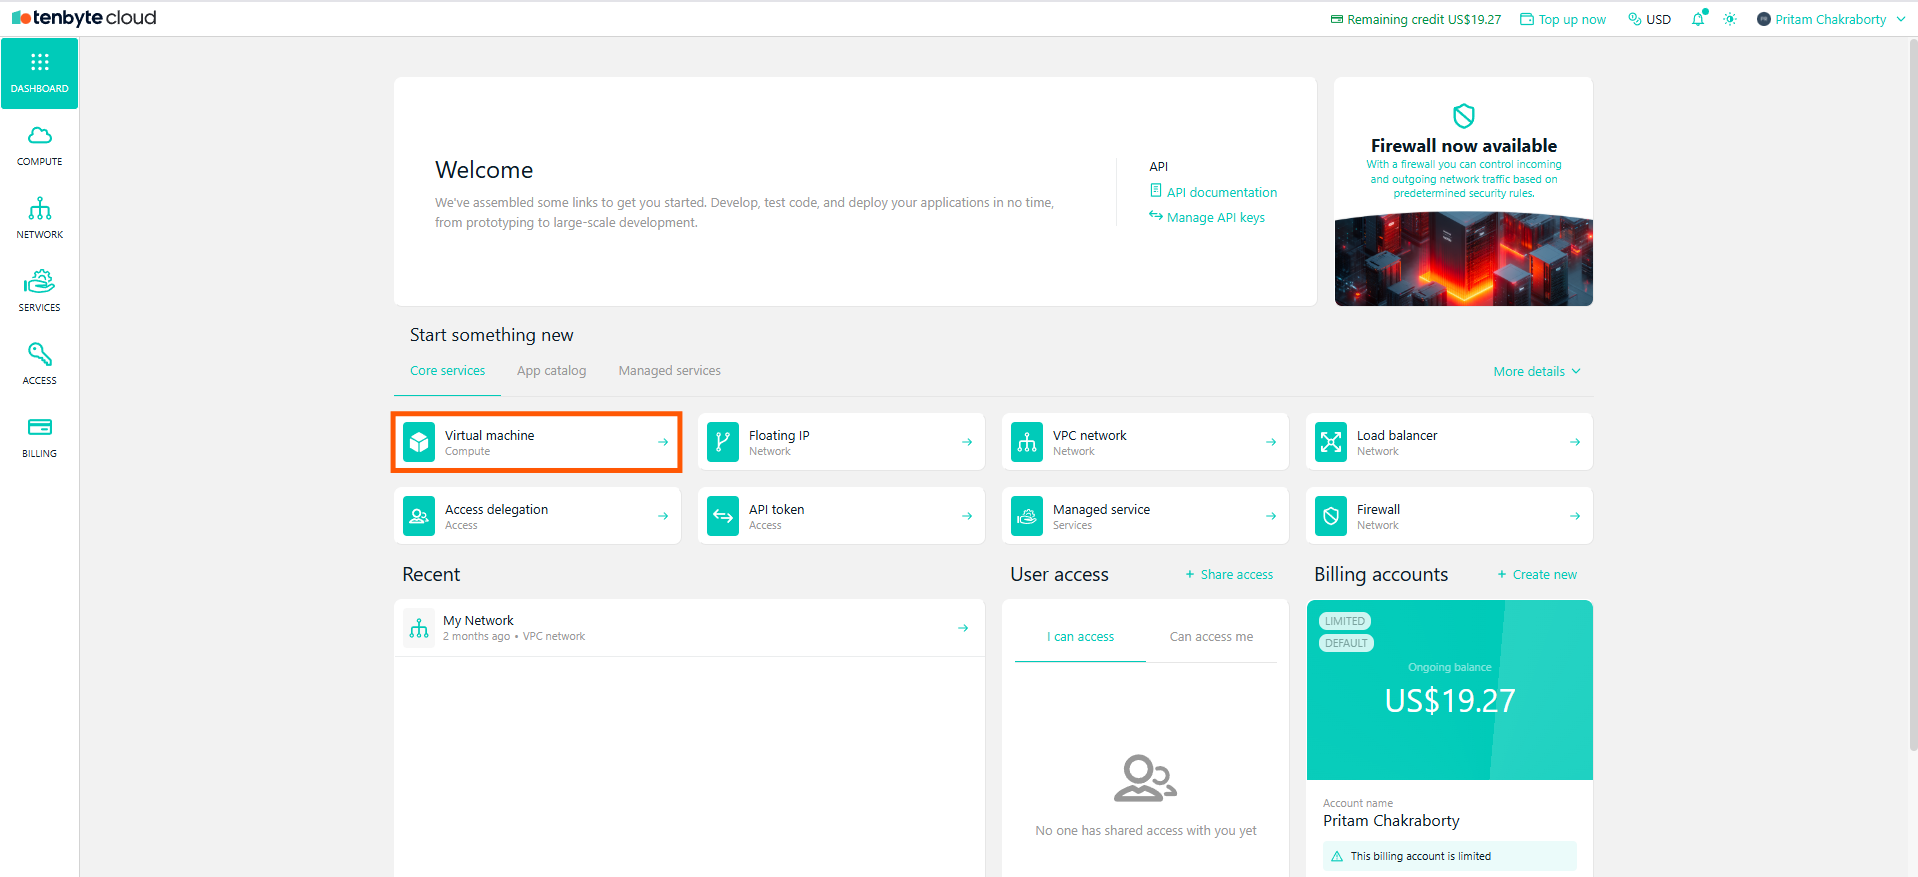
To begin, open your Tenbyte Cloud dashboard and choose Virtual Machine from the list of available services.
Select Virtual Machine
- This takes you to the VM creation page where all configuration options are listed.
Choose Operating System
-
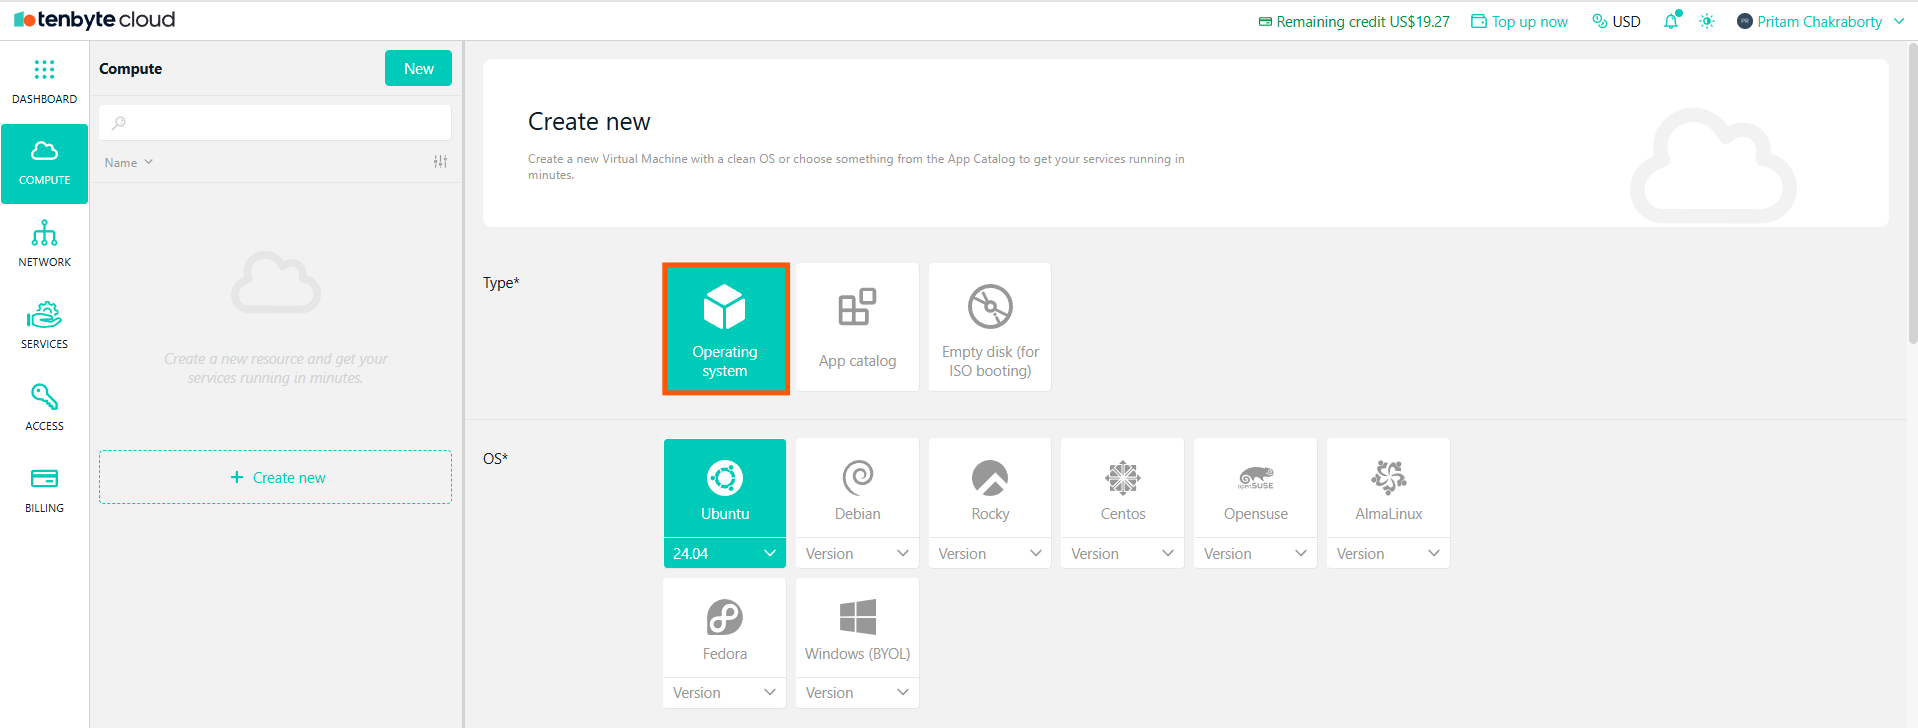
If you want to install an operating system, select Operating System and choose the OS.
Select Operating System
UbuntuDebianRockyCentOSOpenSUSEAlmaLinuxFedoraWindows (BYOL)
Each OS image is maintained and updated regularly to provide a reliable foundation for your workloads.
Choose App Catalog
-
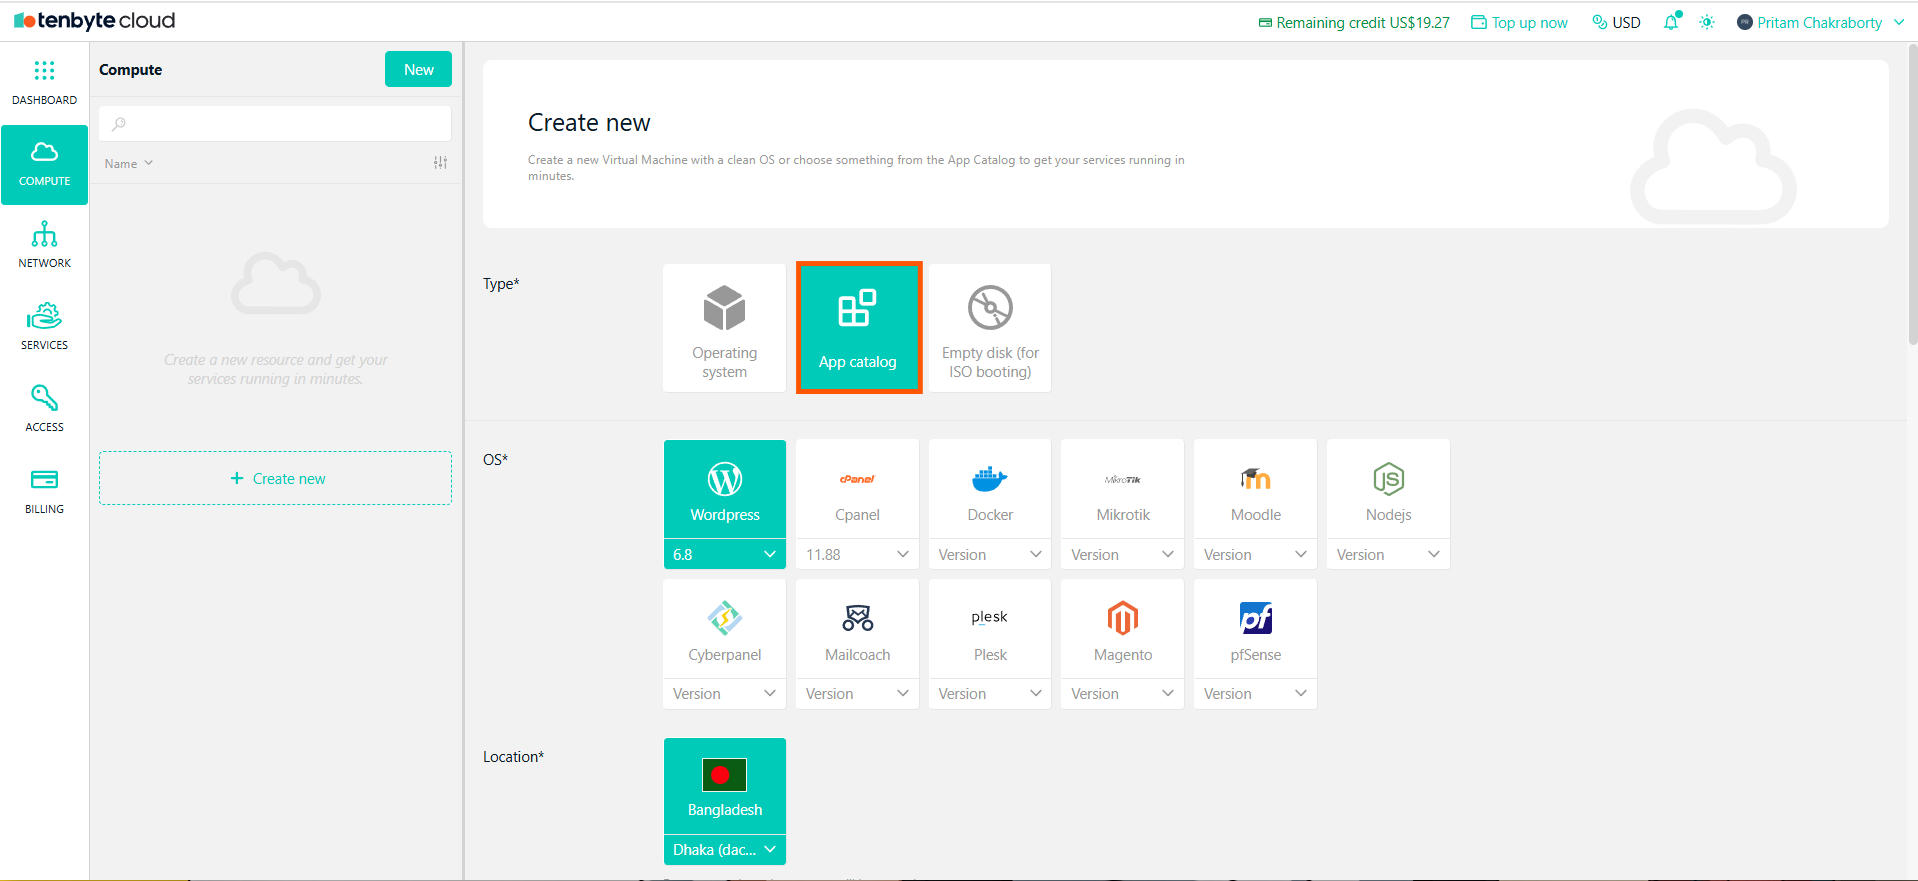
If you need an application, select App Catalog.
Select App Catalog
cPanelDockerMikrotikMoodleNode.jsCyberpanelMailcoachPleskMagentopfSenseWordPress
For both operating systems and applications, you can choose the version that best fits your requirements during the setup process.
Choose Empty Disk for ISO Booting
- If you plan to install an operating system manually using an ISO image, choose Empty disk.
Select your Location
- Choose your Data center where the resource will be created.
Select Server Class
-
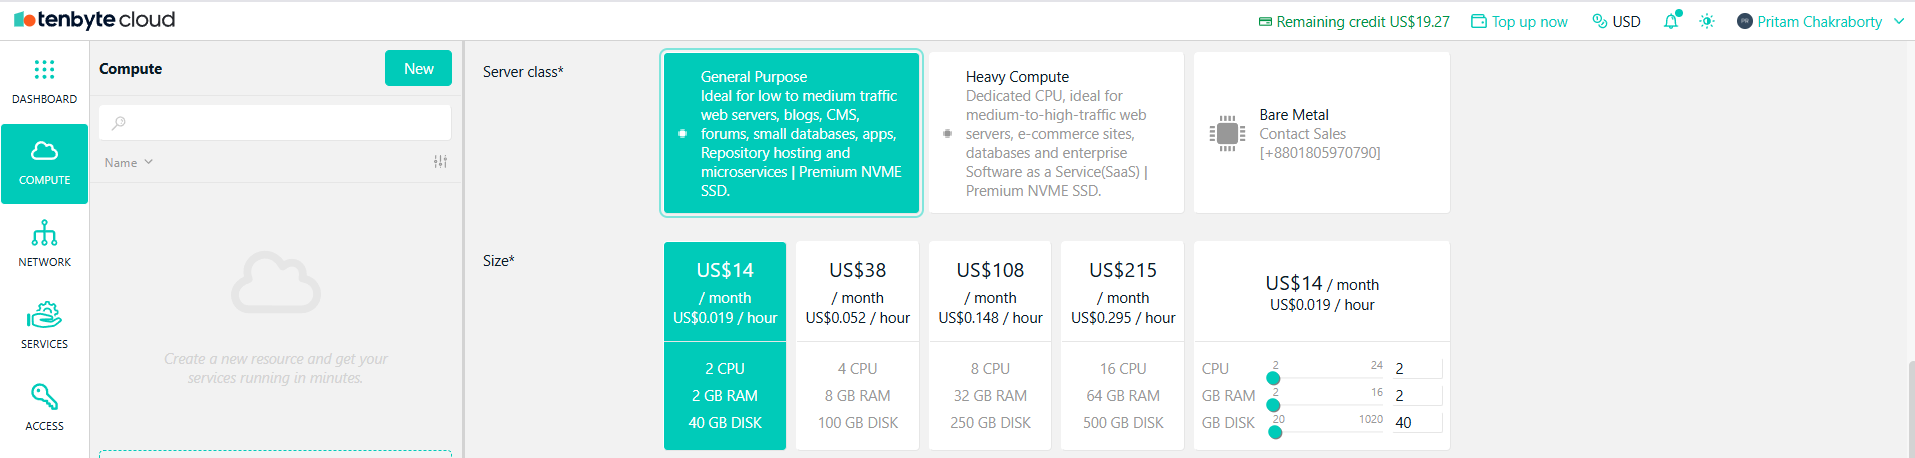
Choose between General Purpose or Heavy Compute based on your workload type.
Select Server Class
- General Purpose: Ideal for everyday applications, low to medium traffic workloads, and business systems.
- Heavy Compute: Recommended for high-traffic systems, intensive compute tasks, and enterprise workloads.
Configure your VM Size
- Select the VM size based on the resources your application requires.
-
You can configure -
- CPU Cores – Match the number of cores to your processing demands.
- Memory (RAM) – Select memory based on your application size and performance needs.
- Storage – Choose the disk size appropriate for your files, databases, or workloads.

Configure VM Size
- This flexible configuration lets you build a VM that fits your exact use case.
Public IPv4 Address
- If you require an external IP for your VM, enable Public IPv4.
Enabling Public IPv4 will incur an additional US$2/month charge.
Select VPC Network
-
Choose an existing VPC network or create a new one for private and secure network setup.

Public IPv4 and VPC Network
- If you want to set up your own VPC network, you can follow the steps in the Tenbyte VPC page found in the Networking and Security section.
Fill in User Information and Billing Details
- Username: Enter a username for your virtual machine. This will be used to log in.
- Password: Set a password that meets the security criteria
- Confirm Password: Re-type the password to ensure it has been entered correctly.
-
SSH Public Key: If you prefer passwordless SSH access, add your SSH key here. Select SSH Keys, and a pop-up will appear where you can enter a key name and paste your public key. Use the format:
ssh-keytype base64_encoded_key optional_comment.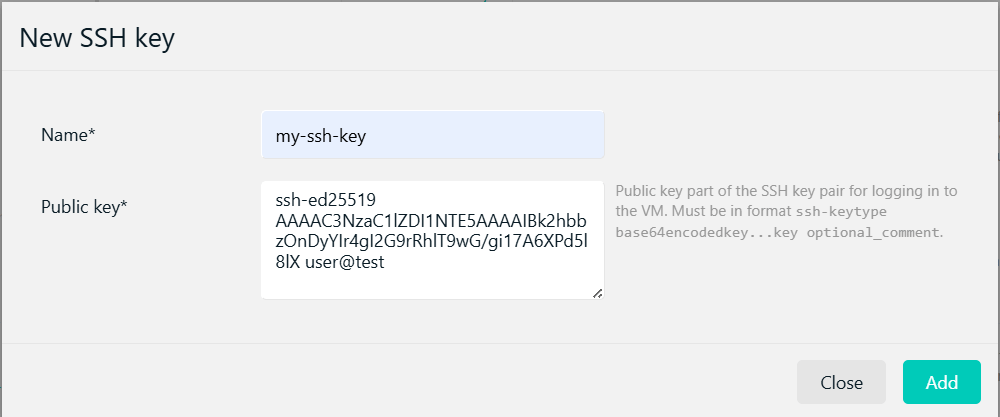
Add your SSH Public Key
Only single-line keys are accepted. Make sure the key is not wrapped, contains no extra spaces, and matches one of the supported key types. - Initialization Script: Optionally, you can add a custom configuration for the VM by using an initialization script. This can include cloud-init configurations to automatically set up your VM during the creation process.
- Resource Name: Provide a resource name for your VM. This will be used to generate a suitable hostname for the machine if applicable.
- Estimated Monthly Cost: This gives you an overview of what you’ll be charged based on the current setup.
- Billing Account: Choose a billing account to associate with the VM.
Create the VM
-
Once you’ve completed all fields and reviewed your details, click the Create button to finalize the creation of your virtual machine.
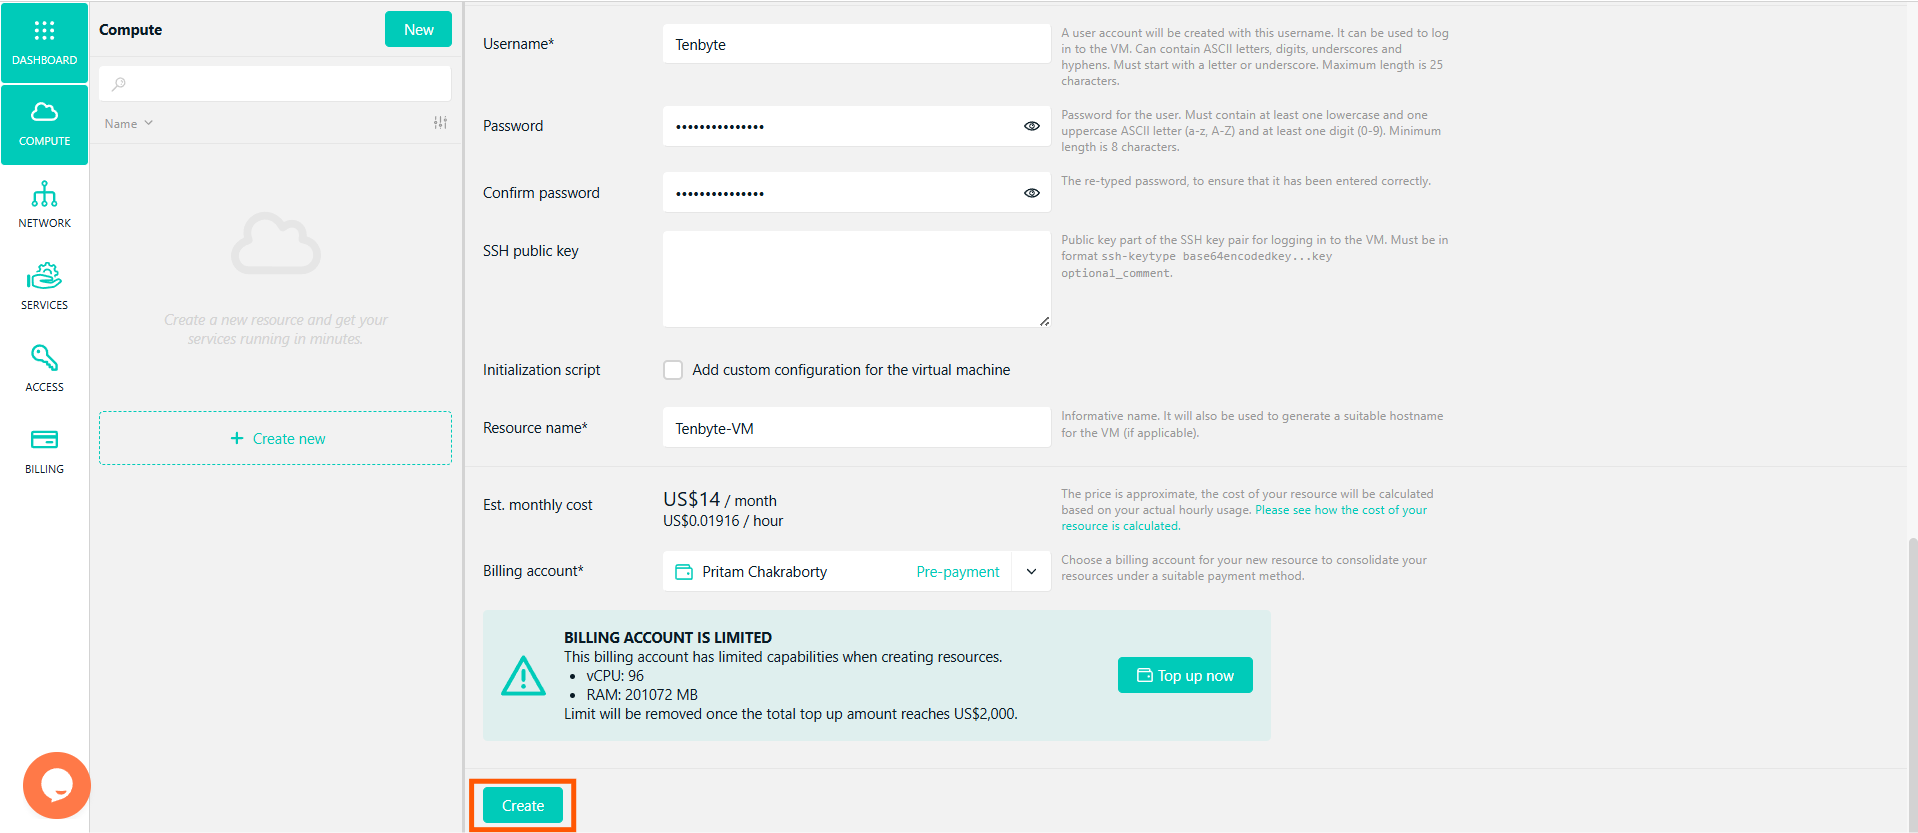
Create your VM
View Your Created Virtual Machine
-
Once your virtual machine (VM) is created, you will see it listed on your VM dashboard.
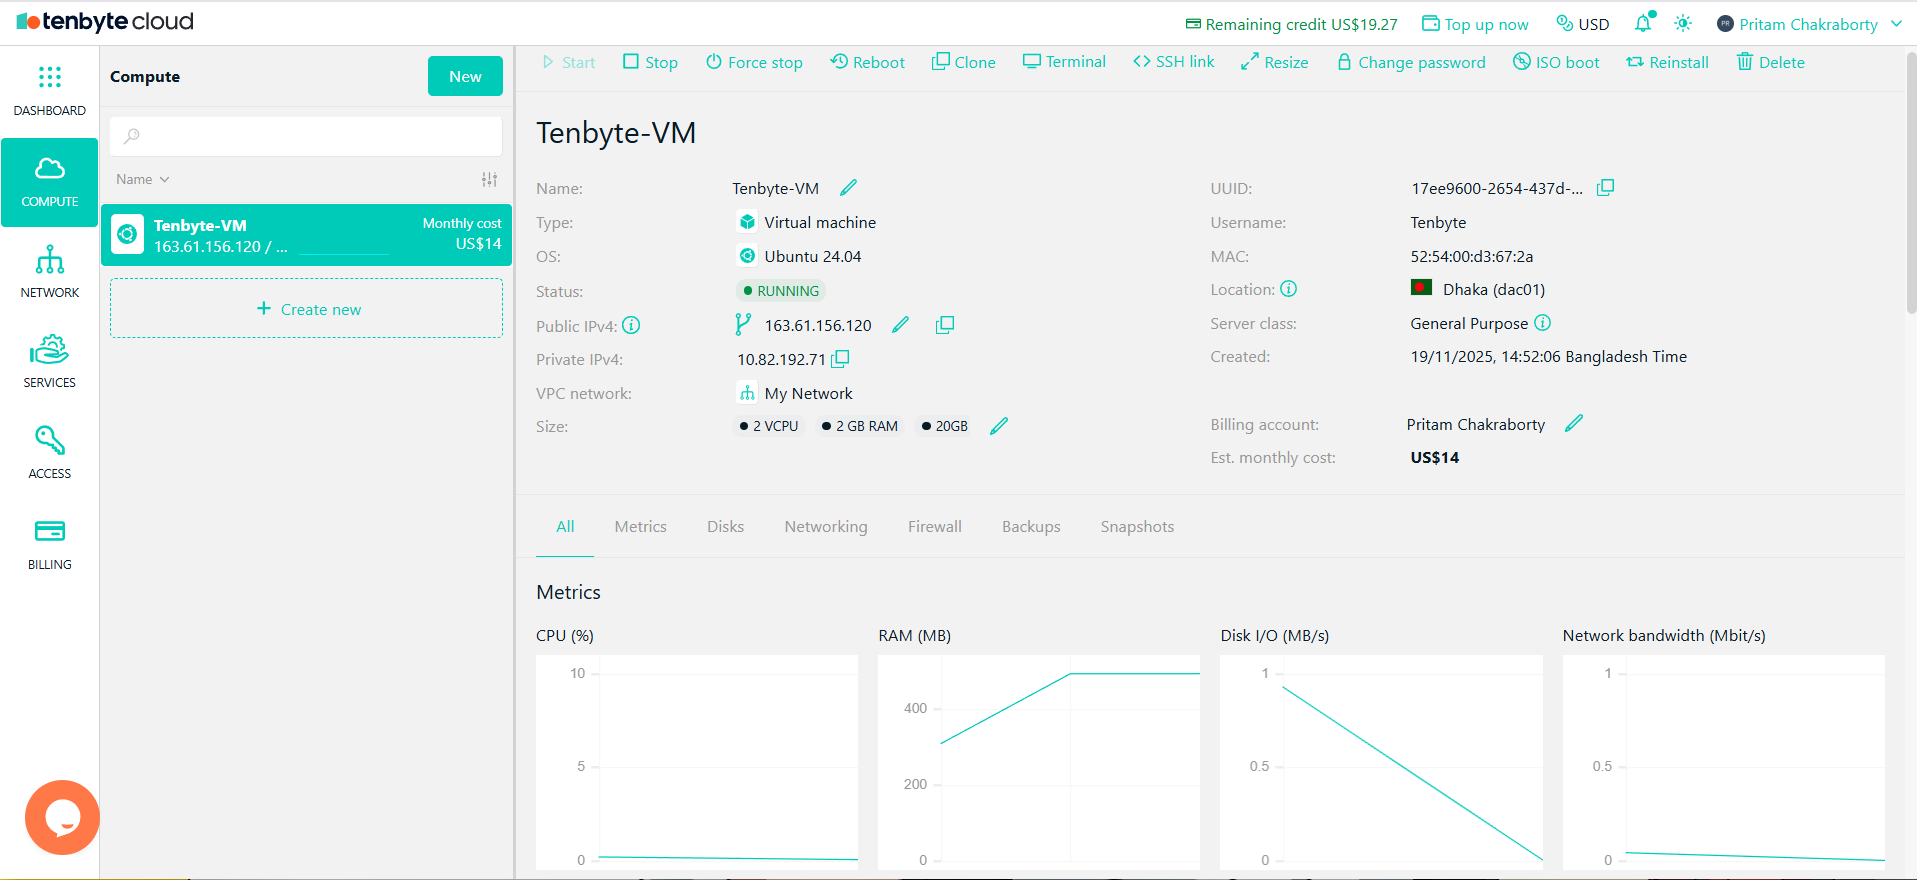
View Your Created Virtual Machine