> ## Documentation Index
> Fetch the complete documentation index at: https://docs.tenbyte.io/llms.txt
> Use this file to discover all available pages before exploring further.
# Quick Start Guide
This guide explains how to upload, process, and stream your first video with Vidinfra, Tenbyte’s all in one video platform.
In just a few steps, you'll transform a raw video file into a ready-to-stream playback link.
## Prerequisites
Before starting, make sure you have:
* A **Tenbyte account** — [Sign up](https://beta.tenbyte.io/vidinfra)
* A **video file** ready to upload (e.g. `.mp4`, `.mov`, `.mkv`)
* An **API key** with `assets:write` permission
***
## Set Up Your Vidinfra Workspace
* After signing in with your registered email and password, you will see a welcome page.
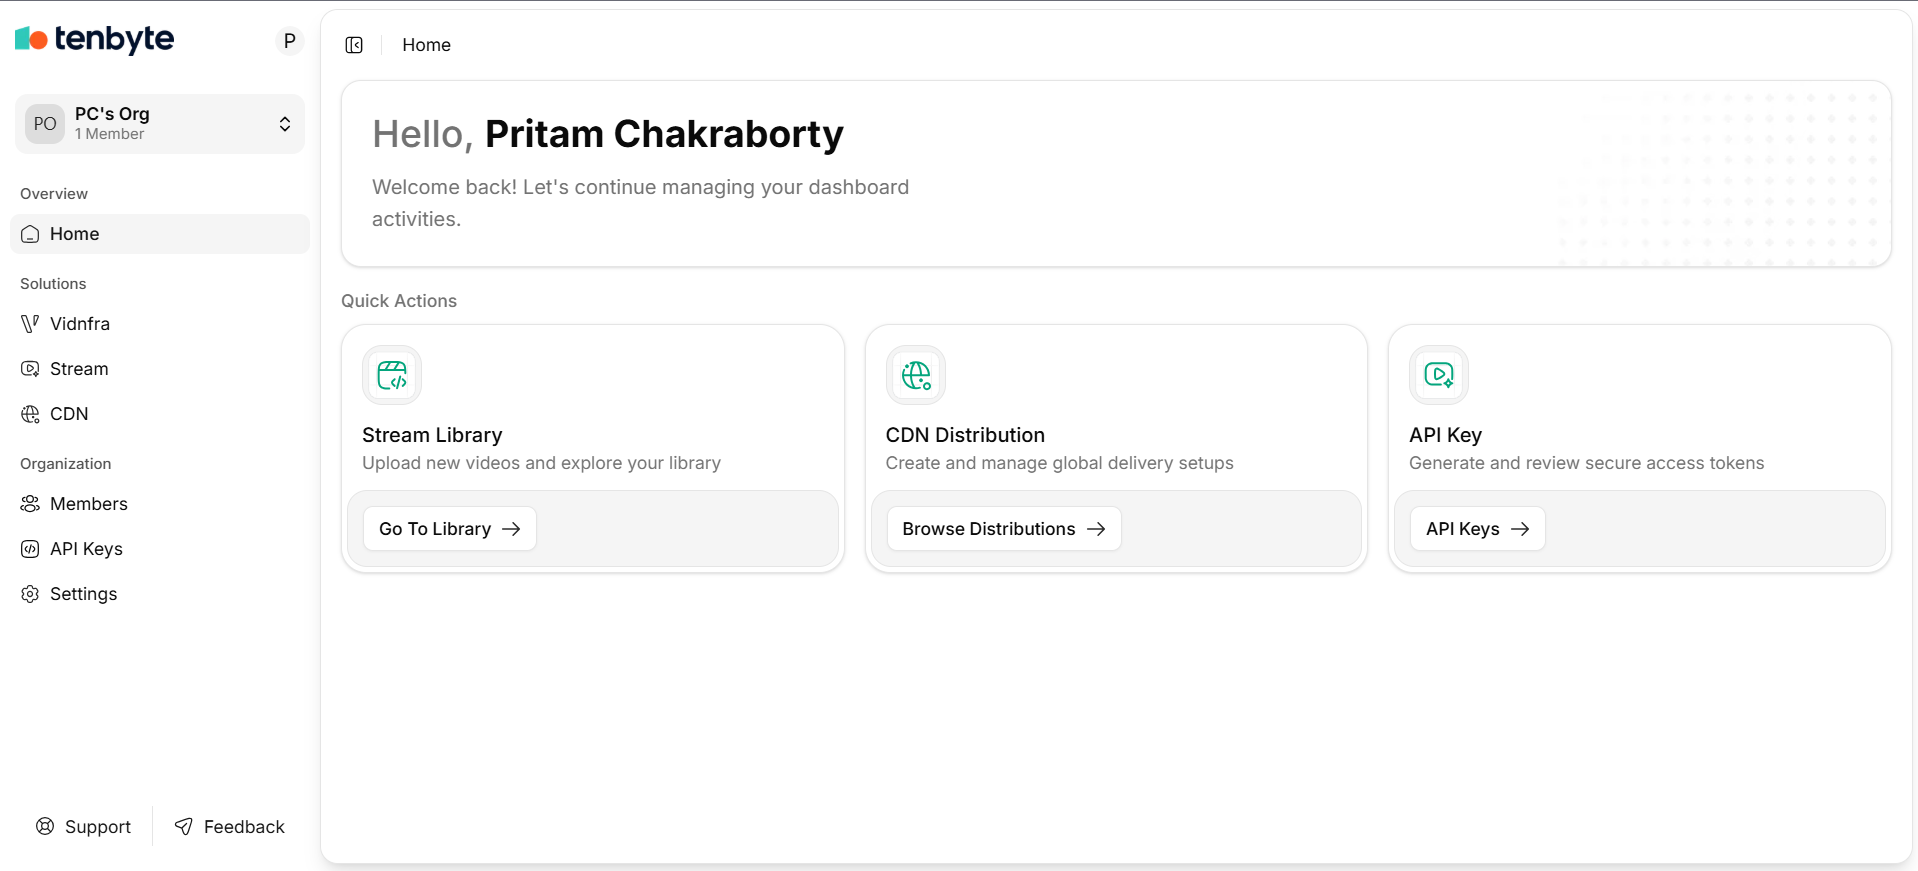 * From the left sidebar, select **Vidinfra** to open the Vidinfra workspace.
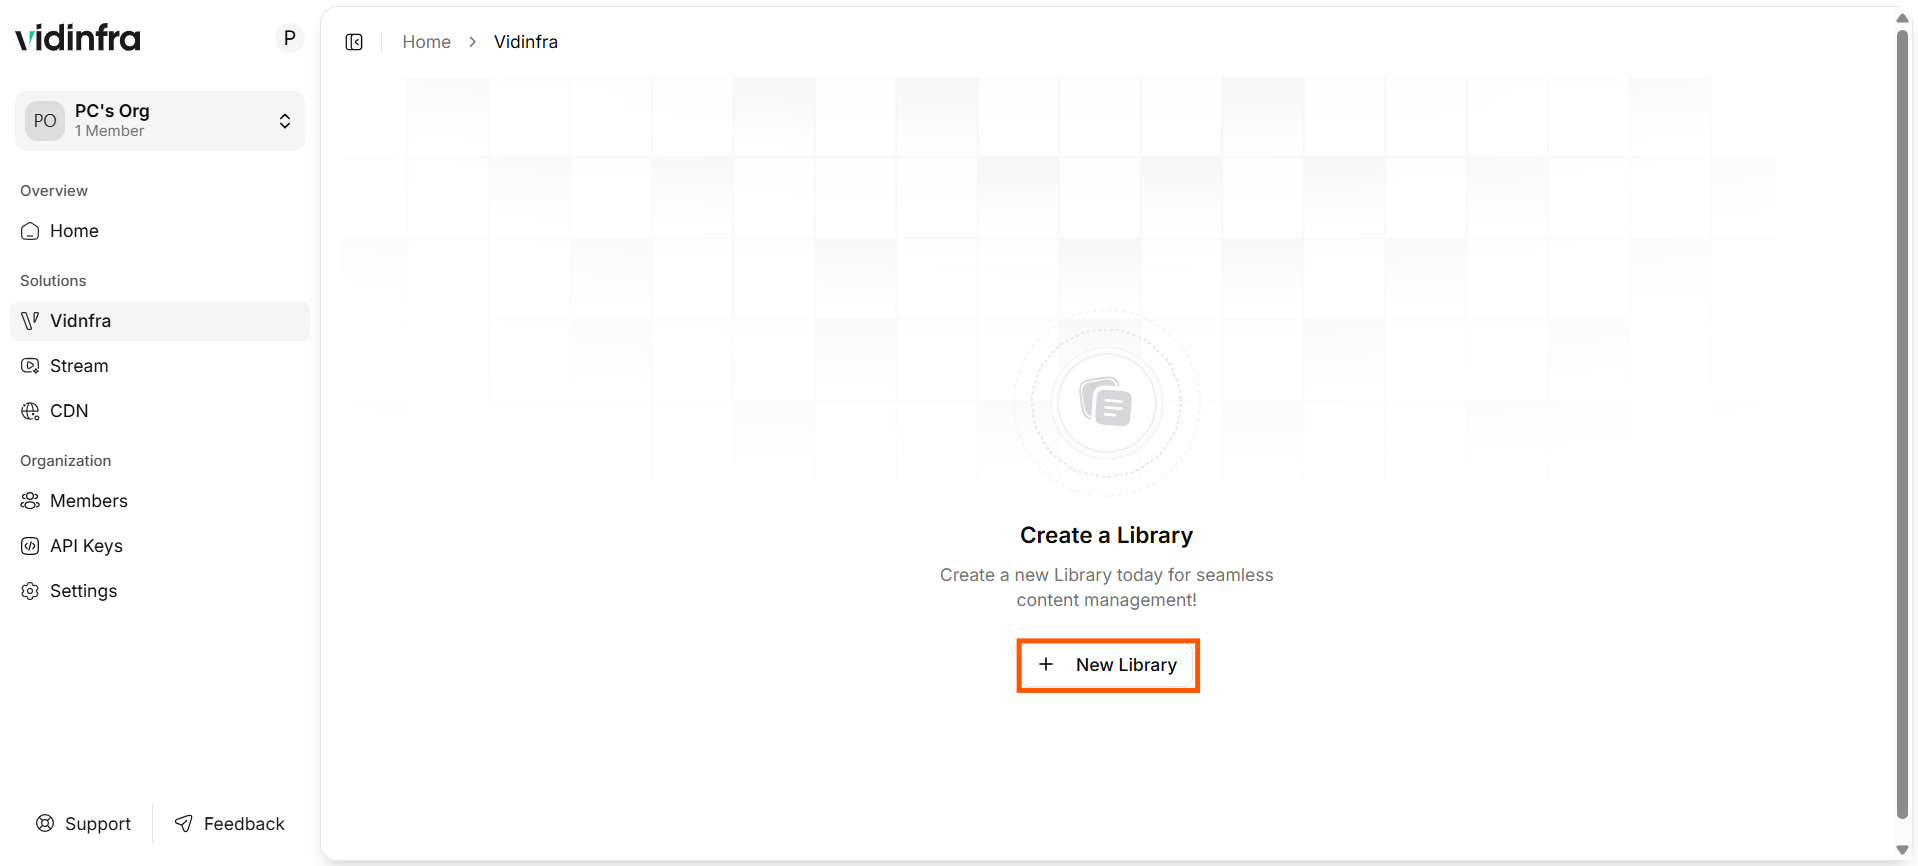
* Click on **New Library** to start building your content library for video storage and management.
* From the left sidebar, select **Vidinfra** to open the Vidinfra workspace.
* Click on **New Library** to start building your content library for video storage and management.
 * Fill in the required fields with your information, including the **library name**, **region**, and **purpose of the library**, then click **Create Library** to continue.
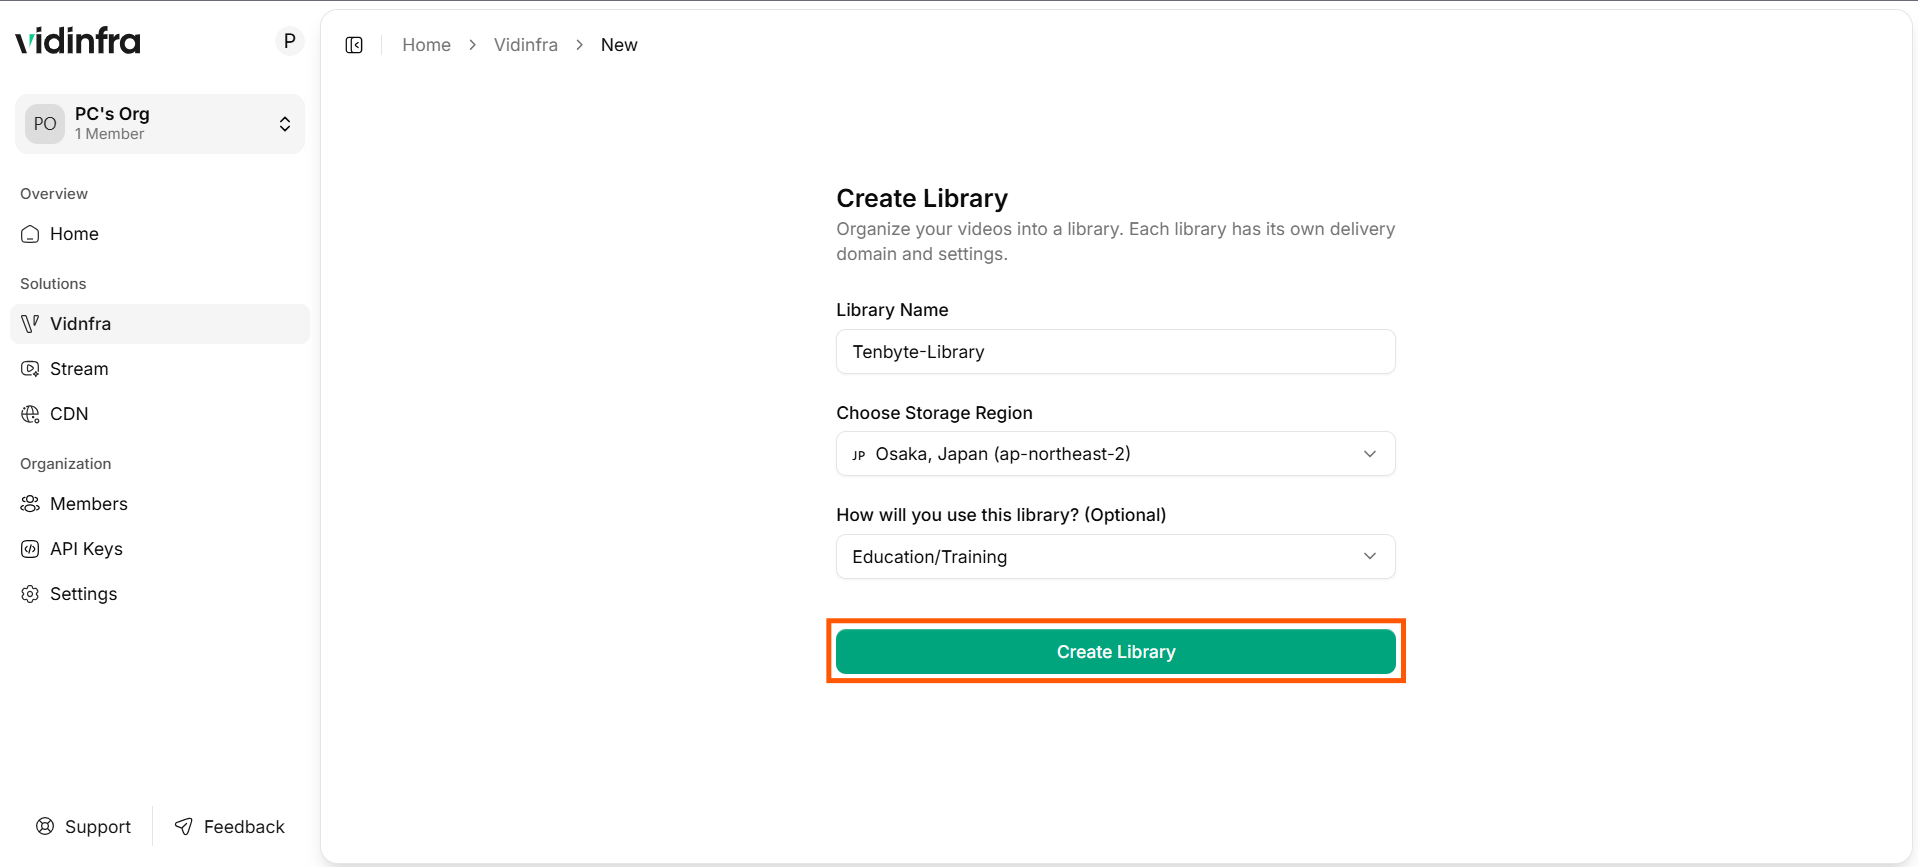 Choose your preferred region to ensure the best performance and streaming quality.
* Once the library is created successfully, your workspace will display the video dashboard.
Choose your preferred region to ensure the best performance and streaming quality.
* Once the library is created successfully, your workspace will display the video dashboard.
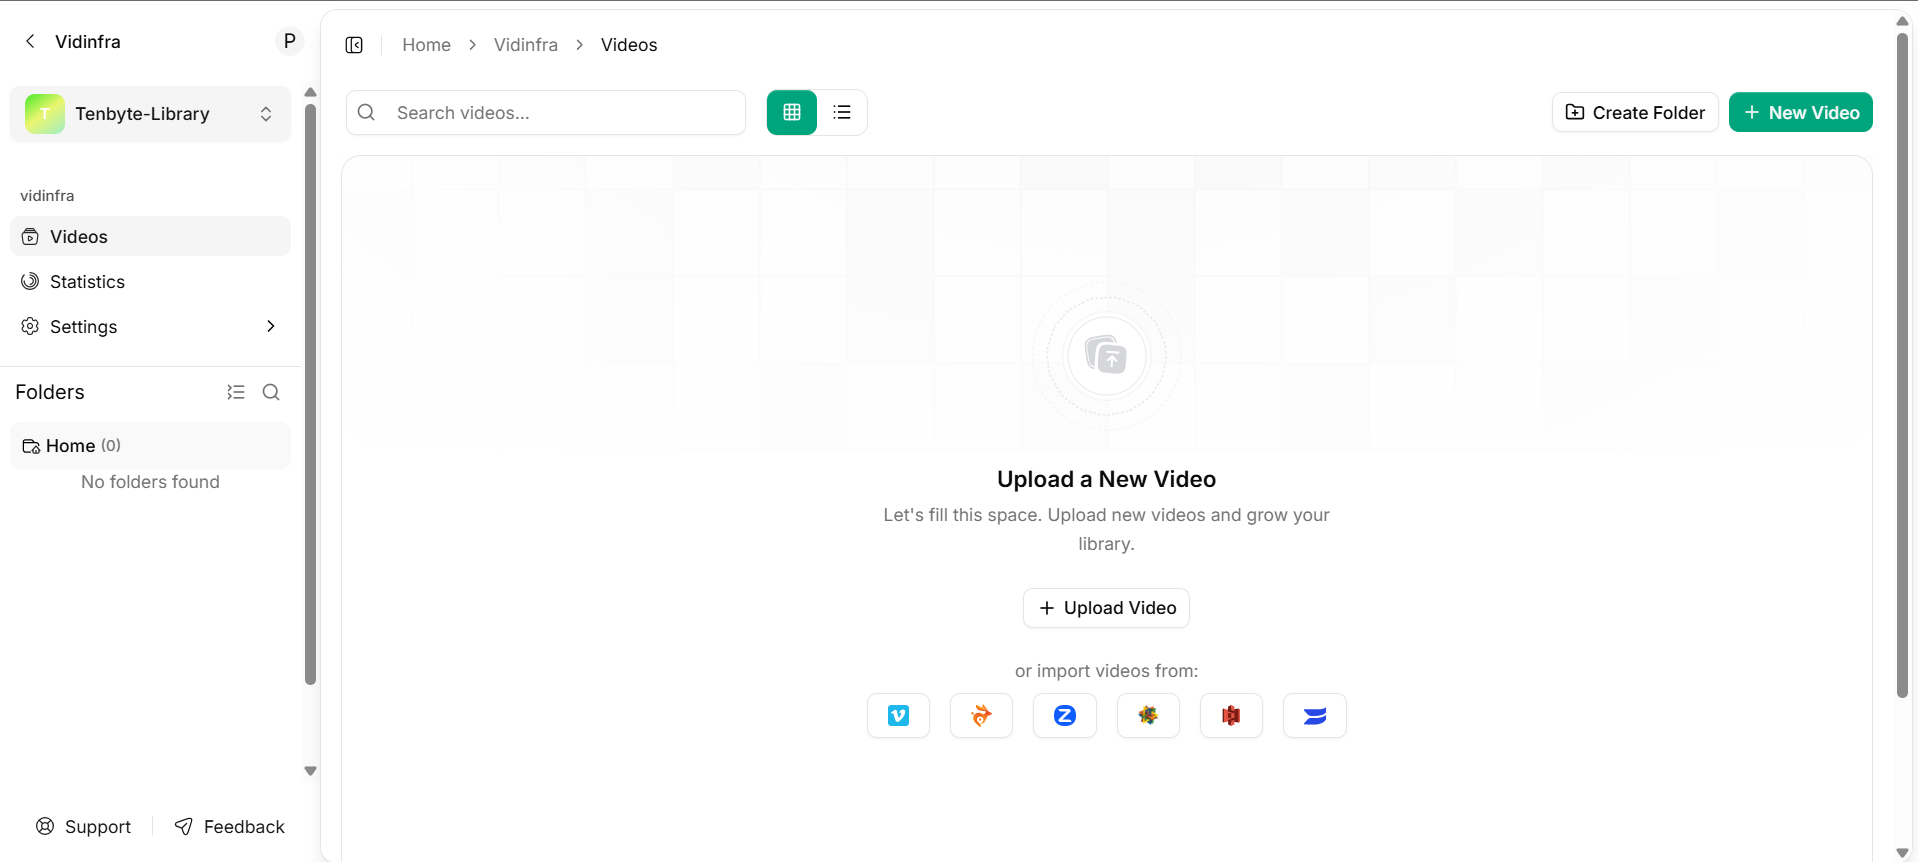 From here, you can **upload** or **import** videos to start building your content library.
***
## Upload your Video
* To upload a video, click the **Upload Video** button from your library dashboard. This will allow you to select a video file from your local device.
From here, you can **upload** or **import** videos to start building your content library.
***
## Upload your Video
* To upload a video, click the **Upload Video** button from your library dashboard. This will allow you to select a video file from your local device.
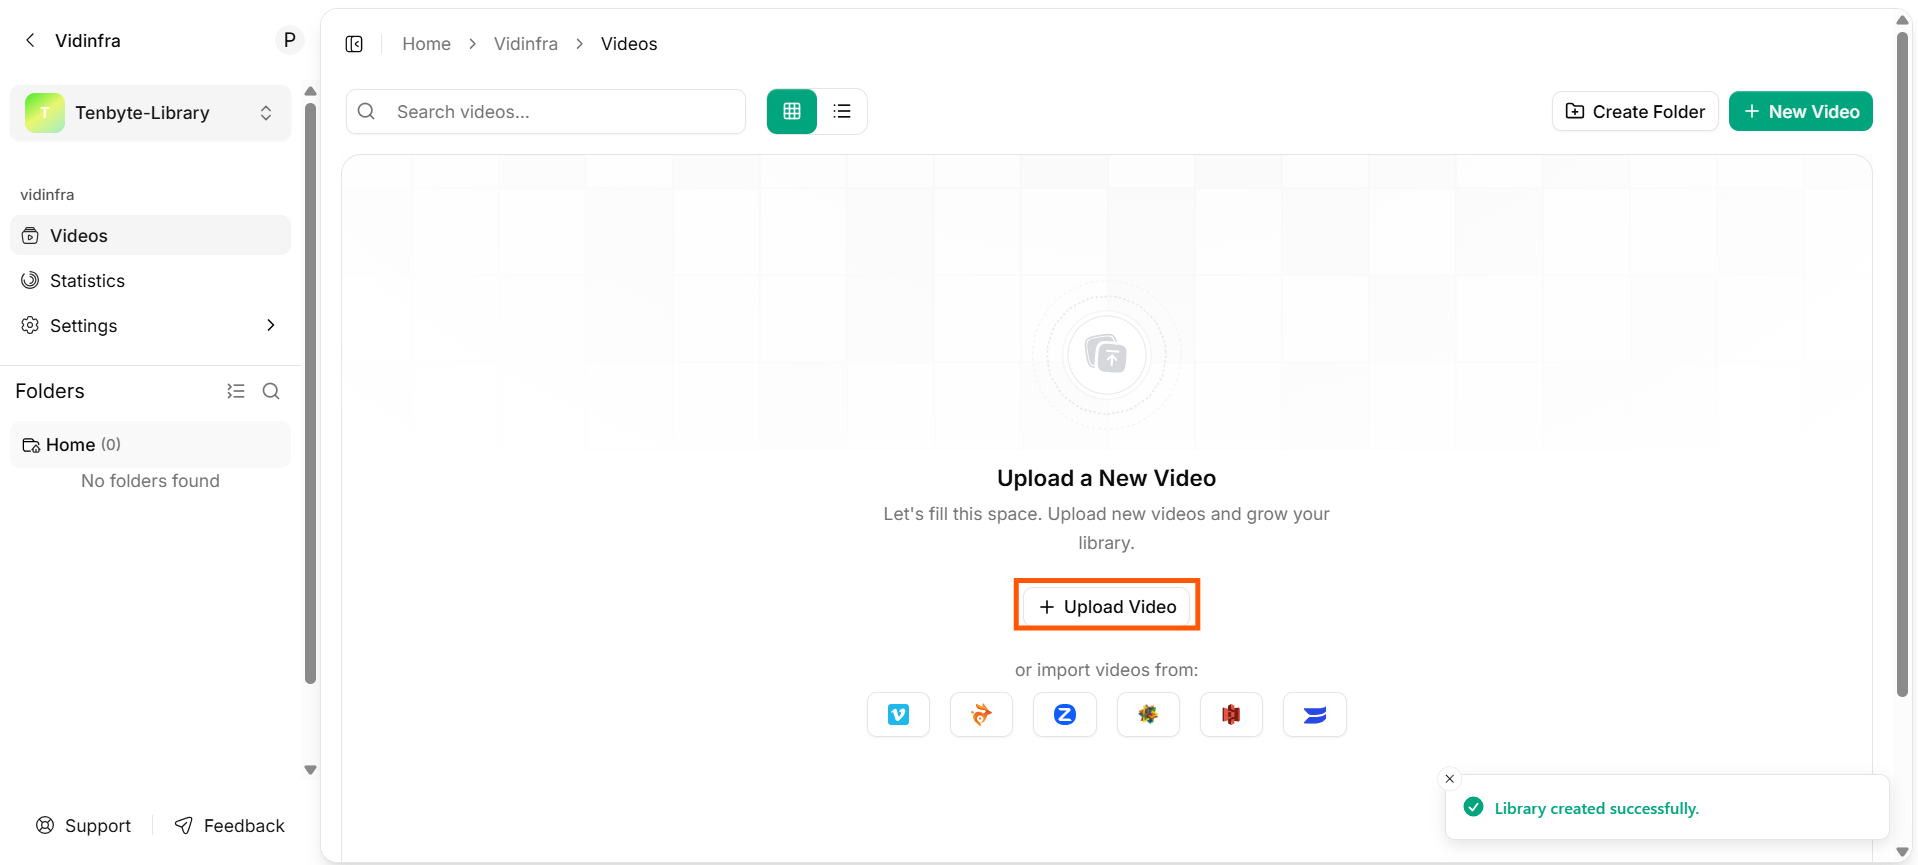 * Alternatively, if your videos are hosted on supported platforms, you can directly import them into Vidinfra by selecting your preferred service.
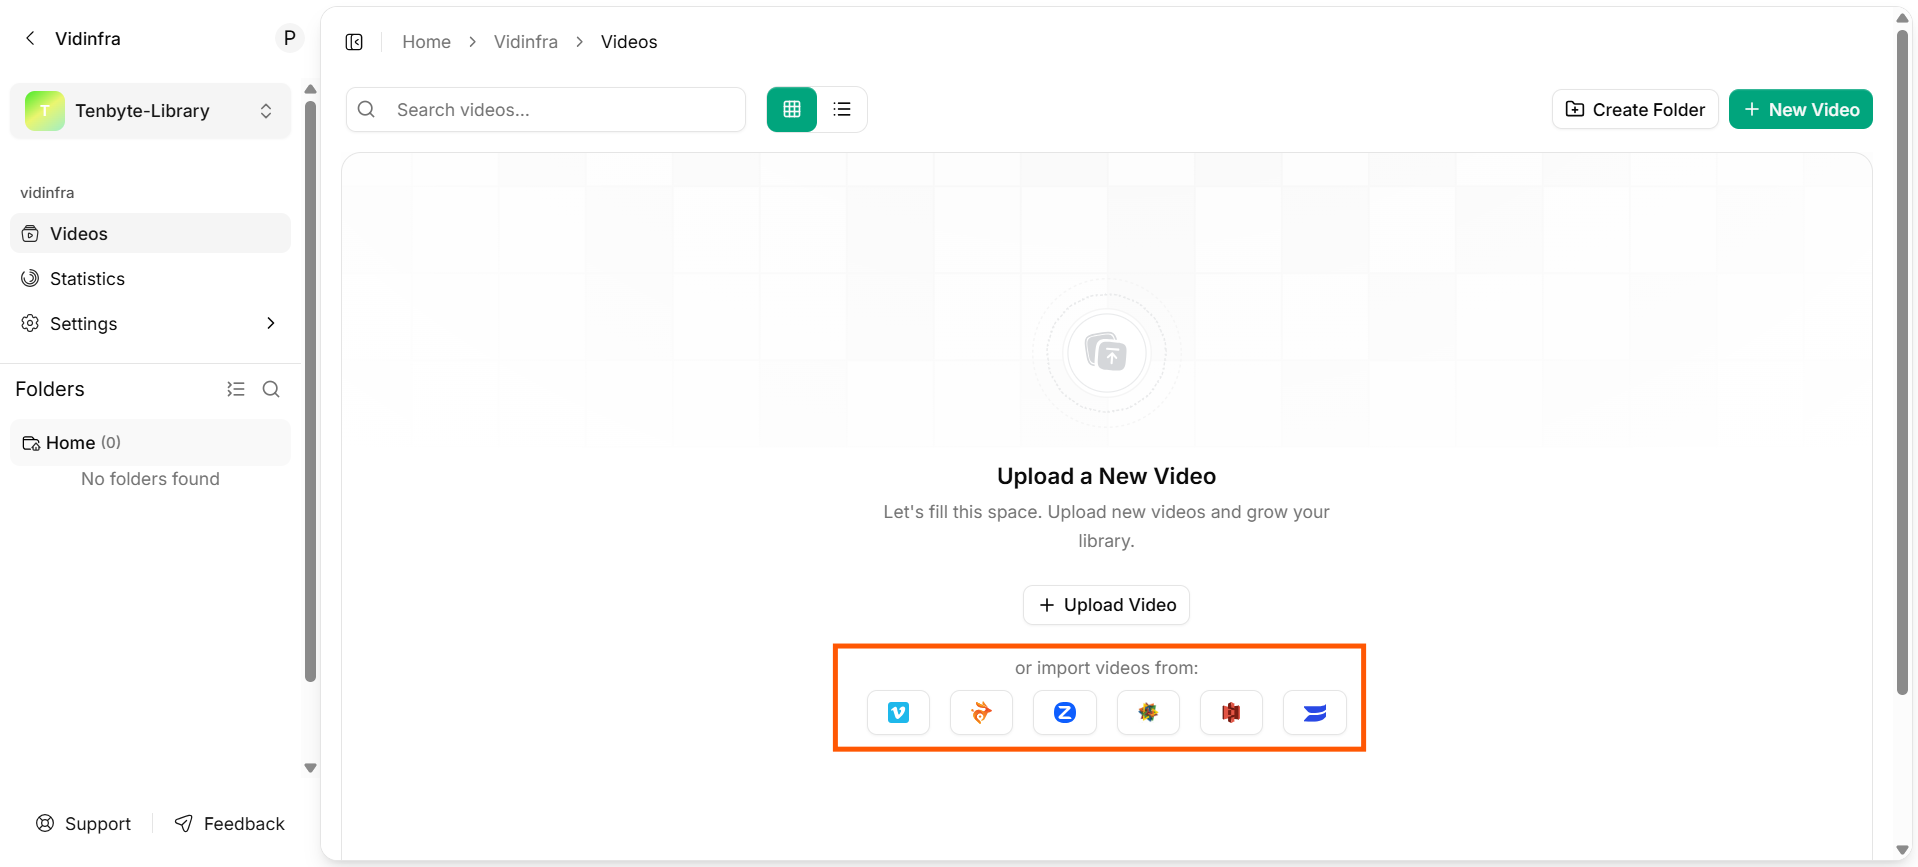 To review the full video submission requirements for Vidinfra, see the [Upload Video Page](/docs/vidinfra/manage-videos/upload-videos#vidinfra-video-submission-requirements) in the Managed Videos section.
***
## Stream your Video
* Once your video is uploaded, Vidinfra automatically begins processing it. This includes:
* Optimizing the video for playback efficiency.
* Transcoding the video into multiple renditions and adaptive bitrates for different network speeds and devices.
* Converting the video into `HLS` (HTTP Live Streaming) and `DASH` (Dynamic Adaptive Streaming over HTTP) formats for smooth, adaptive playback.
To review the full video submission requirements for Vidinfra, see the [Upload Video Page](/docs/vidinfra/manage-videos/upload-videos#vidinfra-video-submission-requirements) in the Managed Videos section.
***
## Stream your Video
* Once your video is uploaded, Vidinfra automatically begins processing it. This includes:
* Optimizing the video for playback efficiency.
* Transcoding the video into multiple renditions and adaptive bitrates for different network speeds and devices.
* Converting the video into `HLS` (HTTP Live Streaming) and `DASH` (Dynamic Adaptive Streaming over HTTP) formats for smooth, adaptive playback.
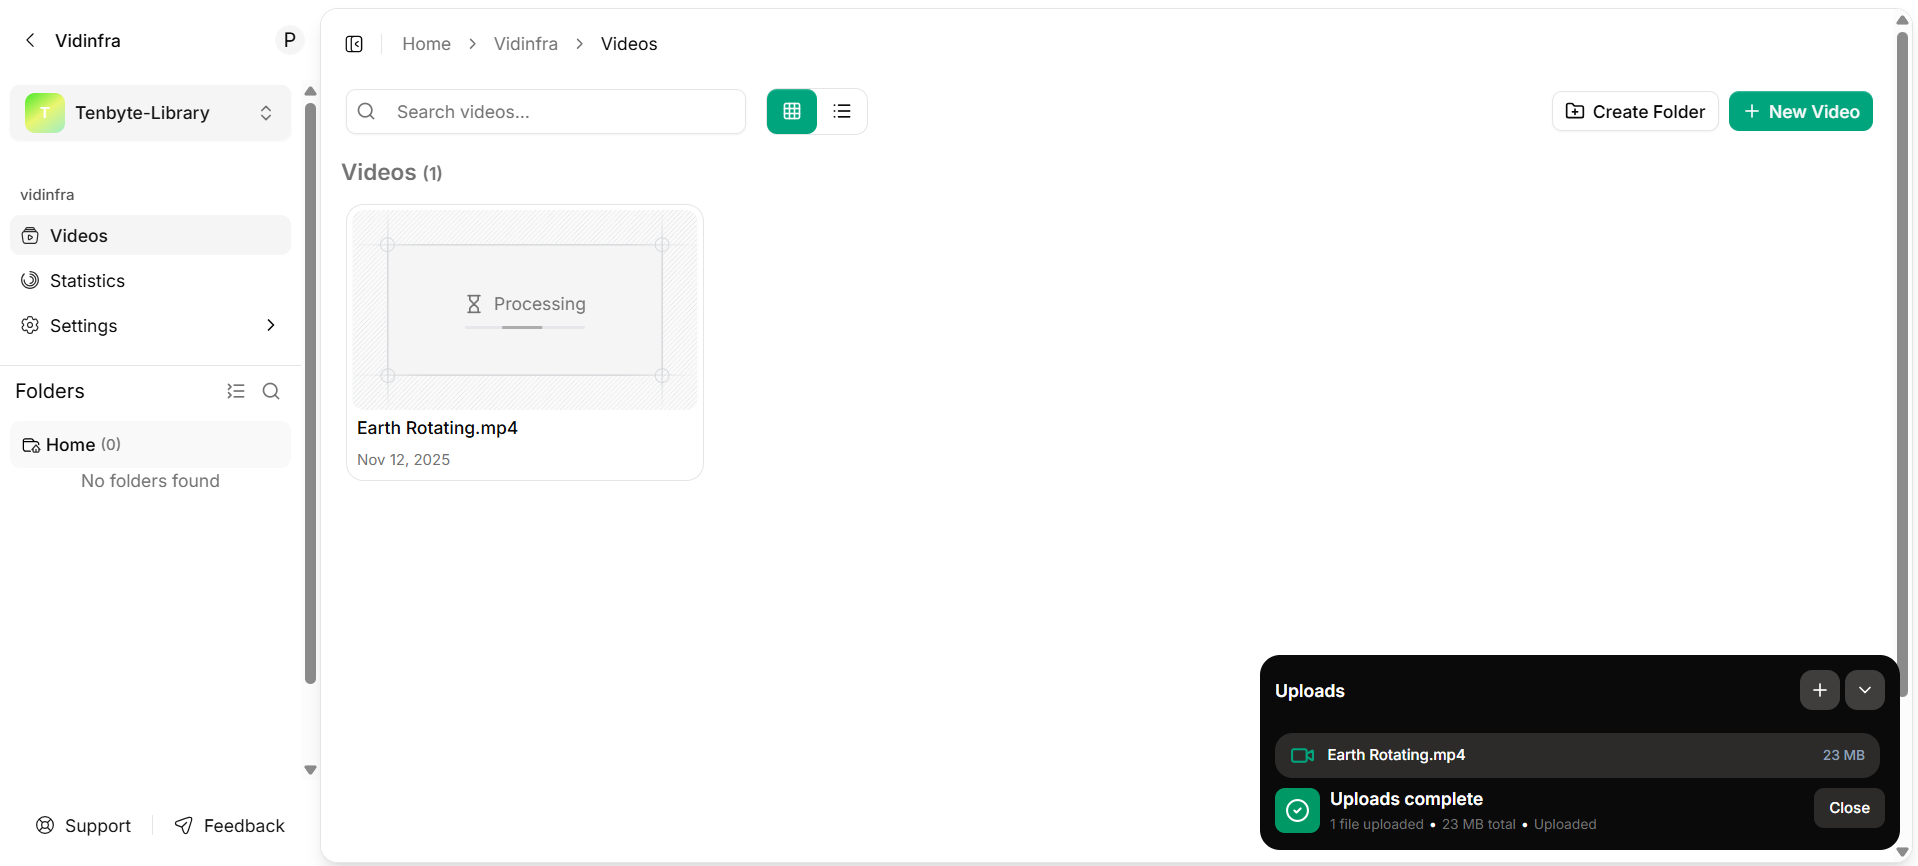 > ✅ Supported formats: `.mp4`, `.mov`, `.mkv`, `.webm`, `.avi`, `.flv`
* After processing, your video is ready to be streamed. You can now:
* Embed it on your website.
* Share the playback link with your audience.
* Stream it across multiple platforms for global delivery.
***
## Copy your video ID
* Go to your Videos section where all your uploaded videos are listed.
* Click the **three dots** or the **Actions** button next to the video you want to copy the ID for.
* From the dropdown menu, select **Copy Video ID**. The video ID will be copied to your clipboard.
> ✅ Supported formats: `.mp4`, `.mov`, `.mkv`, `.webm`, `.avi`, `.flv`
* After processing, your video is ready to be streamed. You can now:
* Embed it on your website.
* Share the playback link with your audience.
* Stream it across multiple platforms for global delivery.
***
## Copy your video ID
* Go to your Videos section where all your uploaded videos are listed.
* Click the **three dots** or the **Actions** button next to the video you want to copy the ID for.
* From the dropdown menu, select **Copy Video ID**. The video ID will be copied to your clipboard.
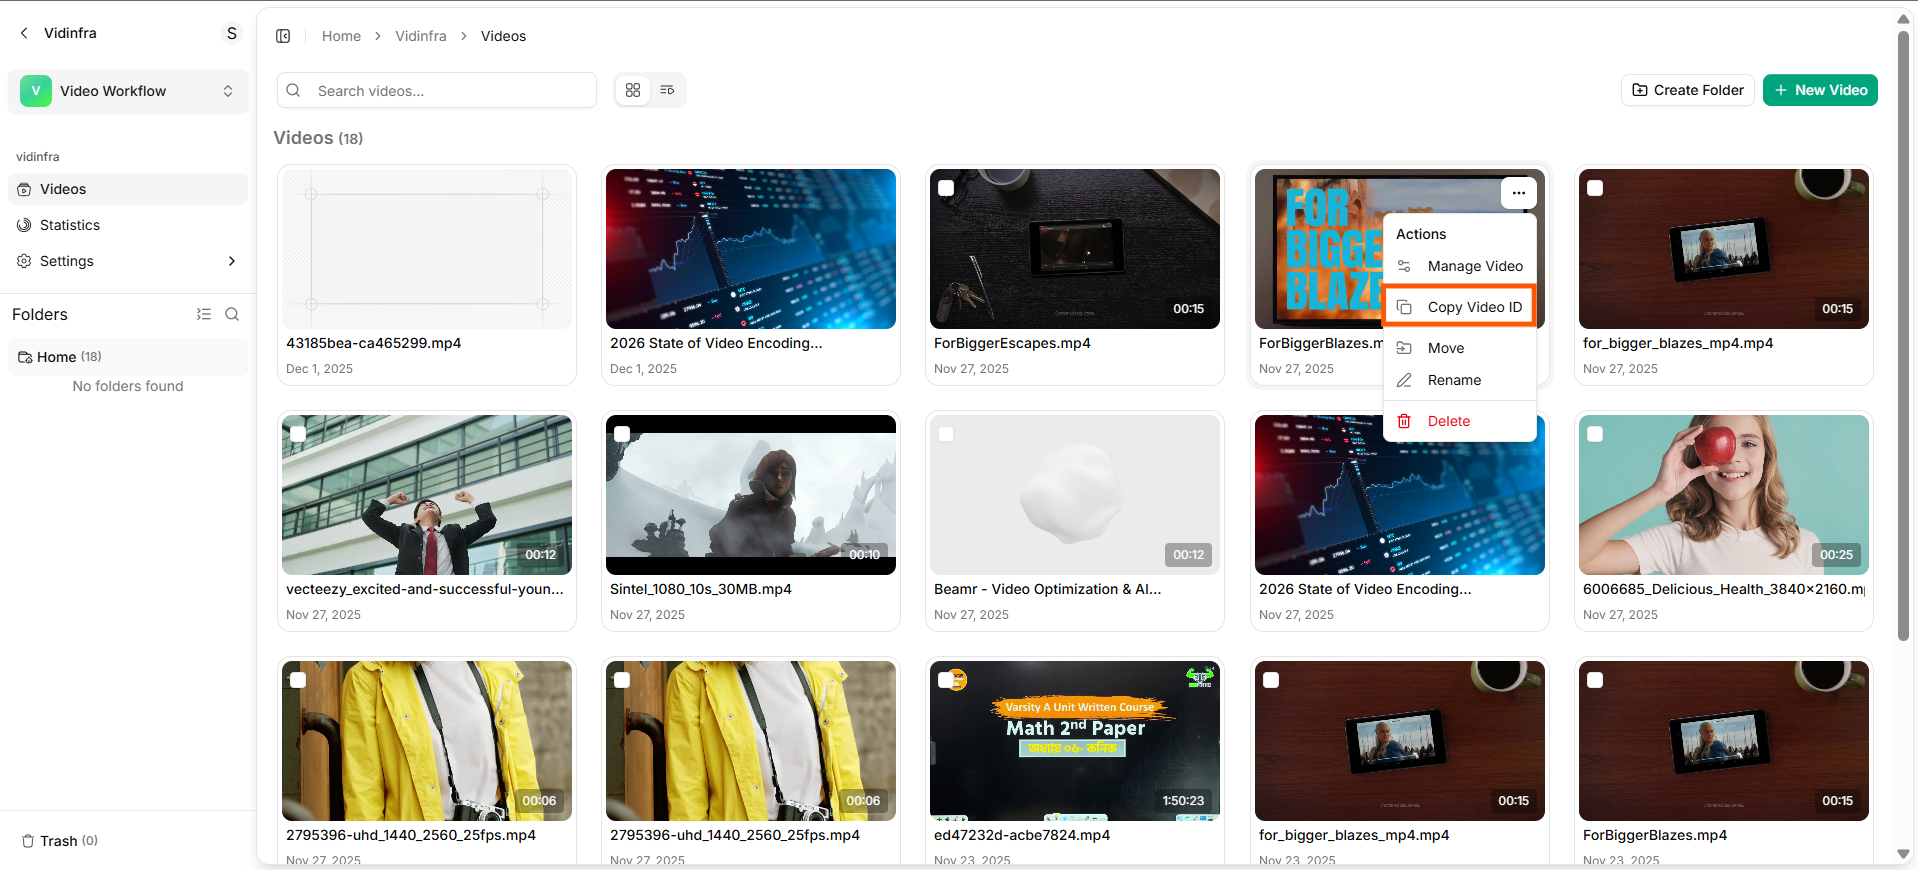 * Now that the video ID is copied, you can paste it wherever needed, like in URLs, APIs, or for linking purposes.