> ## Documentation Index
> Fetch the complete documentation index at: https://docs.tenbyte.io/llms.txt
> Use this file to discover all available pages before exploring further.
# Tenbyte Cloud Block Storage
Block Storage in Tenbyte Cloud lets you attach high performance disks to your virtual machines. You can create new disks, expand existing ones, and manage storage based on your application’s needs.
## Select Compute Section
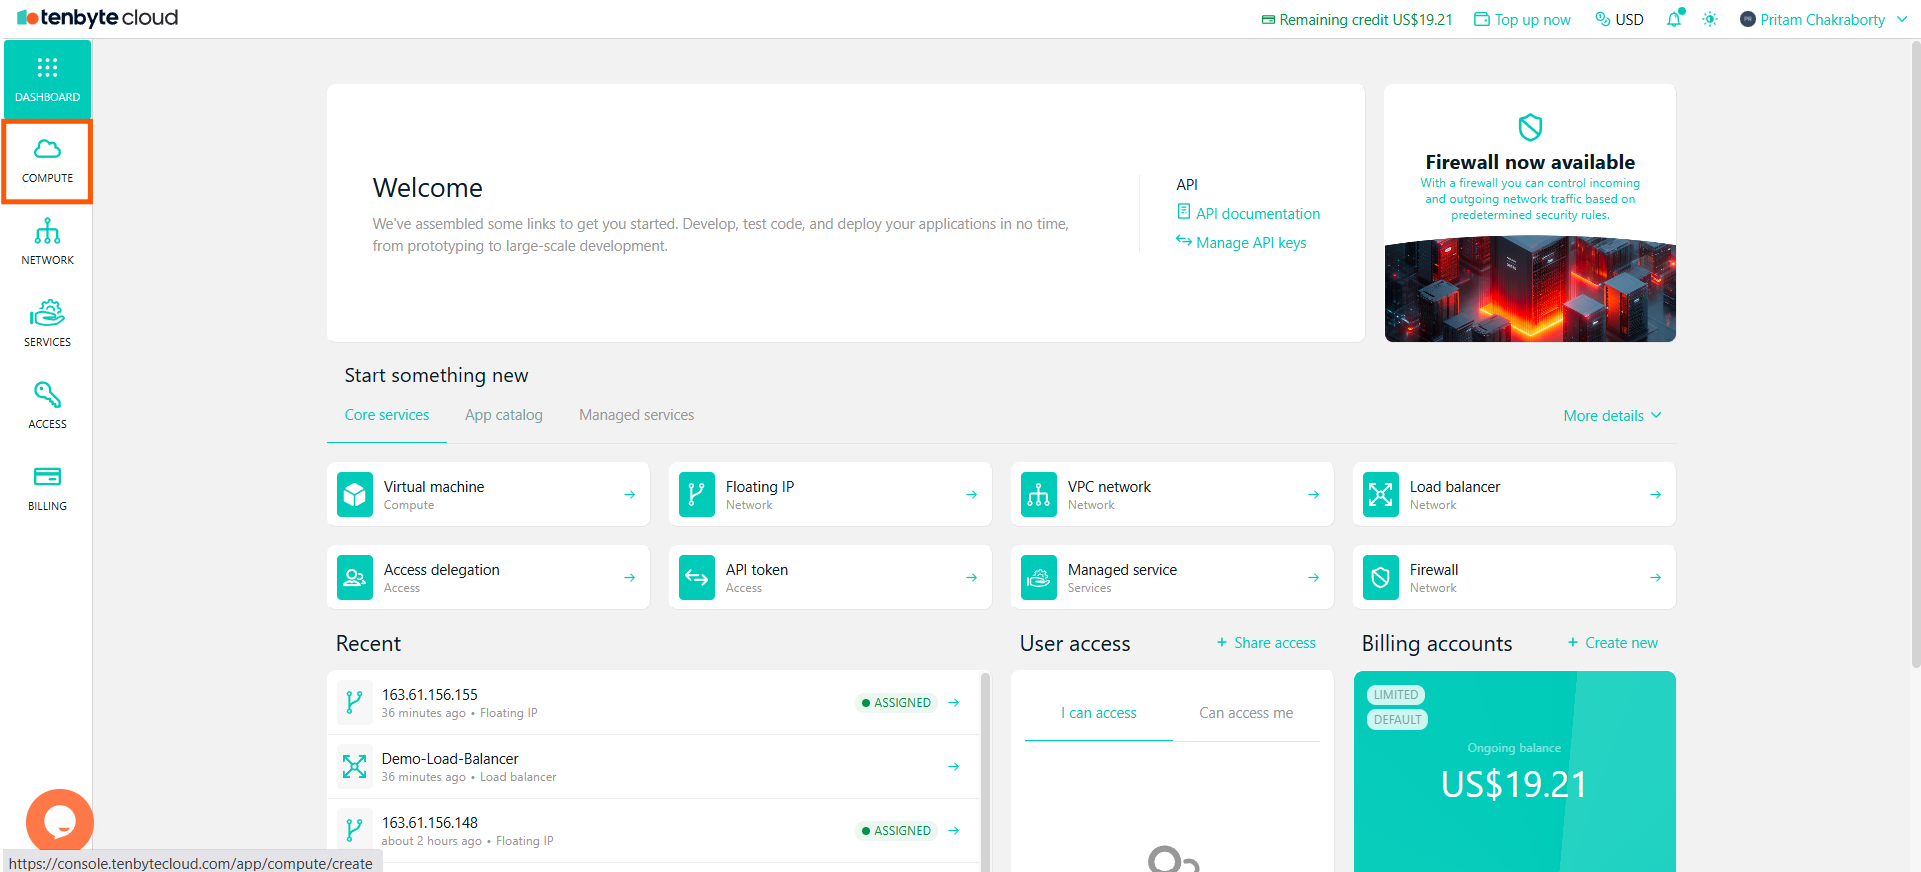
* Start by opening the Compute section from the left sidebar. This page lists all the virtual machines you have created.
 ***
## Choose Your Virtual Machine
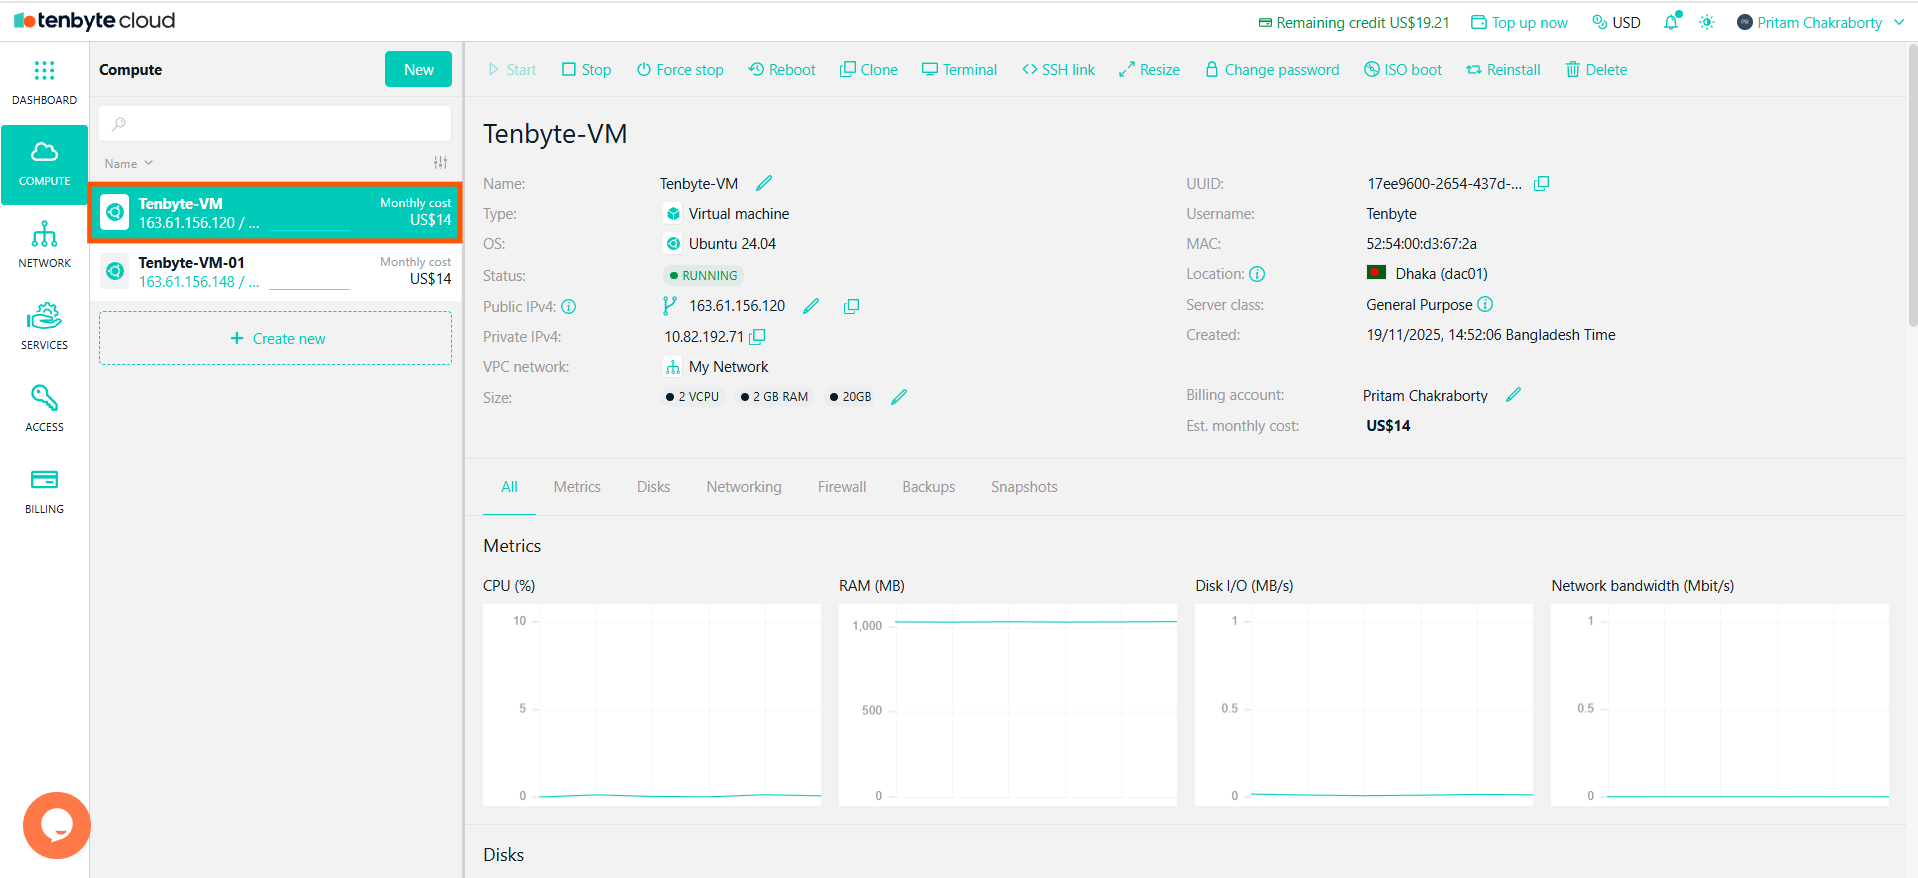
* In the Compute section, locate the VM you want to manage.
***
## Choose Your Virtual Machine
* In the Compute section, locate the VM you want to manage.
 ***
## Navigate to the Disks Tab
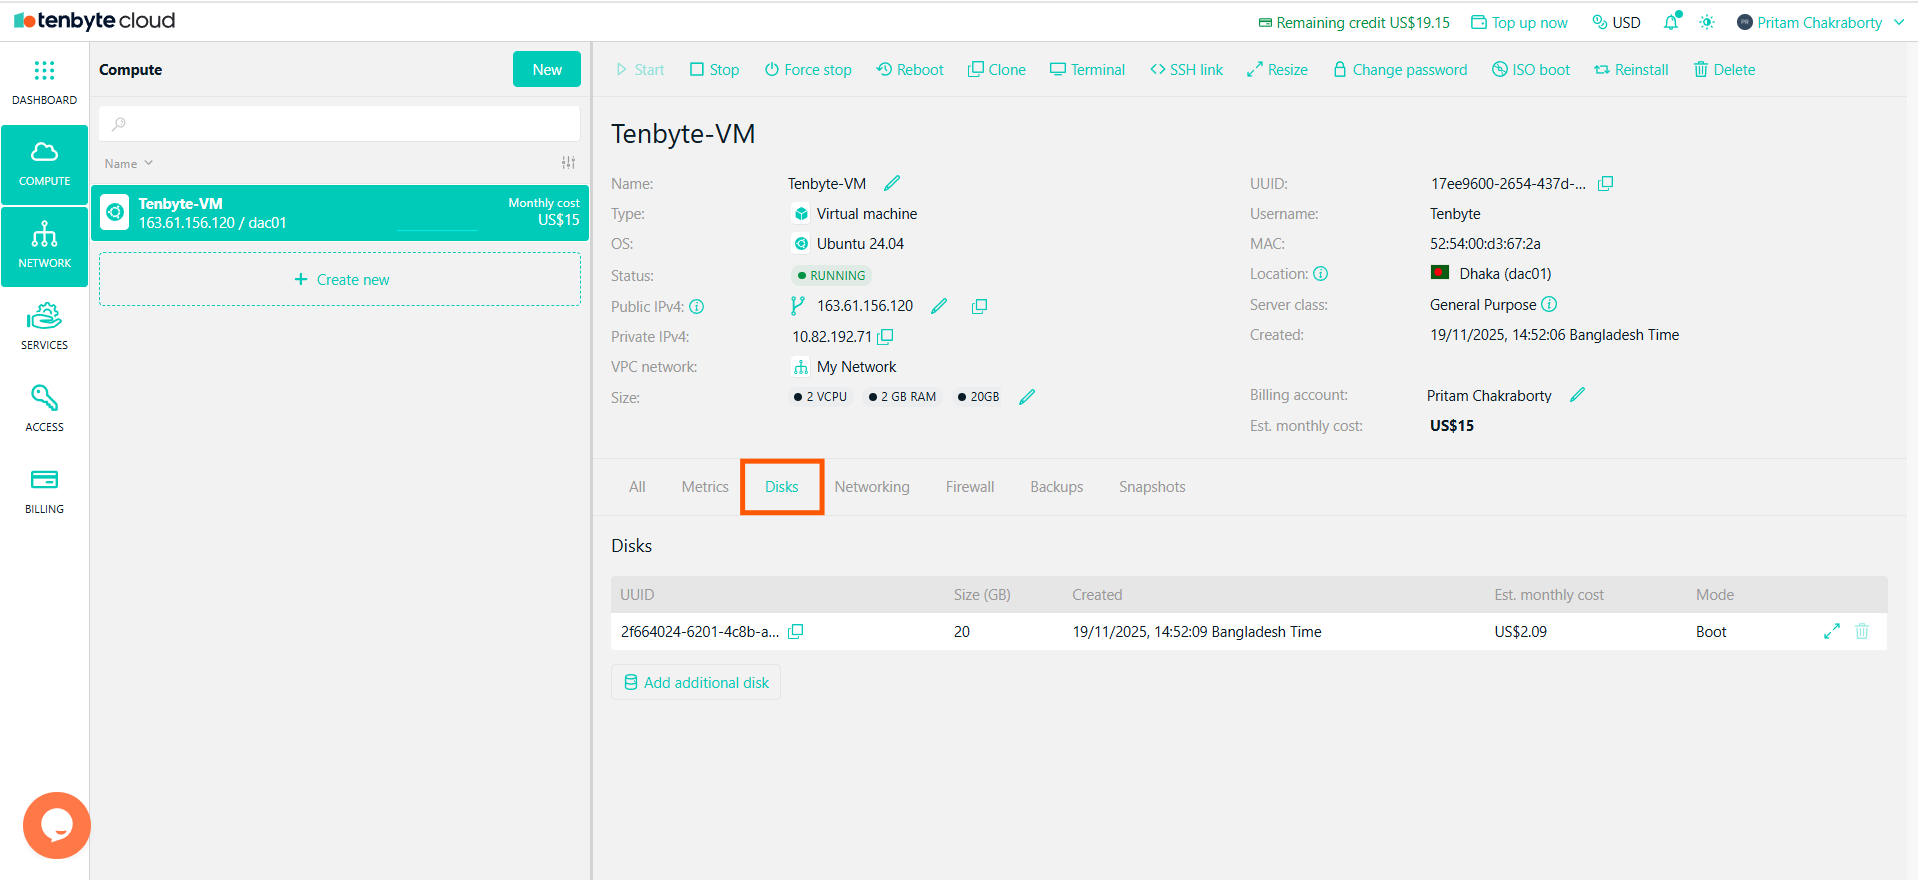
* Once you open the selected VM, you’ll see several tabs with different configuration options.
* Click on the **Disks** tab to manage storage settings for the selected VM.
***
## Navigate to the Disks Tab
* Once you open the selected VM, you’ll see several tabs with different configuration options.
* Click on the **Disks** tab to manage storage settings for the selected VM.
 ***
## View Existing Disks
* The Disks tab displays all disks currently attached to the VM.
***
## View Existing Disks
* The Disks tab displays all disks currently attached to the VM.
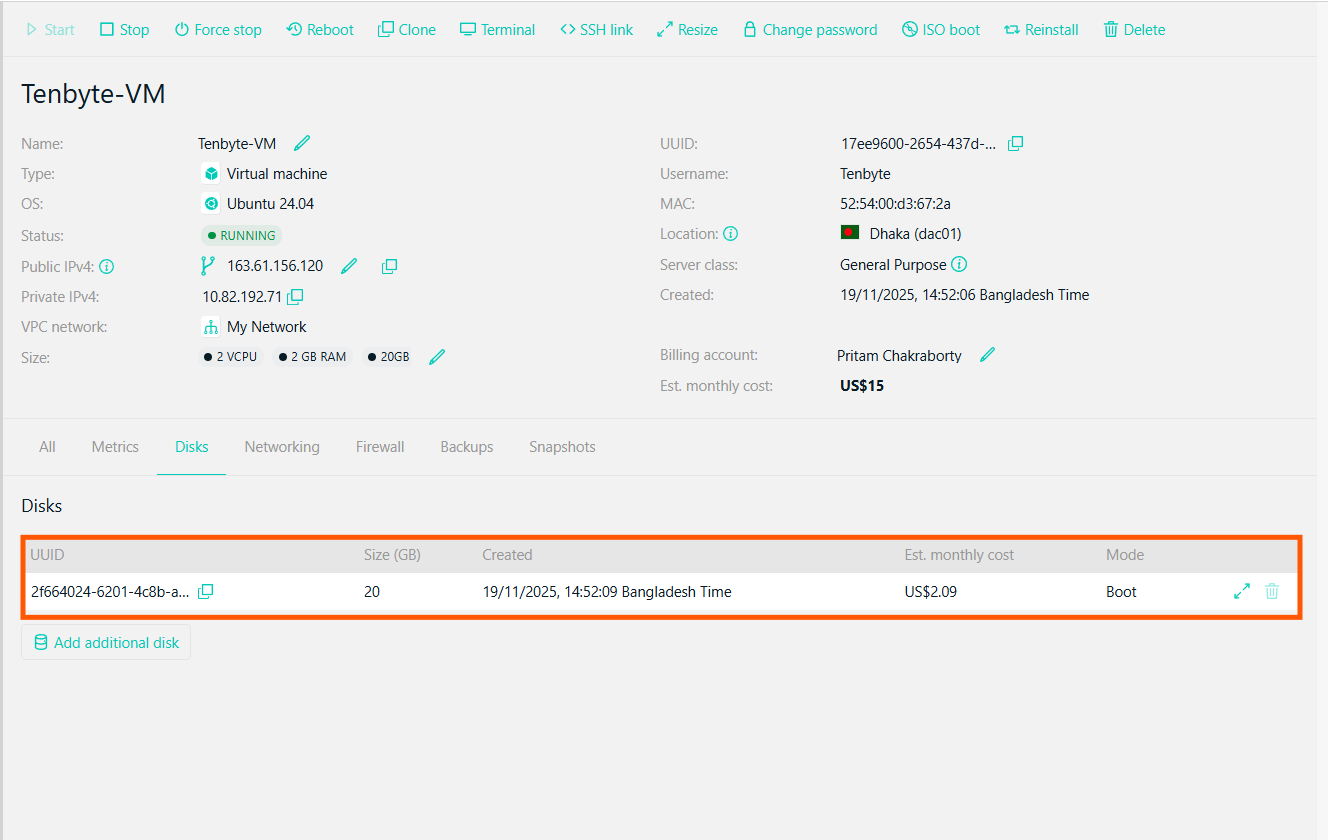 * You may see the Boot Disk with details such as:
* **UUID**: The unique identifier for the disk.
* **Size**: The disk size.
* **Created**: The creation timestamp.
* **Est. Monthly Cost**: The cost for the disk storage.
* This view helps you understand your storage layout before making changes.
***
## Add Additional Disk
* To add a new disk, click on **Add additional disk**. You can choose the disk size based on your requirements and attach it to the VM.
* Click on the **Add** to add additional disk.
* You may see the Boot Disk with details such as:
* **UUID**: The unique identifier for the disk.
* **Size**: The disk size.
* **Created**: The creation timestamp.
* **Est. Monthly Cost**: The cost for the disk storage.
* This view helps you understand your storage layout before making changes.
***
## Add Additional Disk
* To add a new disk, click on **Add additional disk**. You can choose the disk size based on your requirements and attach it to the VM.
* Click on the **Add** to add additional disk.
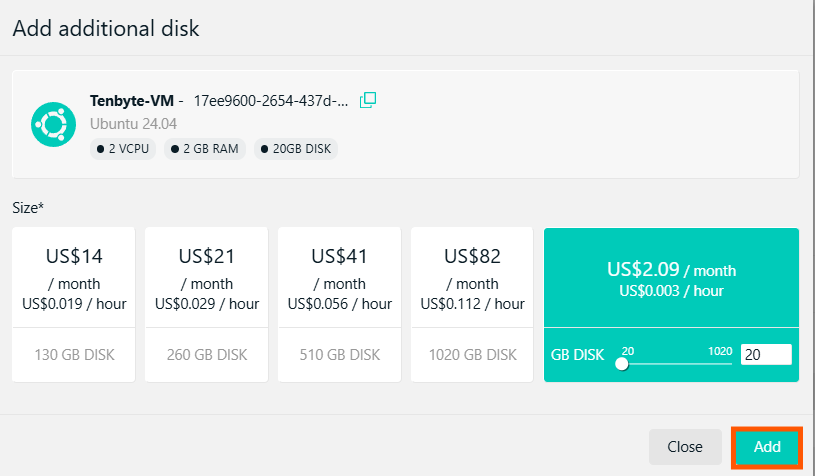 * After creation, the disk will appear in your disk list and can be formatted or mounted inside the VM.
***
## Manage Disks
* Tenbyte Cloud allows you to adjust disk size or remove additional disks based on your needs.
* Next to the disk you want to resize, click on the **Resize** button.
* After creation, the disk will appear in your disk list and can be formatted or mounted inside the VM.
***
## Manage Disks
* Tenbyte Cloud allows you to adjust disk size or remove additional disks based on your needs.
* Next to the disk you want to resize, click on the **Resize** button.
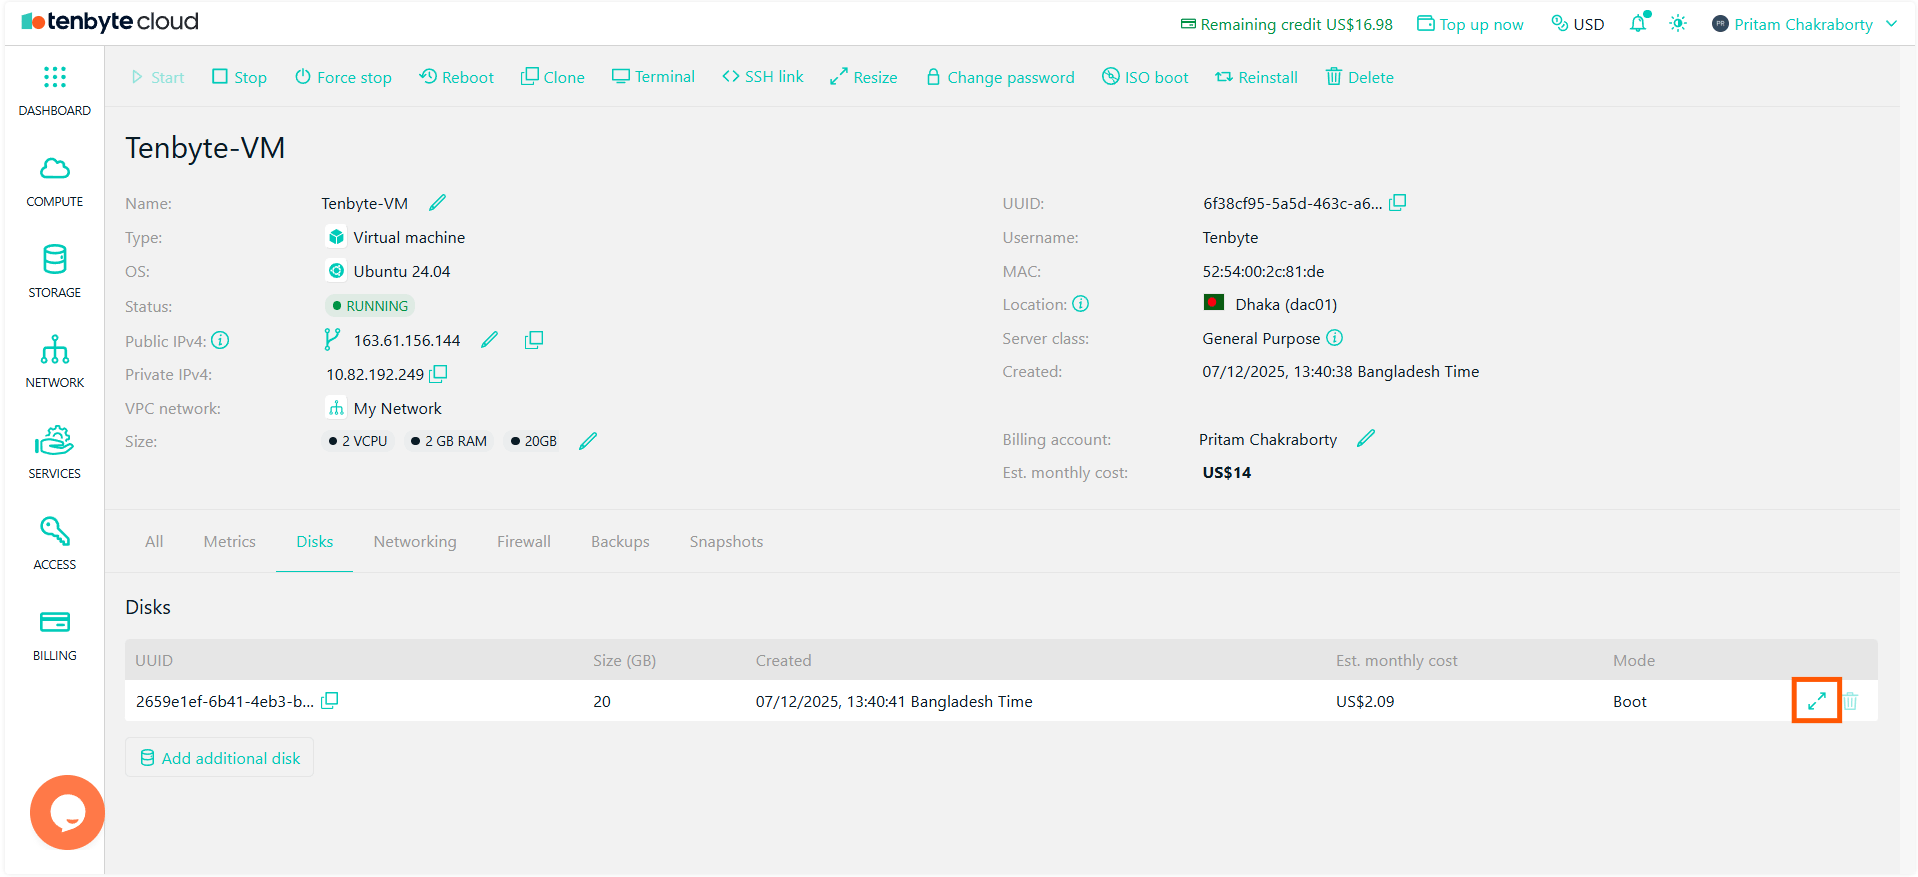 * Adjust the disk size according to your needs by modifying the disk size.
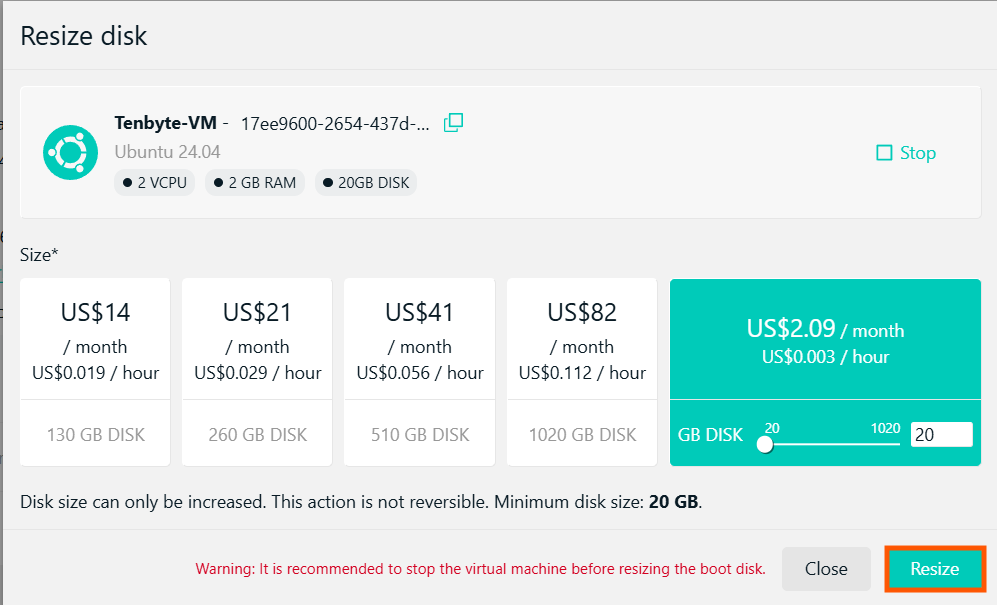 * After setting the desired size, click **Resize** to apply the changes.
It is highly recommended to stop the virtual machine before resizing the boot disk to prevent any issues with the operating system.
* After setting the desired size, click **Resize** to apply the changes.
It is highly recommended to stop the virtual machine before resizing the boot disk to prevent any issues with the operating system.