> ## Documentation Index
> Fetch the complete documentation index at: https://docs.tenbyte.io/llms.txt
> Use this file to discover all available pages before exploring further.
# Tenbyte VPC
Create and manage Virtual Private Clouds in Tenbyte Cloud to isolate resources, define network boundaries, and control traffic flow within your cloud environment.
## Select VPC Network
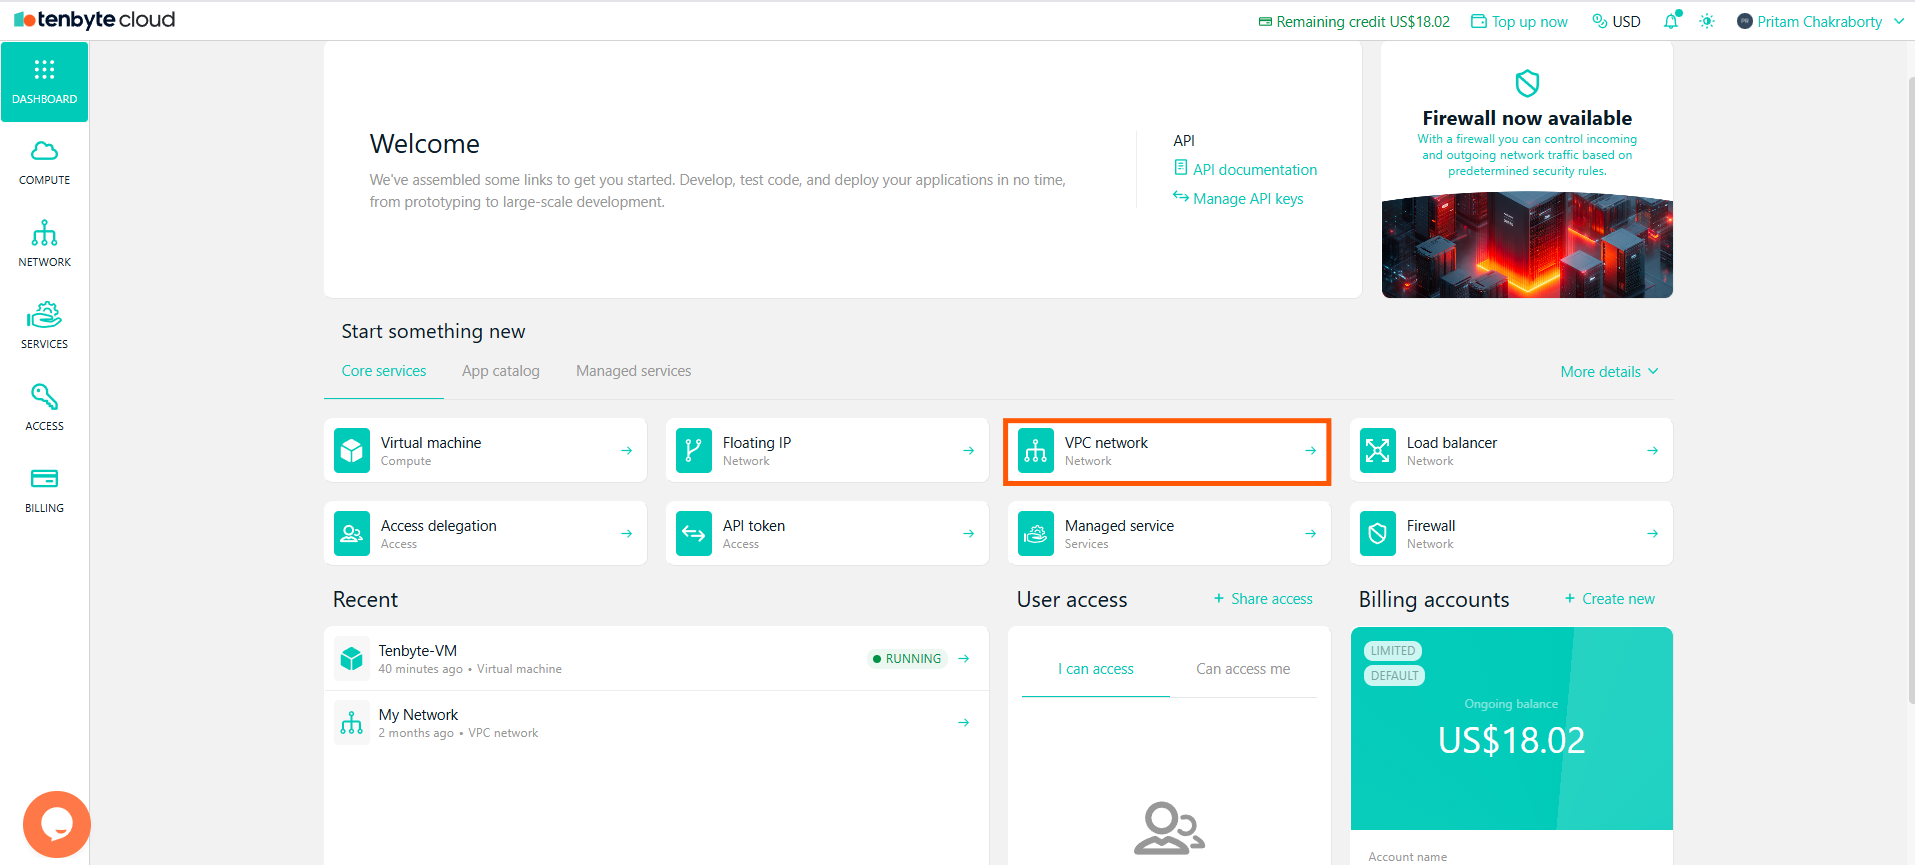
* From your dashboard, click on **VPC Network** to create your own VPC network.
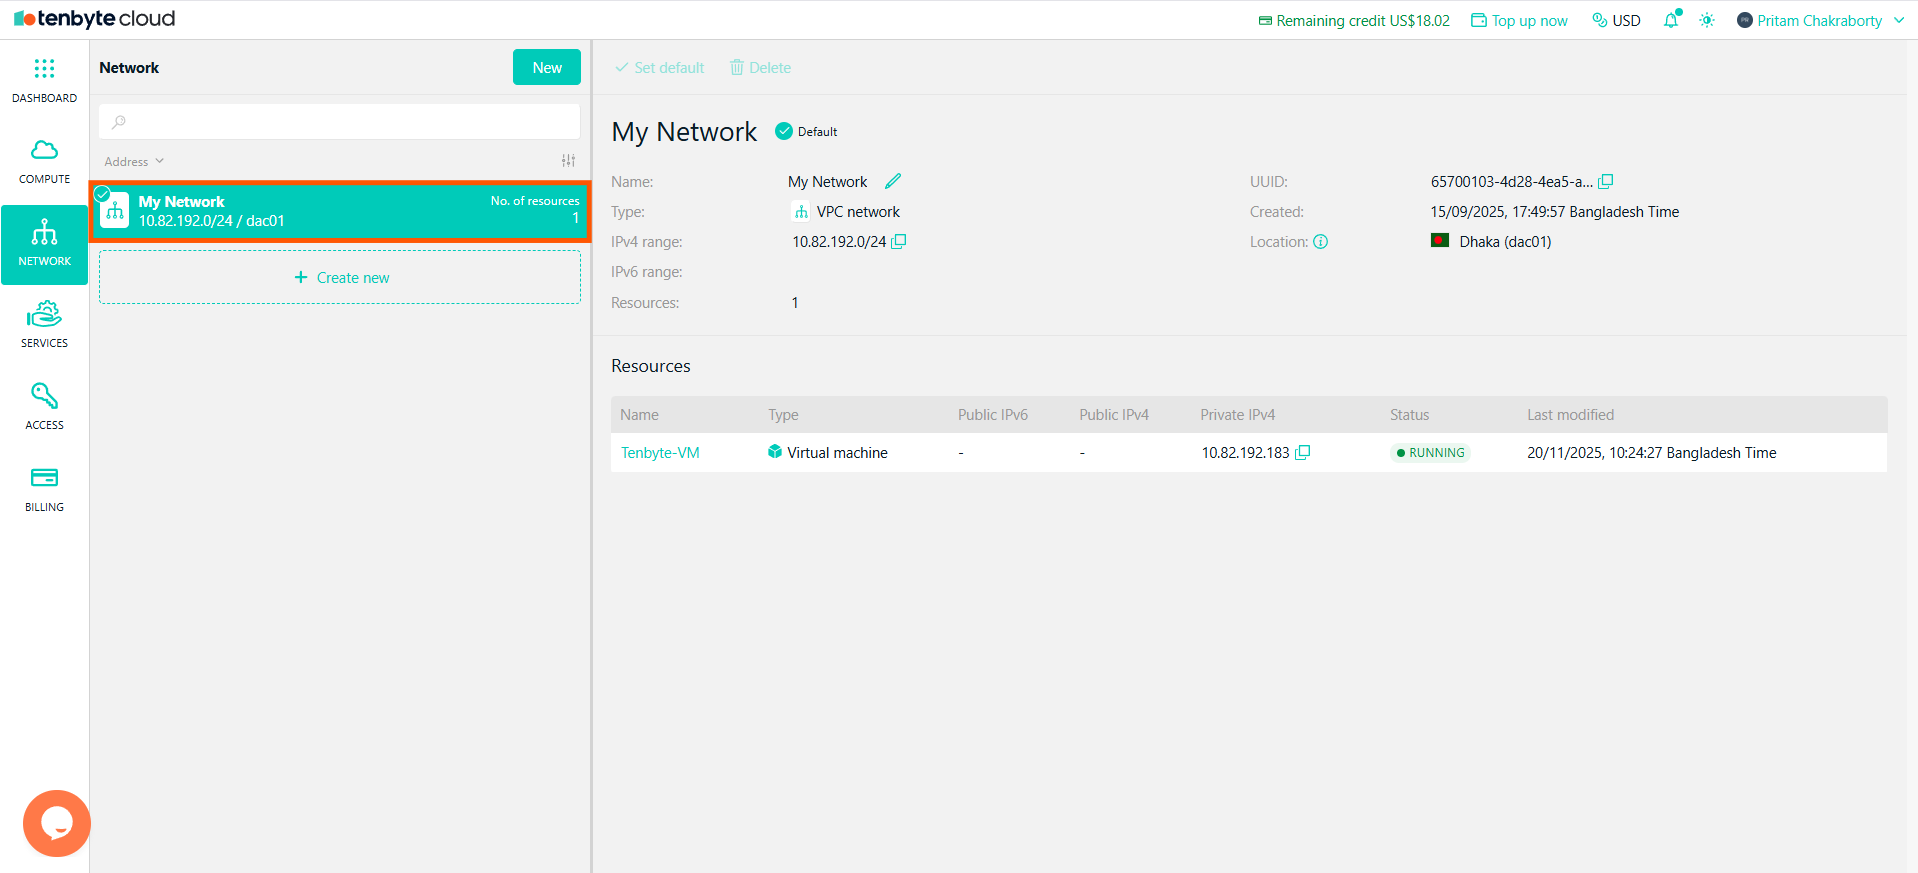
 * When you first access the Network section, the default network is named **My Network**
 ## Create a New VPC Network
* To create a new VPC network, click on **Create new** in the Network section.
## Create a New VPC Network
* To create a new VPC network, click on **Create new** in the Network section.
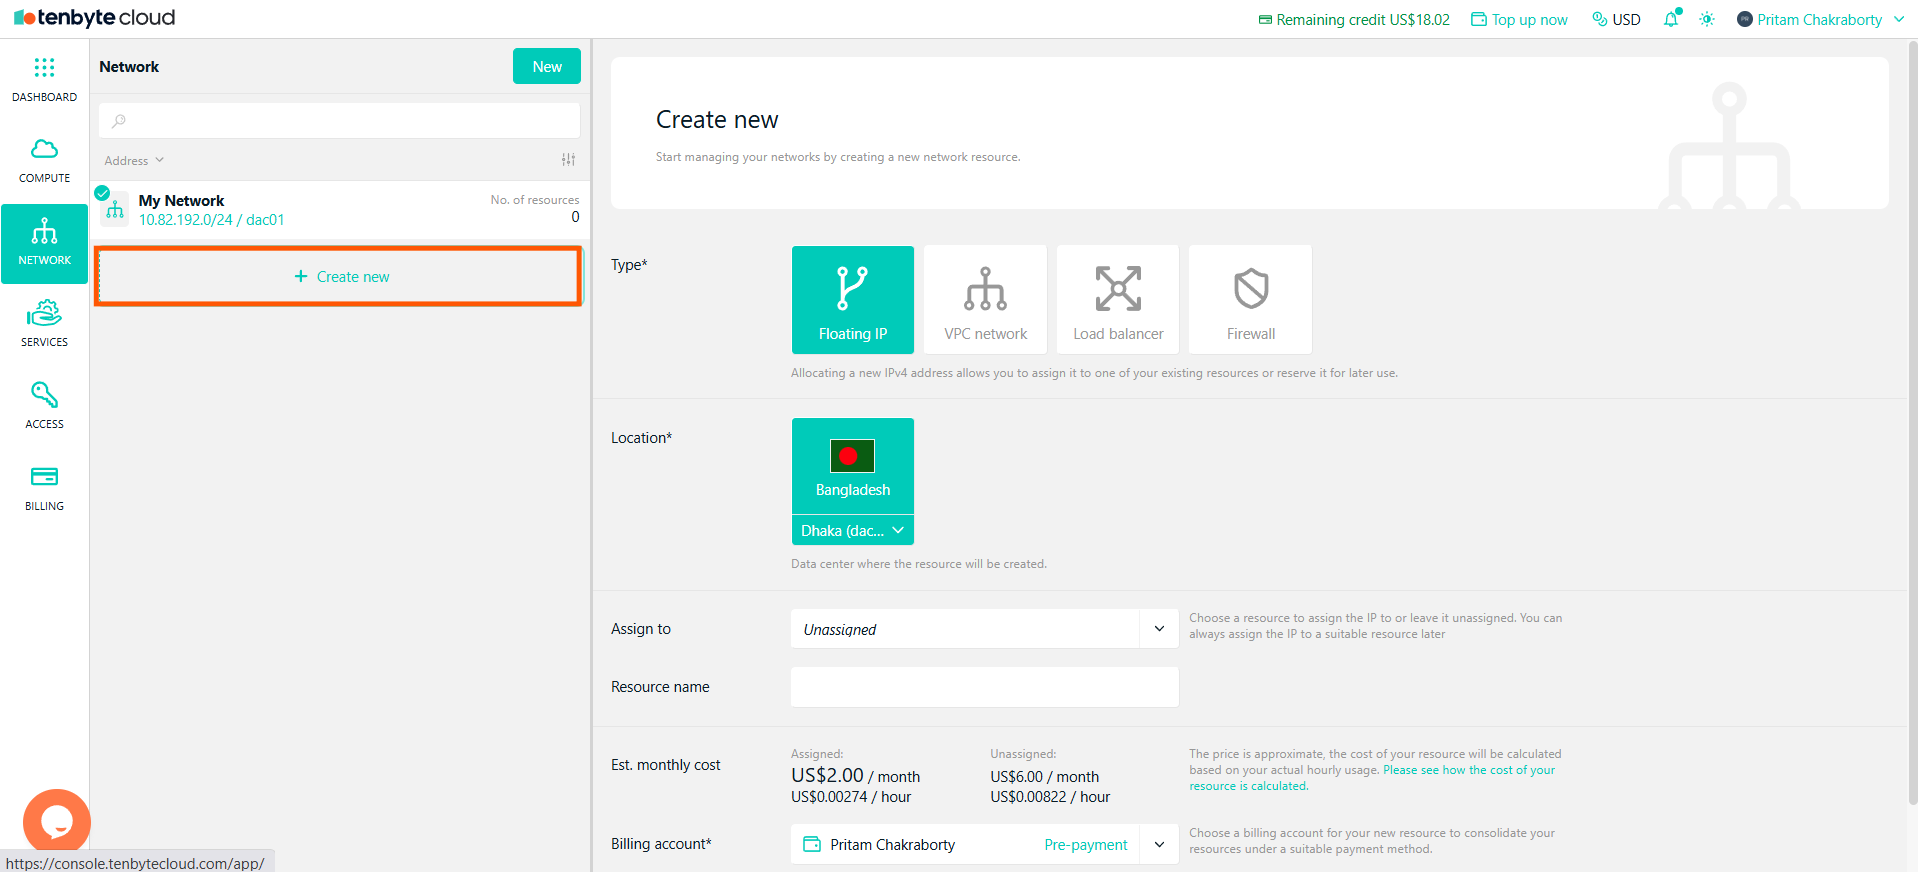 * Choose **VPC network** as the **Type**. This allows you to create a private network to group and isolate your cloud resources.
* Select the data center where the network will be created.
* Enter a name for your new VPC.
* Click **Create** to create the new VPC network.
* Choose **VPC network** as the **Type**. This allows you to create a private network to group and isolate your cloud resources.
* Select the data center where the network will be created.
* Enter a name for your new VPC.
* Click **Create** to create the new VPC network.
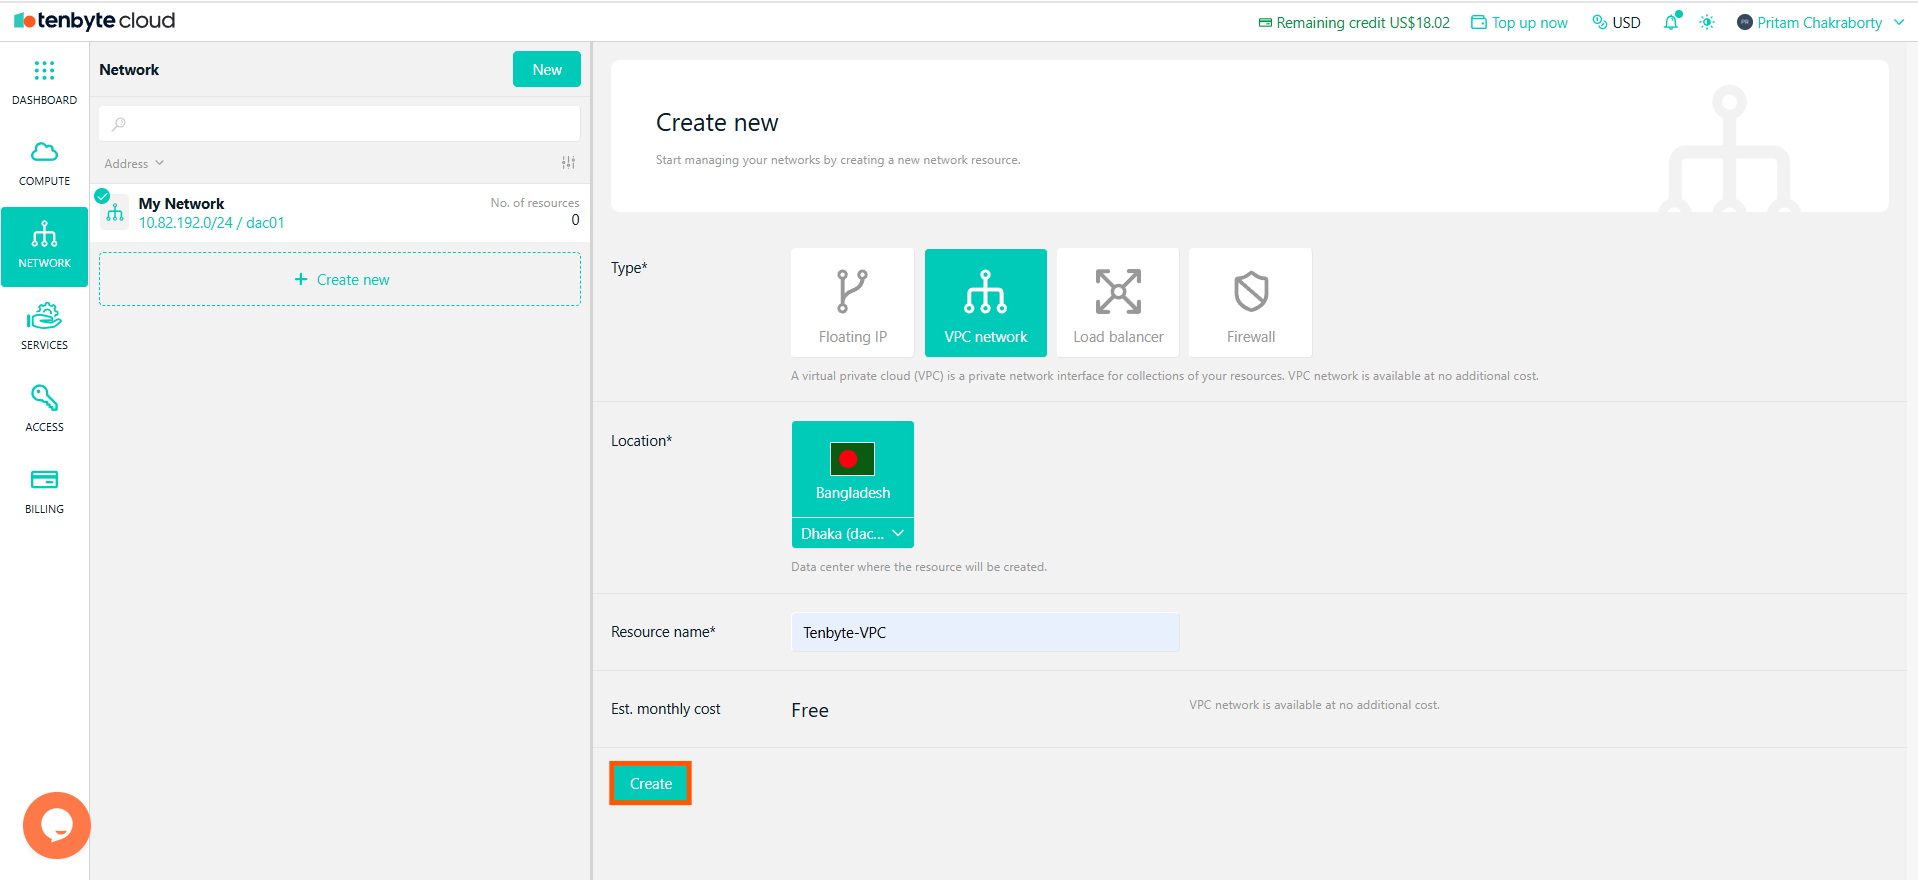 The VPC network is free of charge, but you will be charged for resources connected to it.
## Assign VPC Network During VM Creation
* While creating a **new VM**, you can assign the newly created VPC network. To learn how to **create a virtual machine**, check out the [Virtual Machine](/docs/cloud/compute/cloud-vm) page under the **Compute** section of this document.
* In the VM creation screen, under VPC network, select the desired network from the dropdown:
* My Network (default)
* Newly Created
The VPC network is free of charge, but you will be charged for resources connected to it.
## Assign VPC Network During VM Creation
* While creating a **new VM**, you can assign the newly created VPC network. To learn how to **create a virtual machine**, check out the [Virtual Machine](/docs/cloud/compute/cloud-vm) page under the **Compute** section of this document.
* In the VM creation screen, under VPC network, select the desired network from the dropdown:
* My Network (default)
* Newly Created
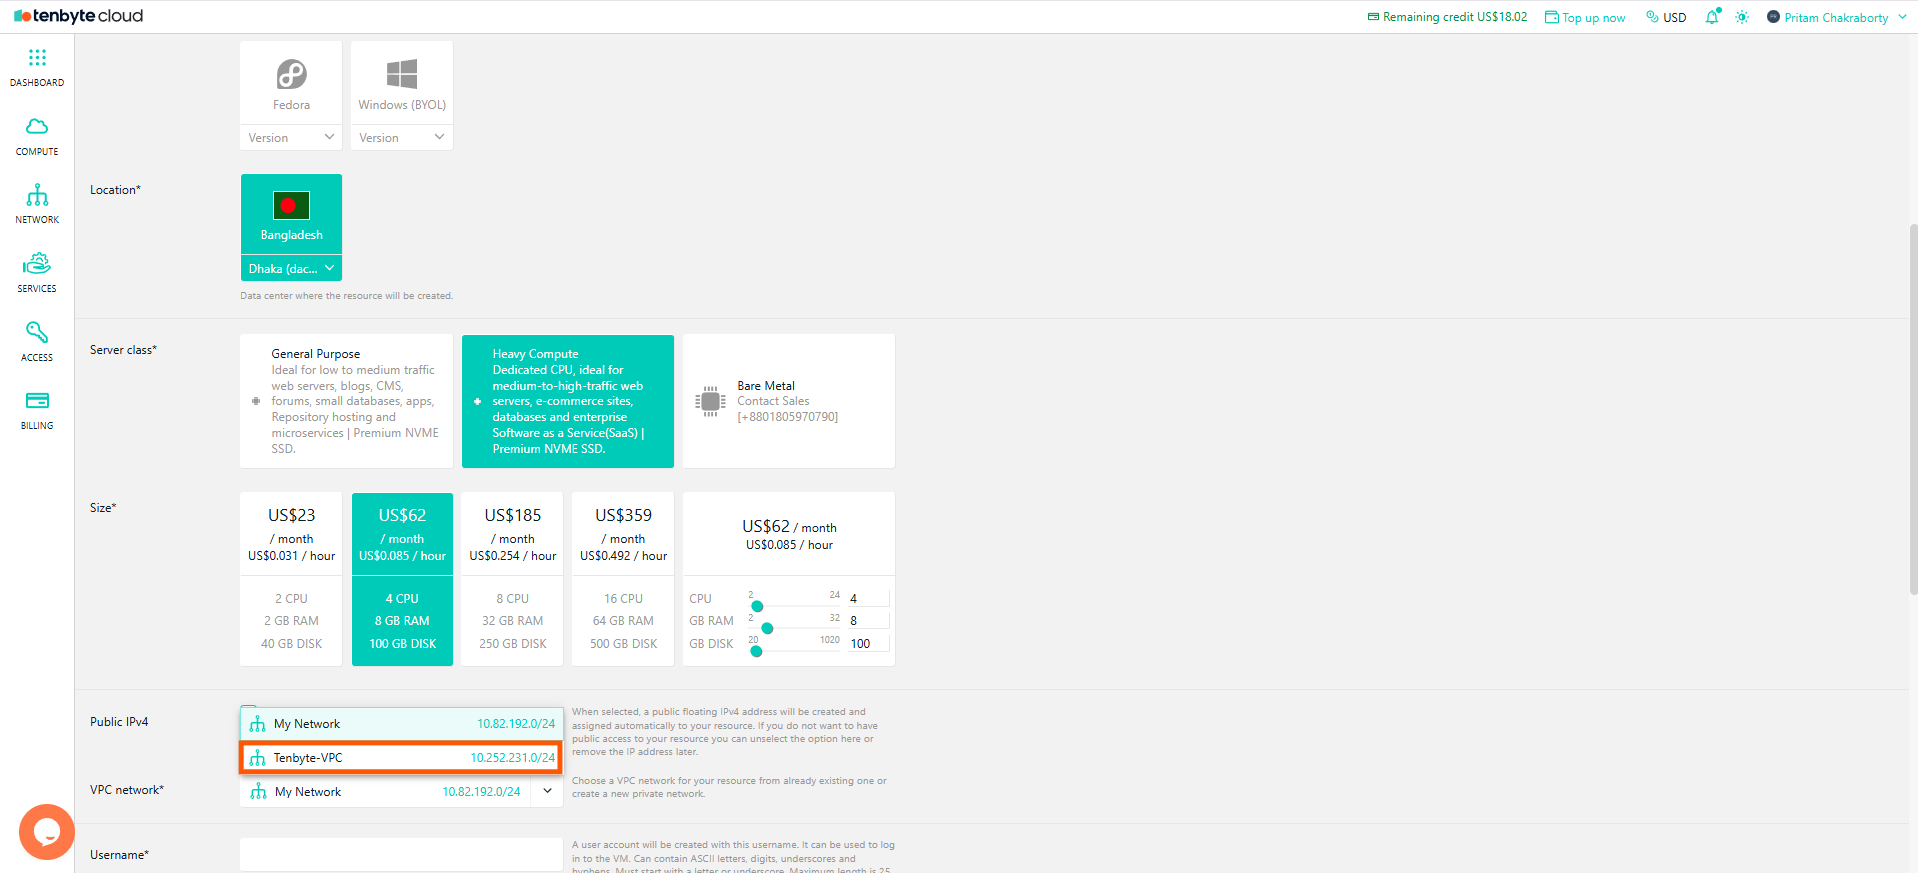 This ensures your VM is connected to the correct network during creation.
## Edit VM Network Settings
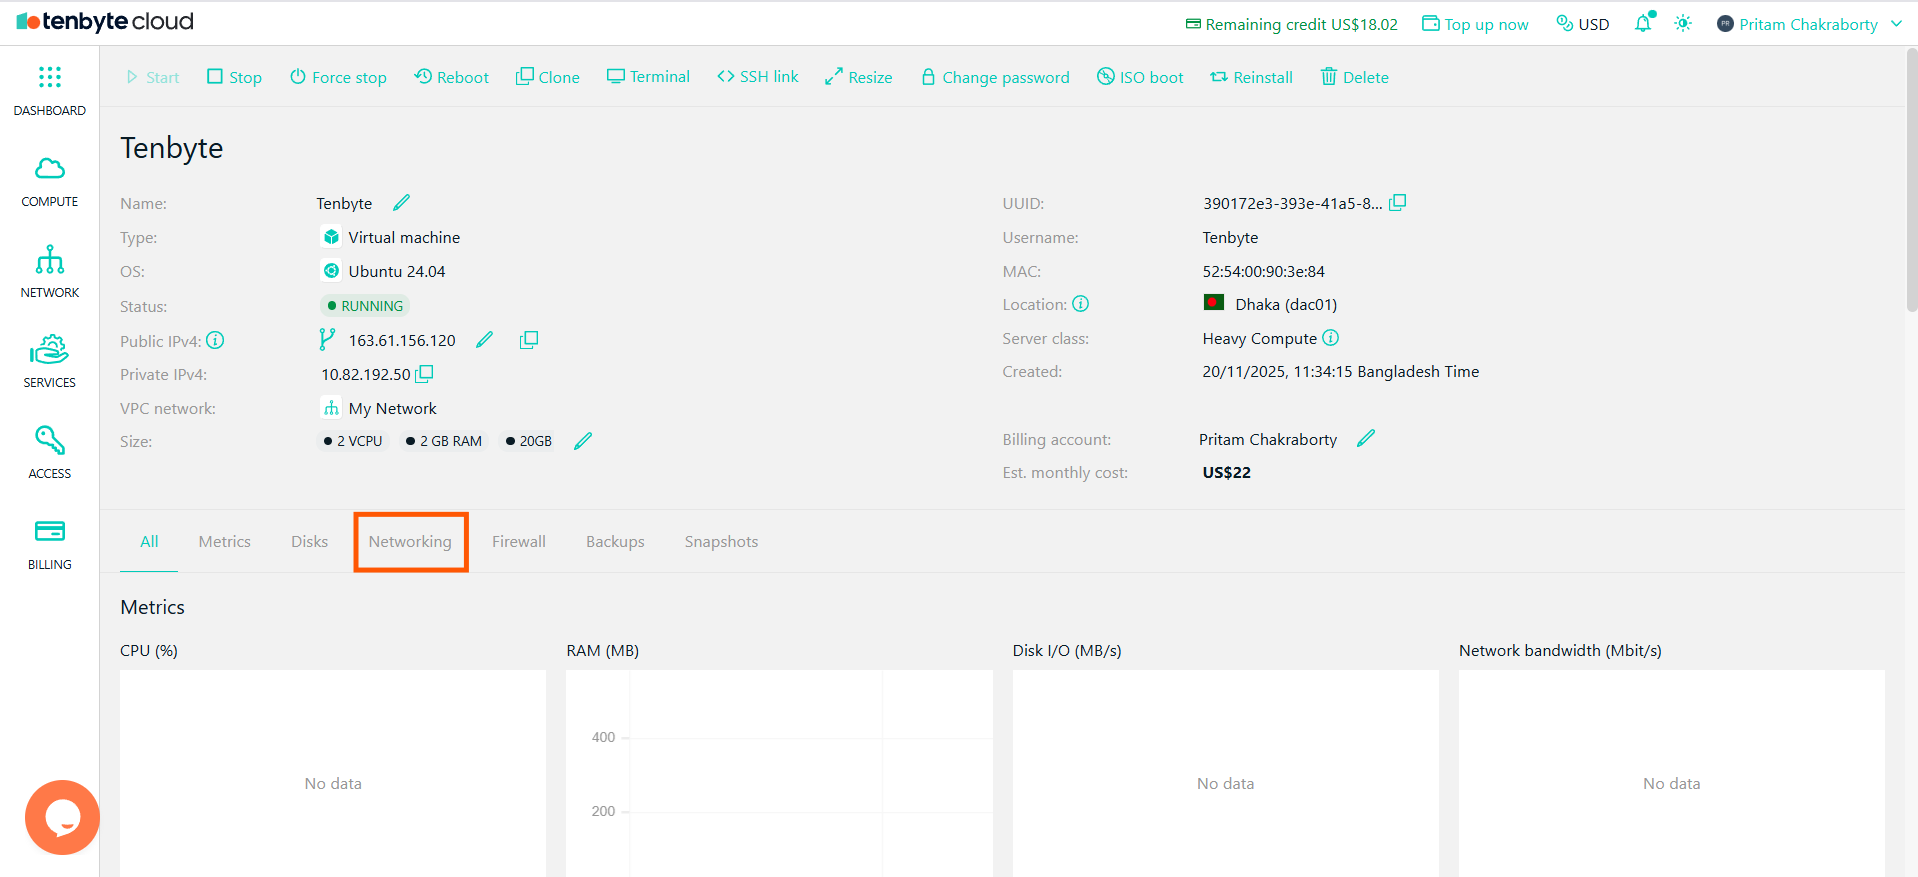
* If you want to change the VPC network after creating the VM, navigate to the **Network Section** in the VM settings.
This ensures your VM is connected to the correct network during creation.
## Edit VM Network Settings
* If you want to change the VPC network after creating the VM, navigate to the **Network Section** in the VM settings.
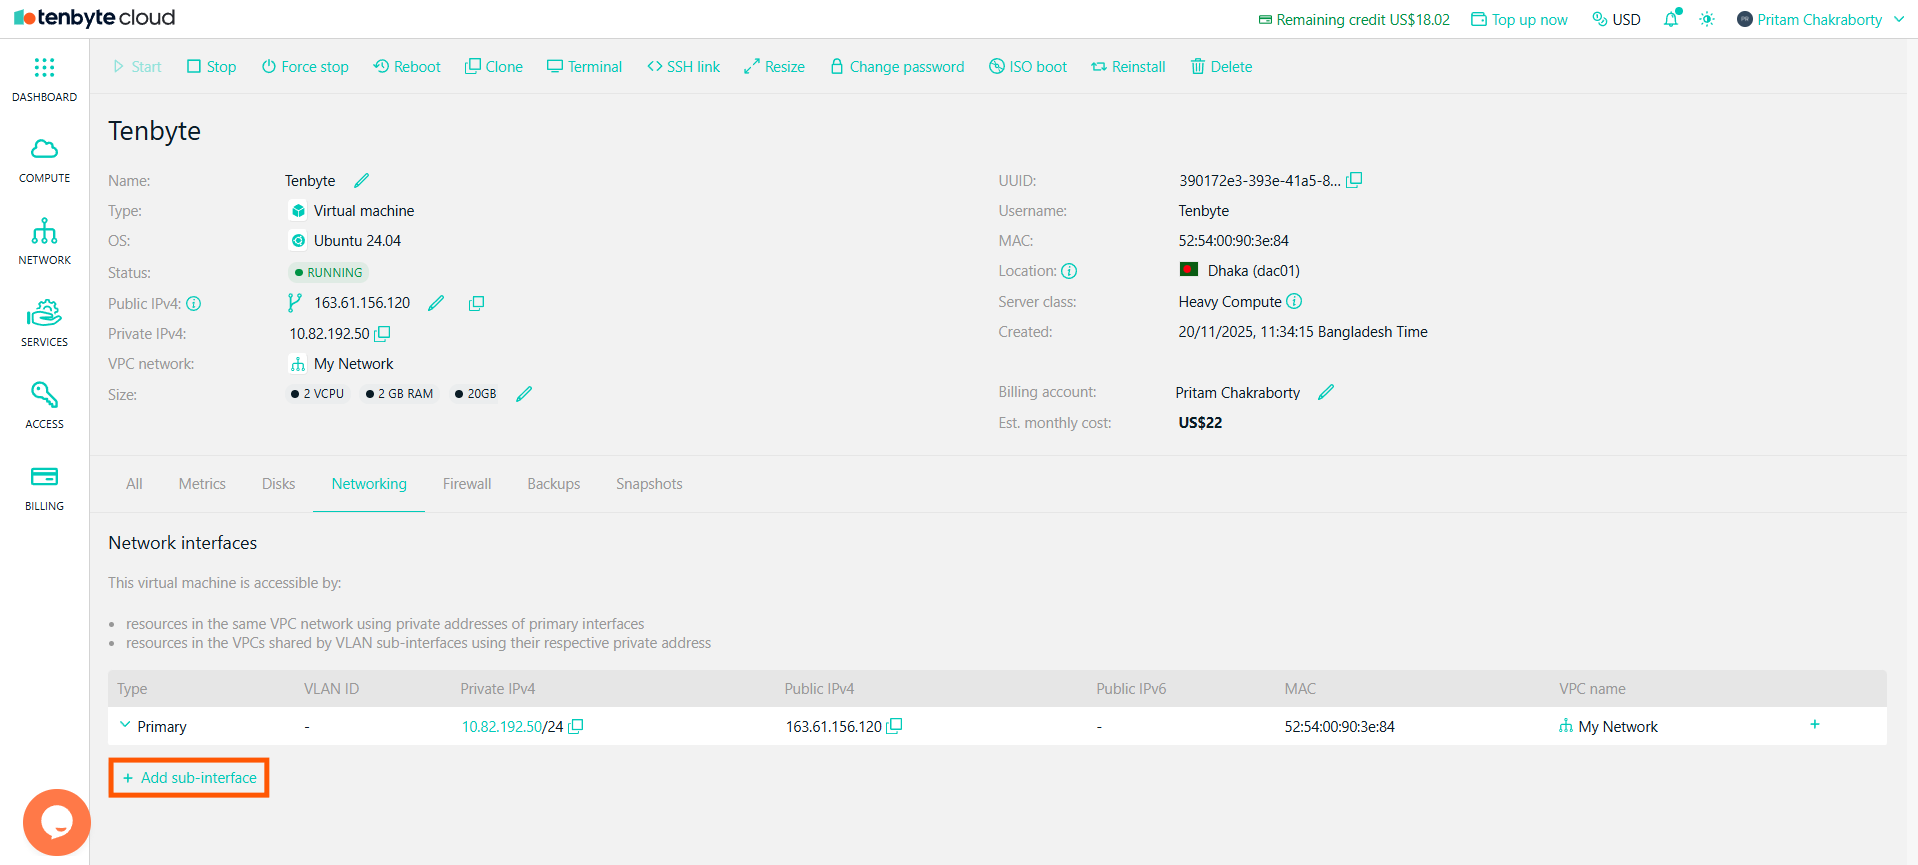
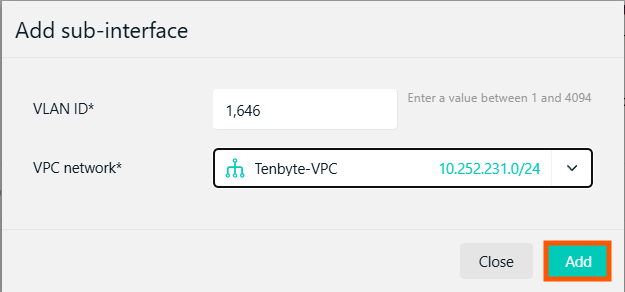
 * Click **Add sub-interface** to create additional interfaces or to modify the current one.
 * Enter the **VLAN ID** for the sub-interface.
* Select the VPC network you want to associate with the VM.
* Enter the **VLAN ID** for the sub-interface.
* Select the VPC network you want to associate with the VM.
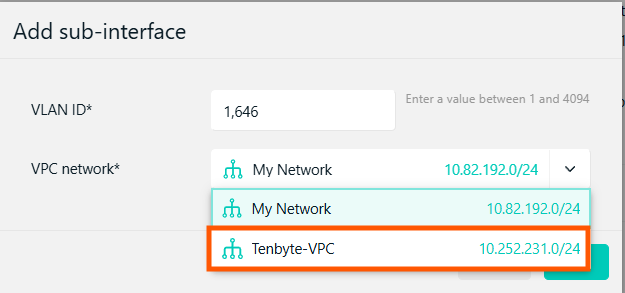 * Click **Add** to associate the **VPC** network with your **VM**.
 ## Review VPC Network and Resources
After creating or modifying your VPC, you can view the VMs associated with the network. The **My Network** or **new vpc** will list the VMs connected to it, showing the public and private IP addresses.
## Review VPC Network and Resources
After creating or modifying your VPC, you can view the VMs associated with the network. The **My Network** or **new vpc** will list the VMs connected to it, showing the public and private IP addresses.