> ## Documentation Index
> Fetch the complete documentation index at: https://docs.tenbyte.io/llms.txt
> Use this file to discover all available pages before exploring further.
# Tenbyte Firewall
Create and manage firewalls in Tenbyte Cloud to control inbound and outbound traffic for your virtual machines.
Firewall rules define which connections are allowed or blocked, and can be configured and attached to VMs directly from the dashboard.
## Select Firewall from Dashboard
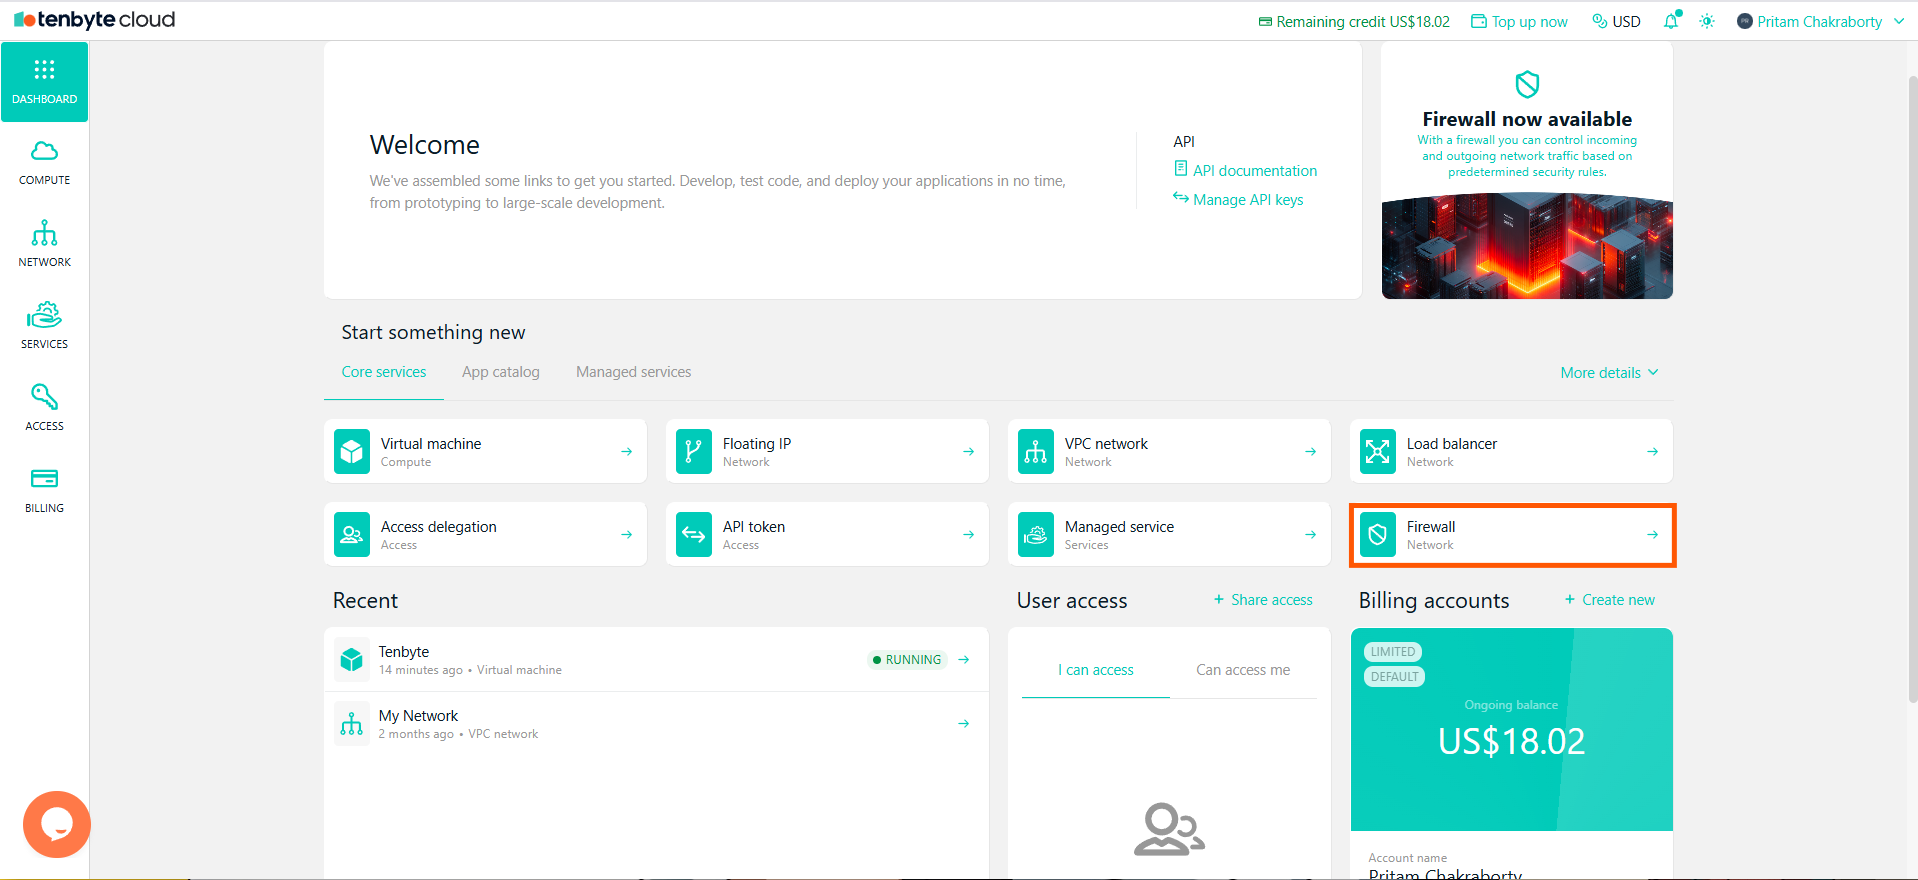
* Open your Cloud dashboard. From dashboard, click on **Firewall** to create your **Firewall**.
 ***
## Create a Firewall
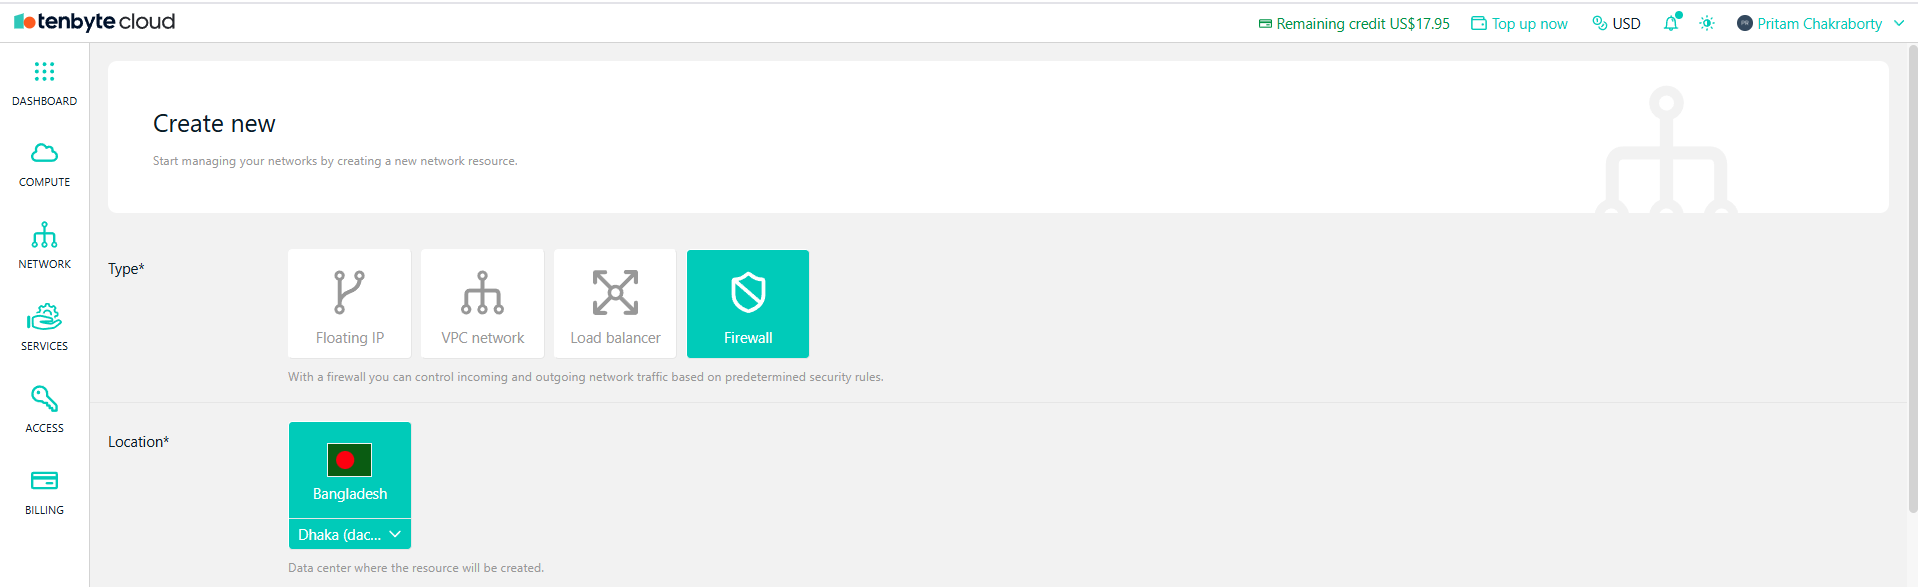
* Choose **Firewall** as the **Type**.
* Choose the data center where the firewall will be applied.
***
## Create a Firewall
* Choose **Firewall** as the **Type**.
* Choose the data center where the firewall will be applied.
 ### Configure Inbound Rules
* Inbound rules control traffic entering your virtual machine. Under Inbound rules, you can specify the traffic allowed to enter your virtual machine.
### Configure Inbound Rules
* Inbound rules control traffic entering your virtual machine. Under Inbound rules, you can specify the traffic allowed to enter your virtual machine.
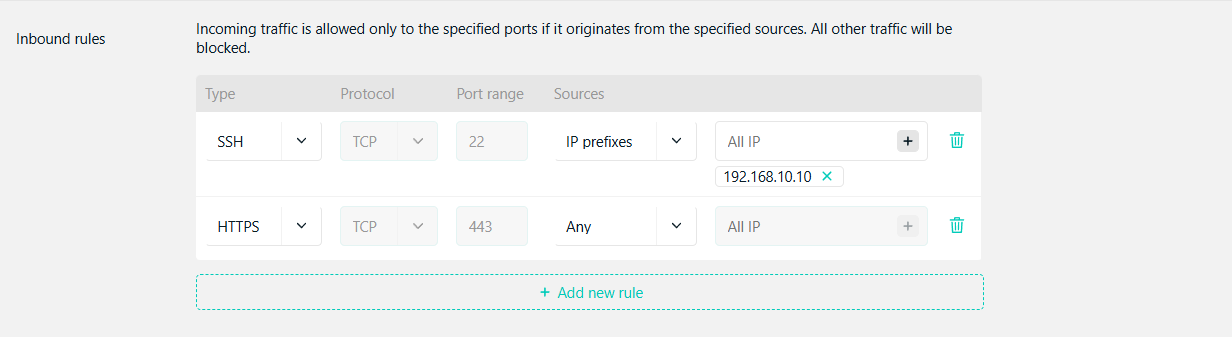 * **Type**: Select the type of traffic.
* **Protocol**: Choose the protocol.
* **Port Range**: Specify the port range.
* **Sources**: Enter the IP prefixes allowed to access the VM or select Any to allow all incoming traffic.
* Use inbound rules to allow only the ports required by your application and block all others.
### Configure Outbound Rules
* Outbound rules control traffic leaving your virtual machine. Under Outbound rules, specify which traffic can leave your virtual machine.
* **Type**: Select the type of traffic.
* **Protocol**: Choose the protocol.
* **Port Range**: Specify the port range.
* **Sources**: Enter the IP prefixes allowed to access the VM or select Any to allow all incoming traffic.
* Use inbound rules to allow only the ports required by your application and block all others.
### Configure Outbound Rules
* Outbound rules control traffic leaving your virtual machine. Under Outbound rules, specify which traffic can leave your virtual machine.
 * **Type**: Select the type of traffic.
* **Protocol**: Choose the protocol.
* **Port Range**: Specify the port range.
* **Destinations**: Select All IP to allow traffic to any destination or specify a target IP range if you want to restrict the destinations.
### Configure Firewall Settings
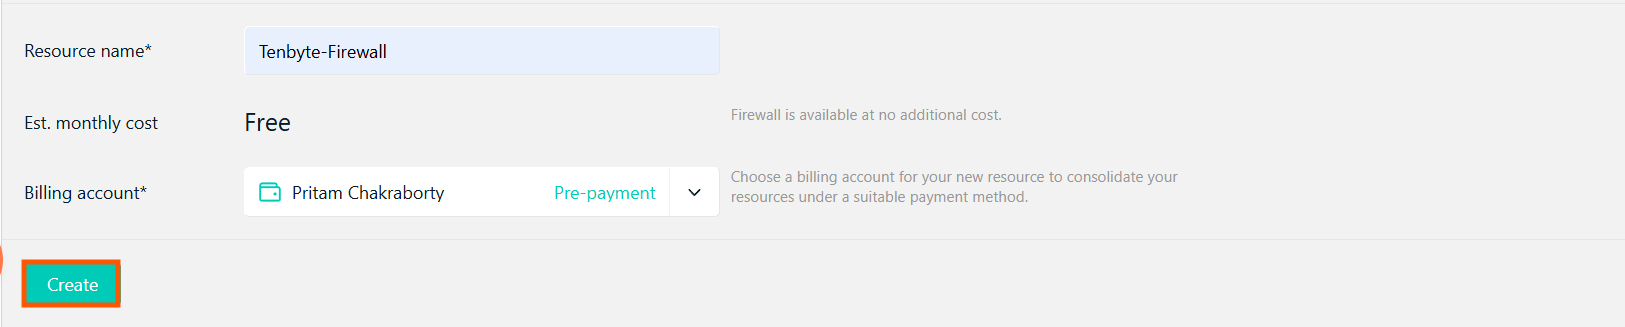
* Enter a name for the firewall.
* Select the billing account that this firewall belongs to.
The firewall service is free, but the resources like VMs attached to it will incur additional charges.
* Click **Create** to finish creating the firewall. It will now be available to assign to your virtual machine.
* **Type**: Select the type of traffic.
* **Protocol**: Choose the protocol.
* **Port Range**: Specify the port range.
* **Destinations**: Select All IP to allow traffic to any destination or specify a target IP range if you want to restrict the destinations.
### Configure Firewall Settings
* Enter a name for the firewall.
* Select the billing account that this firewall belongs to.
The firewall service is free, but the resources like VMs attached to it will incur additional charges.
* Click **Create** to finish creating the firewall. It will now be available to assign to your virtual machine.
 ***
## Assign Firewall to VM
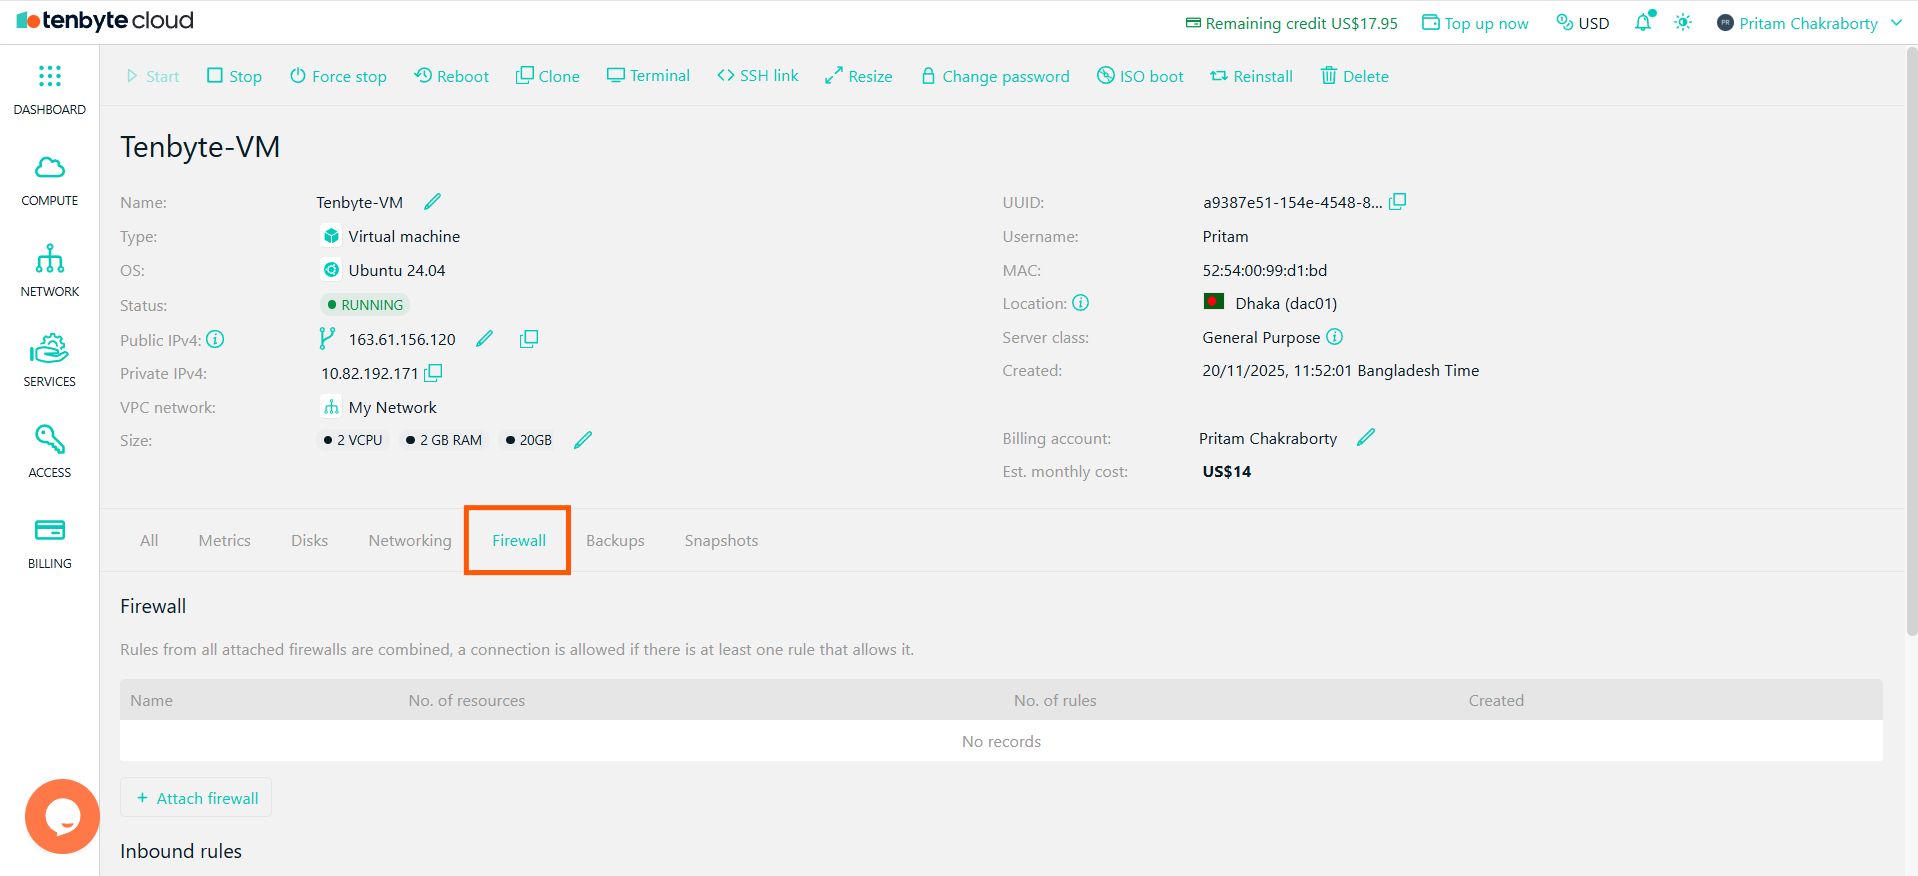
* After creating the firewall with the inbound and outbound rules, go to your created VM dashboard.
* Navigate to the **Firewall section**.
***
## Assign Firewall to VM
* After creating the firewall with the inbound and outbound rules, go to your created VM dashboard.
* Navigate to the **Firewall section**.
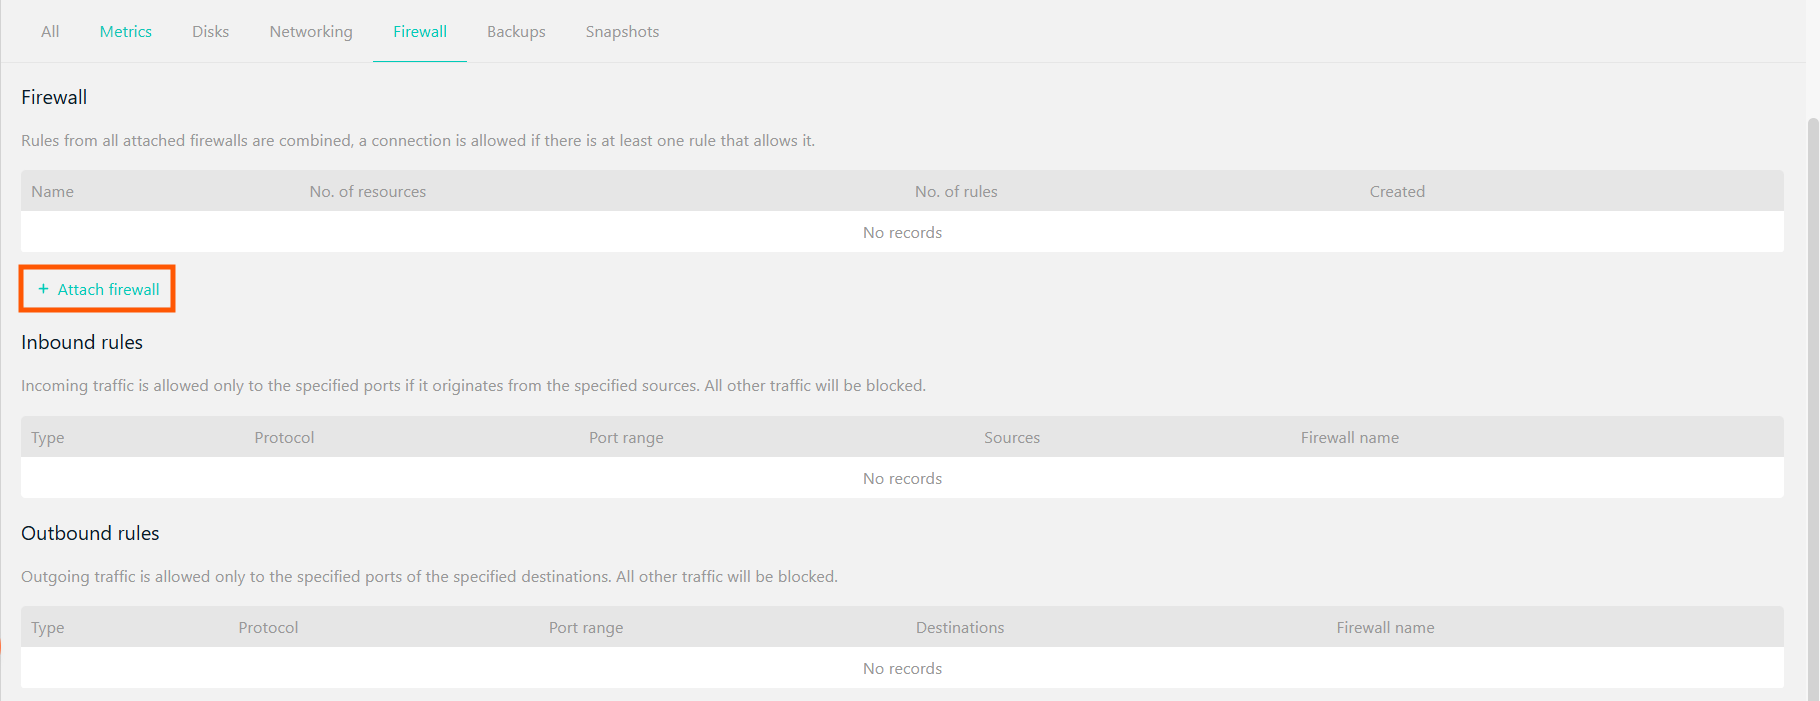
 * Click on **Attach Firewall**.
 * Select the firewall you created and click on **Add**.
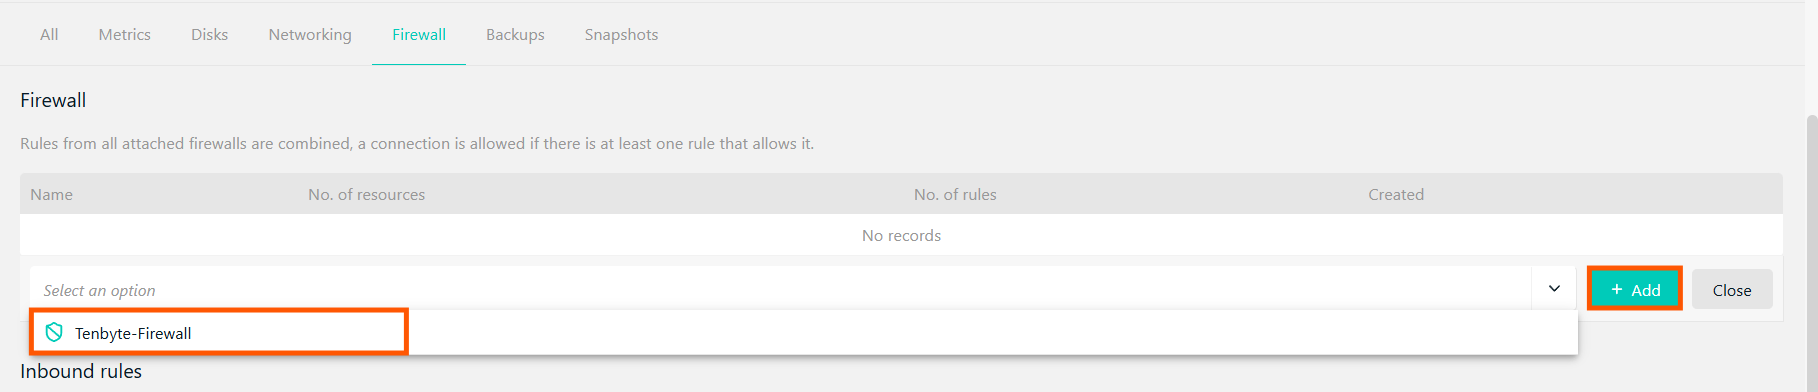 * Once added, the firewall rules will be applied to the VM, ensuring that only allowed traffic can access it.