> ## Documentation Index
> Fetch the complete documentation index at: https://docs.tenbyte.io/llms.txt
> Use this file to discover all available pages before exploring further.
# Tenbyte Cloud Virtual Machines
This guide explains the full process of creating a virtual machine in Tenbyte Cloud. It covers selecting an operating system or application image, configuring the machine type, setting up networking, and completing the VM setup.
## Select Virtual Machine
* To begin, open your Tenbyte Cloud dashboard and choose Virtual Machine from the list of available services.
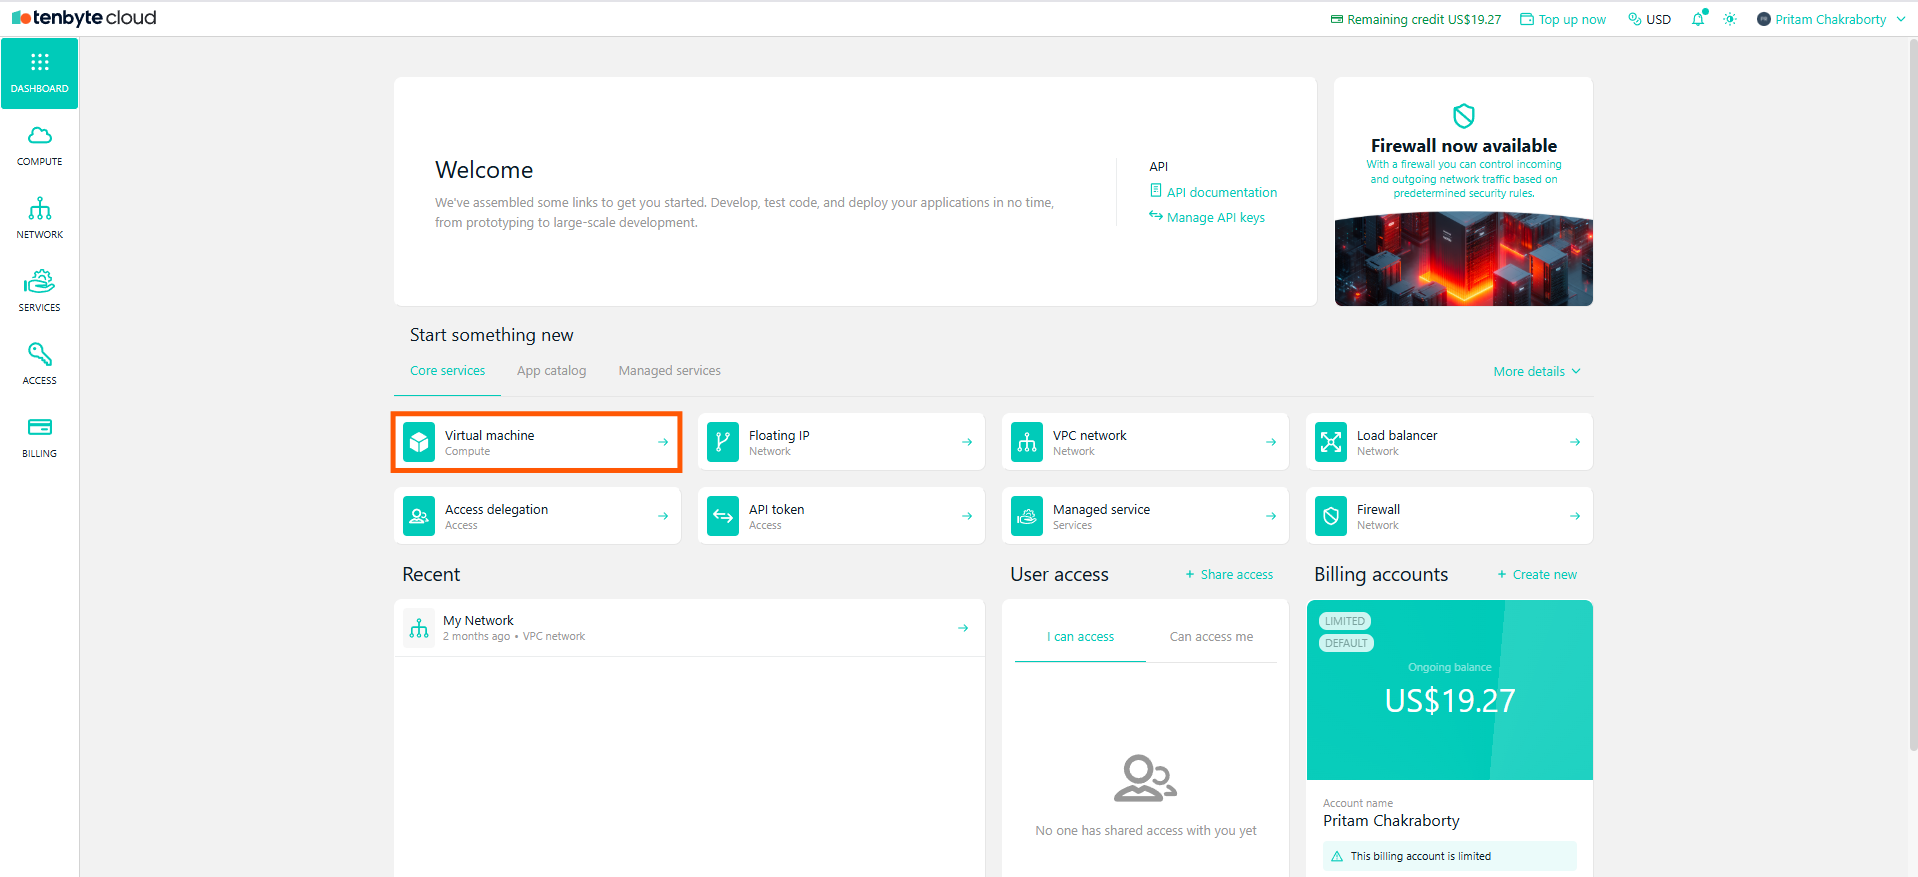 * This takes you to the VM creation page where all configuration options are listed.
***
## Choose Operating System
* If you want to install an operating system, select **Operating System** and choose the OS.
* This takes you to the VM creation page where all configuration options are listed.
***
## Choose Operating System
* If you want to install an operating system, select **Operating System** and choose the OS.
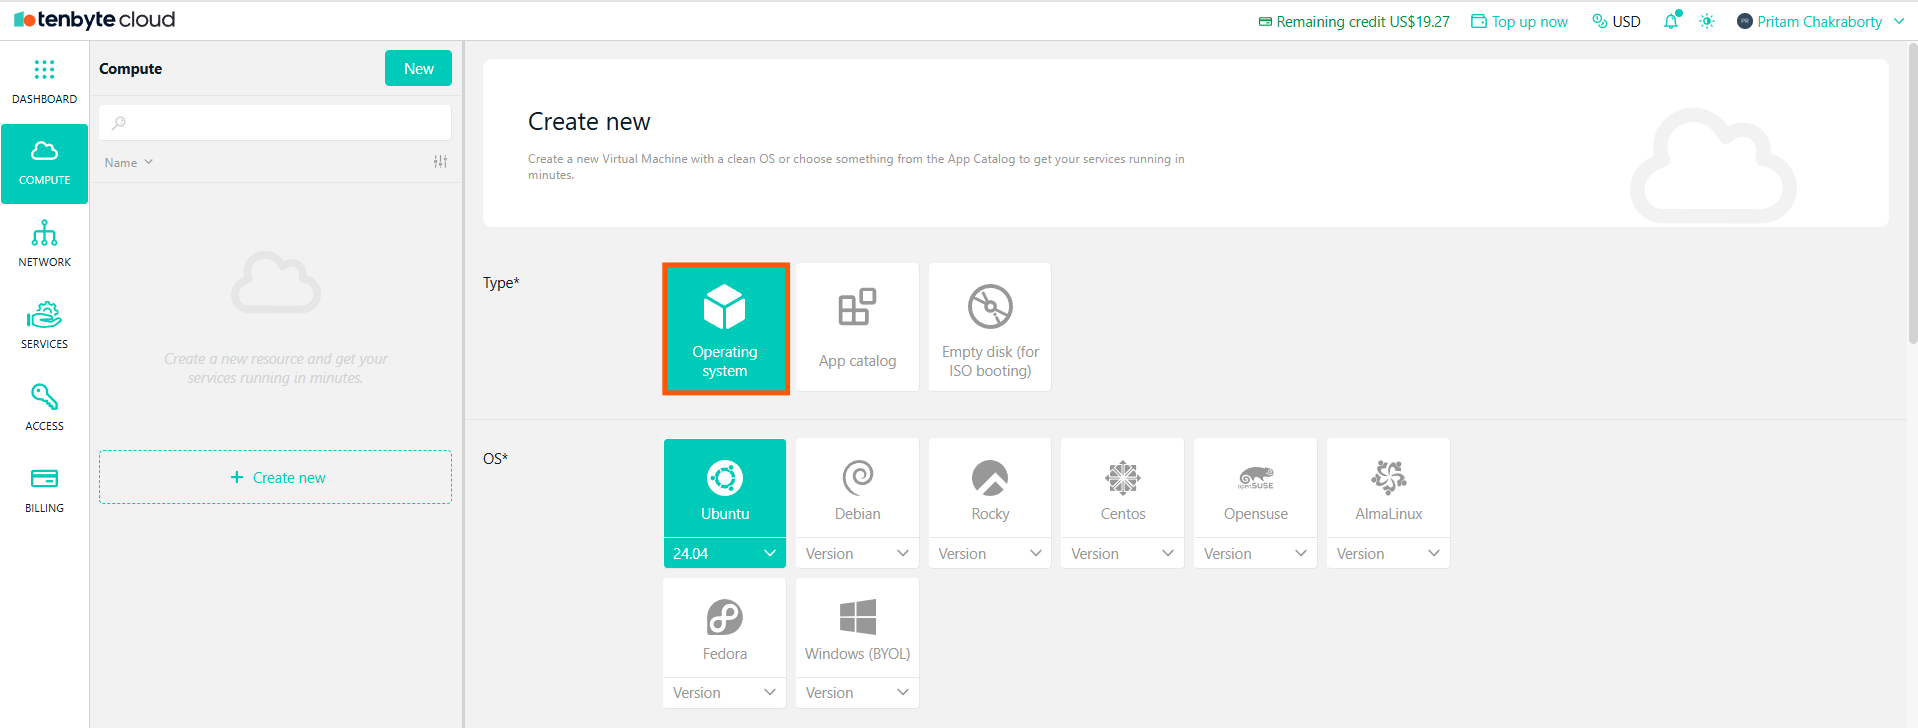 You can choose from the following operating systems:
1. **`Ubuntu`**
2. **`Debian`**
3. **`Rocky`**
4. **`CentOS`**
5. **`OpenSUSE`**
6. **`AlmaLinux`**
7. **`Fedora`**
8. **`Windows (BYOL)`**
Each OS image is maintained and updated regularly to provide a reliable foundation for your workloads.
***
## Choose App Catalog
* If you need an application, select **App Catalog**.
You can choose from the following operating systems:
1. **`Ubuntu`**
2. **`Debian`**
3. **`Rocky`**
4. **`CentOS`**
5. **`OpenSUSE`**
6. **`AlmaLinux`**
7. **`Fedora`**
8. **`Windows (BYOL)`**
Each OS image is maintained and updated regularly to provide a reliable foundation for your workloads.
***
## Choose App Catalog
* If you need an application, select **App Catalog**.
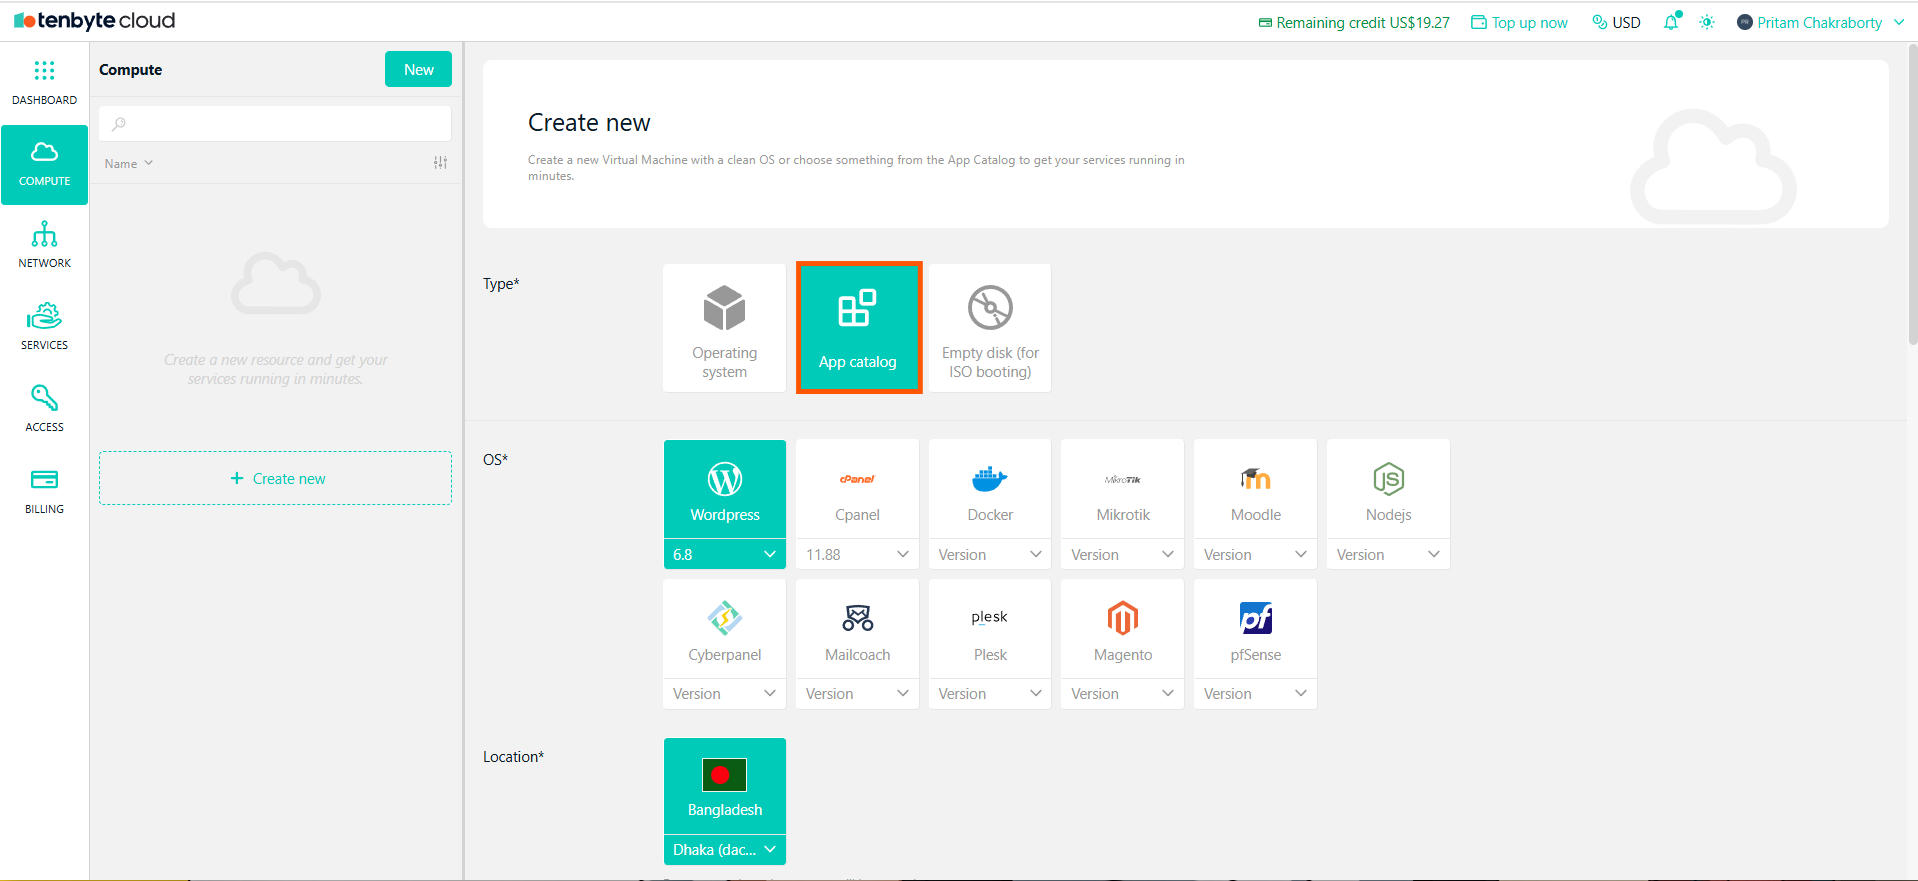 Choose from available applications like:
1. **`cPanel`**
2. **`Docker`**
3. **`Mikrotik`**
4. **`Moodle`**
5. **`Node.js`**
6. **`Cyberpanel`**
7. **`Mailcoach`**
8. **`Plesk`**
9. **`Magento`**
10. **`pfSense`**
11. **`WordPress`**
For both operating systems and applications, you can choose the version that best fits your requirements during the setup process.
***
## Choose Empty Disk for ISO Booting
* If you plan to install an operating system manually using an ISO image, choose Empty disk.
***
## Select your Location
* Choose your Data center where the resource will be created.
Selecting a region close to your users or infrastructure can improve performance and lower latency.
***
## Select Server Class
* Choose between **General Purpose** or **Heavy Compute** based on your workload type.
Choose from available applications like:
1. **`cPanel`**
2. **`Docker`**
3. **`Mikrotik`**
4. **`Moodle`**
5. **`Node.js`**
6. **`Cyberpanel`**
7. **`Mailcoach`**
8. **`Plesk`**
9. **`Magento`**
10. **`pfSense`**
11. **`WordPress`**
For both operating systems and applications, you can choose the version that best fits your requirements during the setup process.
***
## Choose Empty Disk for ISO Booting
* If you plan to install an operating system manually using an ISO image, choose Empty disk.
***
## Select your Location
* Choose your Data center where the resource will be created.
Selecting a region close to your users or infrastructure can improve performance and lower latency.
***
## Select Server Class
* Choose between **General Purpose** or **Heavy Compute** based on your workload type.
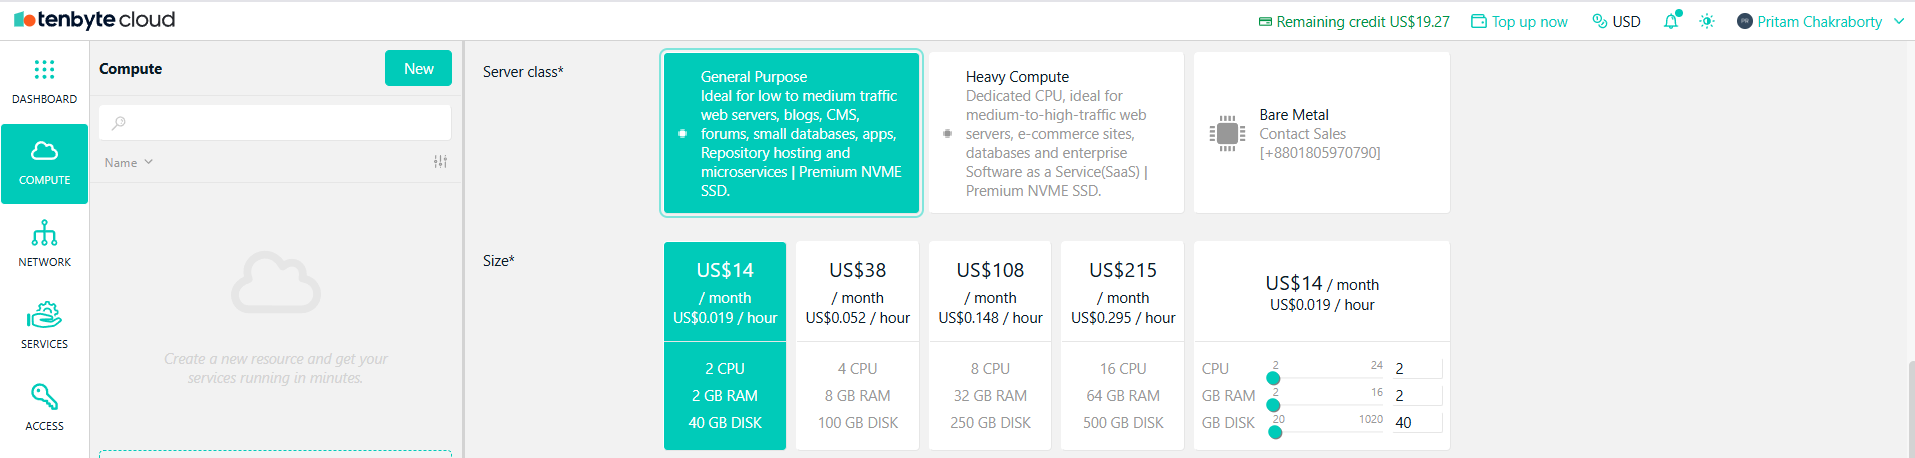 1. **General Purpose**: Ideal for everyday applications, low to medium traffic workloads, and business systems.
2. **Heavy Compute**: Recommended for high-traffic systems, intensive compute tasks, and enterprise workloads.
***
## Configure your VM Size
* Select the **VM size** based on the resources your application requires.
* You can configure -
* **CPU Cores** – Match the number of cores to your processing demands.
* **Memory (RAM)** – Select memory based on your application size and performance needs.
* **Storage** – Choose the disk size appropriate for your files, databases, or workloads.
1. **General Purpose**: Ideal for everyday applications, low to medium traffic workloads, and business systems.
2. **Heavy Compute**: Recommended for high-traffic systems, intensive compute tasks, and enterprise workloads.
***
## Configure your VM Size
* Select the **VM size** based on the resources your application requires.
* You can configure -
* **CPU Cores** – Match the number of cores to your processing demands.
* **Memory (RAM)** – Select memory based on your application size and performance needs.
* **Storage** – Choose the disk size appropriate for your files, databases, or workloads.
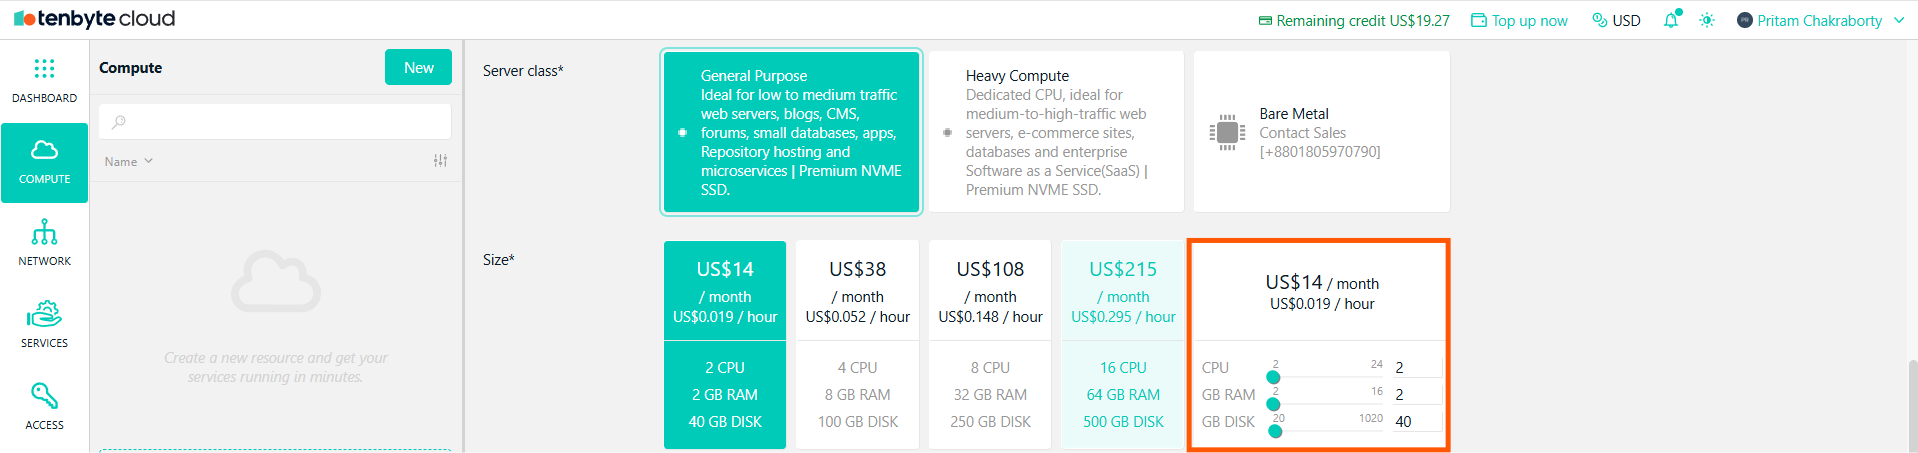 * This flexible configuration lets you build a VM that fits your exact use case.
***
## Public IPv4 Address
* If you require an **external IP** for your VM, **enable Public IPv4**.
Enabling Public IPv4 will incur an additional US\$2/month charge.
***
## Select VPC Network
* Choose an existing VPC network or create a new one for private and secure network setup.
* This flexible configuration lets you build a VM that fits your exact use case.
***
## Public IPv4 Address
* If you require an **external IP** for your VM, **enable Public IPv4**.
Enabling Public IPv4 will incur an additional US\$2/month charge.
***
## Select VPC Network
* Choose an existing VPC network or create a new one for private and secure network setup.
 * If you want to set up your own VPC network, you can follow the steps in the [Tenbyte VPC](/docs/cloud/networking/vpc) page found in the **Networking and Security** section.
***
## Fill in User Information and Billing Details
1. **Username**: Enter a username for your virtual machine. This will be used to log in.
2. **Password**: Set a password that meets the security criteria
3. **Confirm Password**: Re-type the password to ensure it has been entered correctly.
4. **SSH Public Key**: If you prefer passwordless SSH access, add your SSH key here. Select **SSH Keys**, and a pop-up will appear where you can enter a key name and paste your public key. Use the format:
**`ssh-keytype base64_encoded_key optional_comment`**.
* If you want to set up your own VPC network, you can follow the steps in the [Tenbyte VPC](/docs/cloud/networking/vpc) page found in the **Networking and Security** section.
***
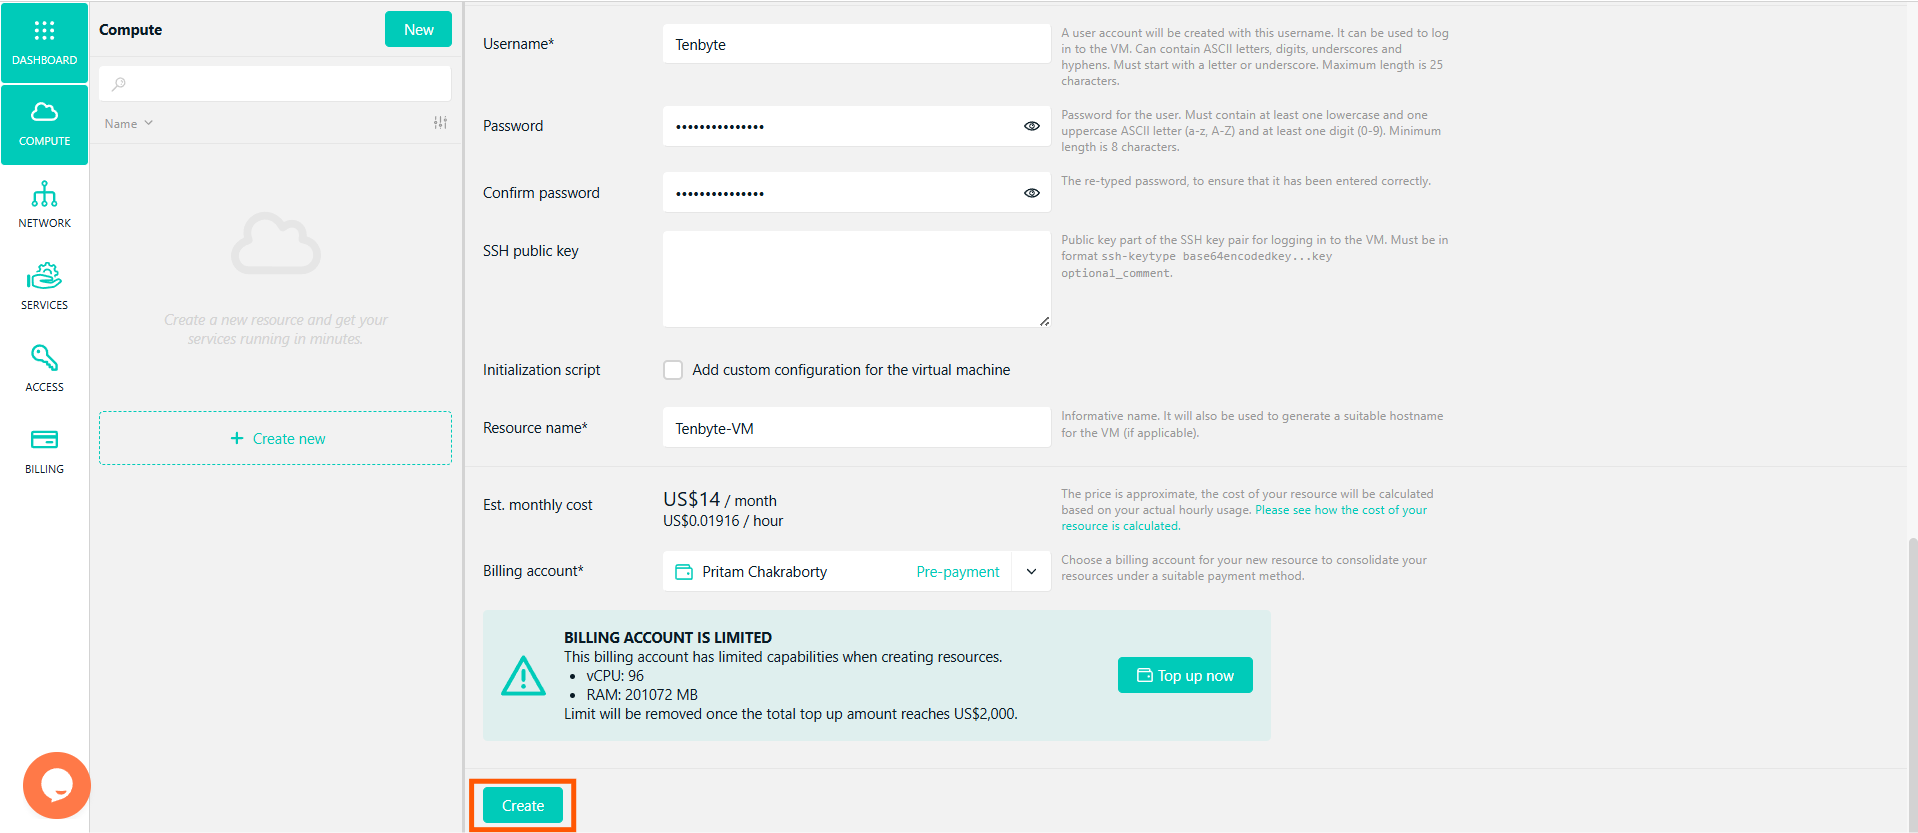
## Fill in User Information and Billing Details
1. **Username**: Enter a username for your virtual machine. This will be used to log in.
2. **Password**: Set a password that meets the security criteria
3. **Confirm Password**: Re-type the password to ensure it has been entered correctly.
4. **SSH Public Key**: If you prefer passwordless SSH access, add your SSH key here. Select **SSH Keys**, and a pop-up will appear where you can enter a key name and paste your public key. Use the format:
**`ssh-keytype base64_encoded_key optional_comment`**.
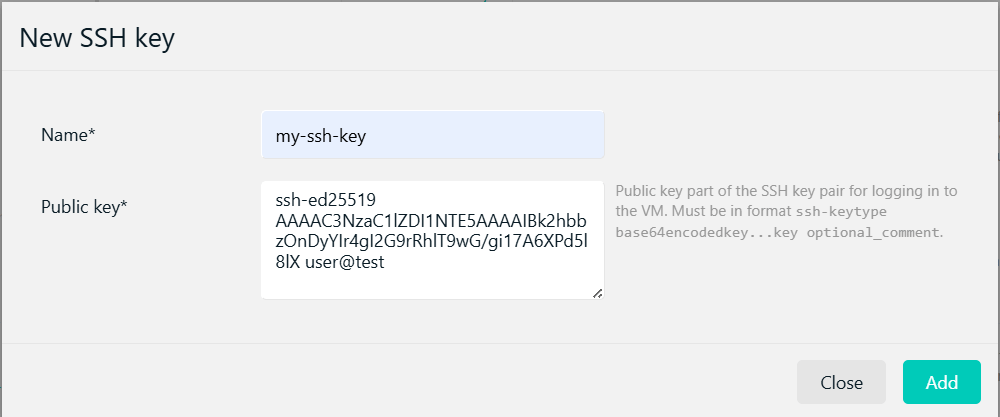 Only single-line keys are accepted. Make sure the key is not wrapped, contains no extra spaces, and matches one of the supported key types.
5. **Initialization Script**: Optionally, you can add a custom configuration for the VM by using an initialization script. This can include cloud-init configurations to automatically set up your VM during the creation process.
6. **Resource Name**: Provide a resource name for your VM. This will be used to generate a suitable hostname for the machine if applicable.
7. **Estimated Monthly Cost**: This gives you an overview of what you’ll be charged based on the current setup.
8. **Billing Account**: Choose a billing account to associate with the VM.
If your account has limitations, a notice will appear, indicating these limits. The restriction will be removed once your total top-up reaches US\$2,000.
***
## Create the VM
* Once you’ve completed all fields and reviewed your details, click the Create button to finalize the creation of your virtual machine.
Only single-line keys are accepted. Make sure the key is not wrapped, contains no extra spaces, and matches one of the supported key types.
5. **Initialization Script**: Optionally, you can add a custom configuration for the VM by using an initialization script. This can include cloud-init configurations to automatically set up your VM during the creation process.
6. **Resource Name**: Provide a resource name for your VM. This will be used to generate a suitable hostname for the machine if applicable.
7. **Estimated Monthly Cost**: This gives you an overview of what you’ll be charged based on the current setup.
8. **Billing Account**: Choose a billing account to associate with the VM.
If your account has limitations, a notice will appear, indicating these limits. The restriction will be removed once your total top-up reaches US\$2,000.
***
## Create the VM
* Once you’ve completed all fields and reviewed your details, click the Create button to finalize the creation of your virtual machine.
 ***
## View Your Created Virtual Machine
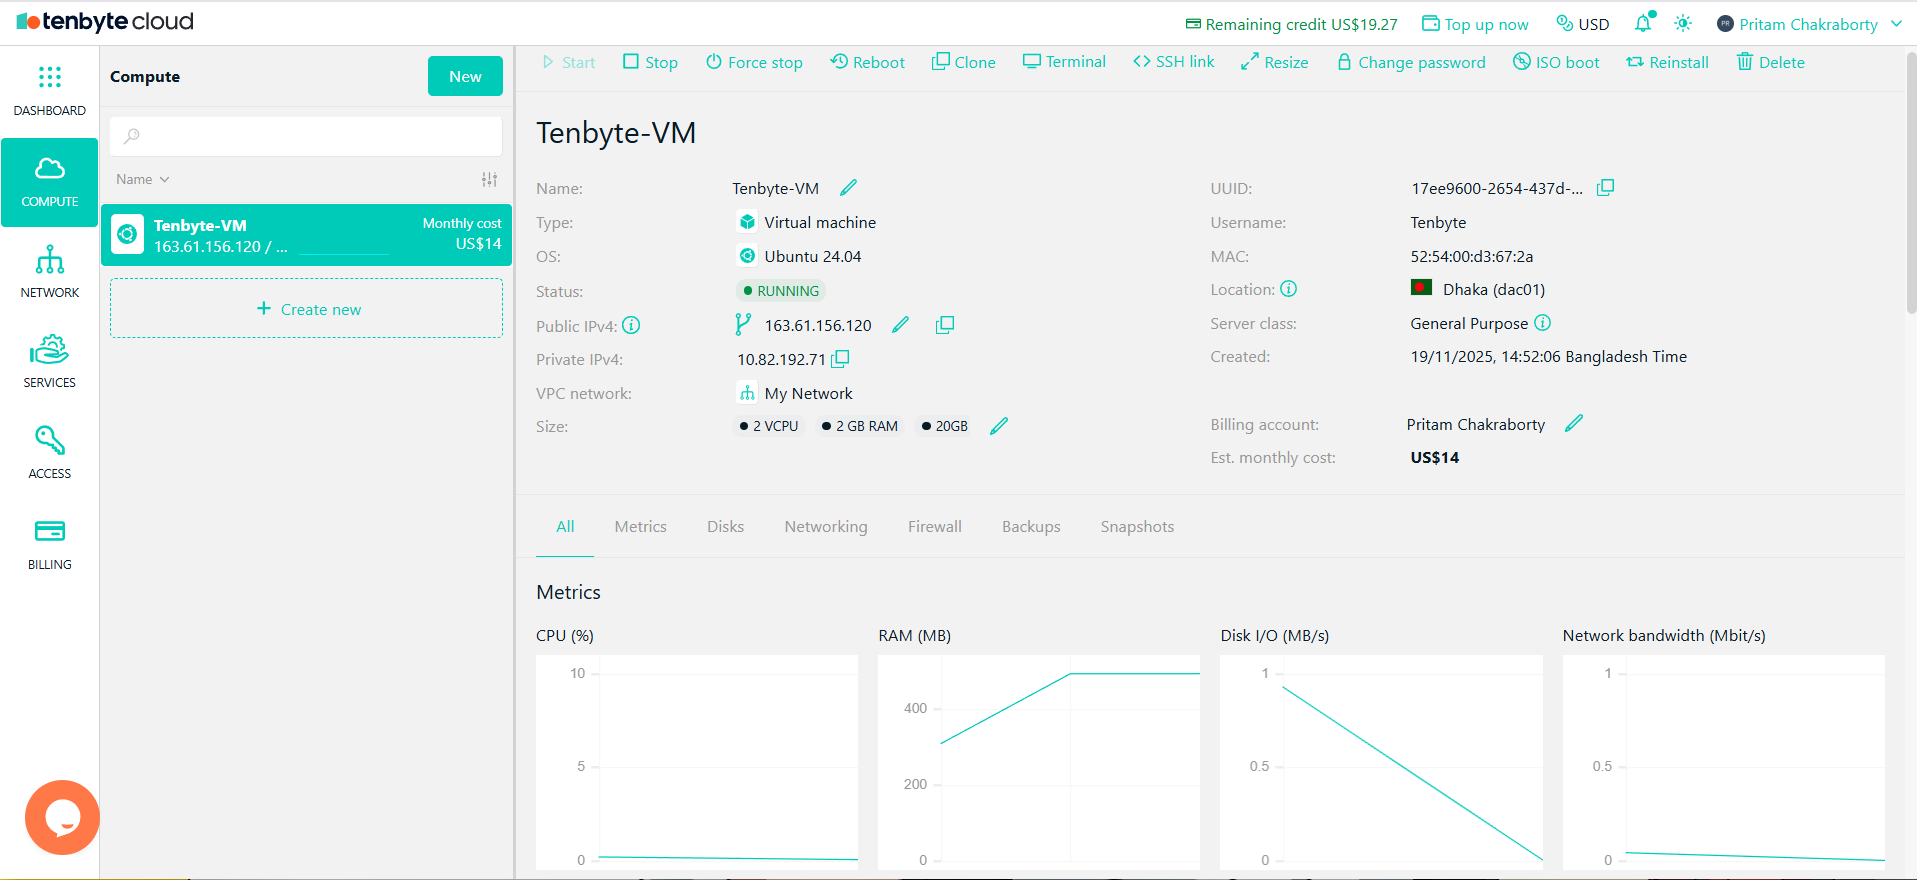
* Once your virtual machine (VM) is created, you will see it listed on your VM dashboard.
***
## View Your Created Virtual Machine
* Once your virtual machine (VM) is created, you will see it listed on your VM dashboard.